I vividly remember the moment I realized my batter was ruined—not because I overmixed, but because of a simple mistake with my whisk attachment. It was a Sunday afternoon, and I was eager to surprise my family with a batch of fluffy pancakes. But as I poured the batter into the pan, I noticed its unpleasant lumps and uneven texture. Frustration crept in. That lightbulb moment made me dig into the problem and realize that my trusty stand mixer and its whisk attachment had a sneaky secret to fix my batter battles.
Why Clumpy Batter Is a Baking Nightmare—and How You Can Fix It
Many home bakers face this issue, especially when trying to achieve that perfect, airy consistency in their baked goods. Clumps can ruin the texture, mess up your presentation, and make even expert bakers question if they’re doing something wrong. The truth is, the way you use your whisk attachment plays a crucial role in smooth, well-incorporated batter. And with the upcoming advancements in kitchen tools in 2026, understanding these tips is more vital than ever. Trust me, I’ve made mistakes early on—like rushing the mixing process or using incompatible attachments—that caused my batter to turn out lumpy and uneven. But once I mastered a few simple techniques, my baking results improved dramatically. If you’re tired of battling lumps in your batter, stick around because I’m about to share the game-changing tips that will transform your baking experience.
Will Better Whisk Attachments Really Make a Difference?
One common skepticism I’ve encountered is whether upgrading to high-quality whisk attachments is worth the hype. My early mistake was sticking to basic, generic attachments without realizing that they often don’t distribute ingredients evenly or properly aerate your mixture. Modern innovations, like silicon-edged whisks, are designed to improve mixing efficiency—especially crucial for the delicate task of beating egg whites or incorporating flour smoothly. If you want to make a smarter choice for your baking arsenal, check out the latest silicon-edge whisk attachments. They’re a simple upgrade that can dramatically reduce lumps and improve your batter’s texture.
Now that we’ve set the stage, let’s dive into the practical tips that will help you eliminate clumps and ensure your baking projects turn out perfect, every time. Are you ready to upgrade your mixer skills and say goodbye to uneven batter? Let’s get started!
Get Your Mixer Ready for Action
Before you start, ensure your equipment is suitable for the task. For most baking needs, a quality stand mixer is ideal, especially because they can handle thicker batters better than handheld models, which often struggle with dense ingredients. Check out this guide on which mixer suits your baking style. Position your mixer on a flat surface and gather your ingredients, measuring accurately to prevent unnecessary adjustments during mixing.
Prepare Your Ingredients Properly
Make sure dry ingredients like flour are sifted thoroughly before adding them to wet components. This step breaks up any clumps and aerates the flour, making it easier for your whisk to incorporate everything smoothly. I vividly recall a time when skipping this step resulted in lumps that stubbornly refused to disappear, despite prolonged mixing. Sifting not only helps eliminate clumps but also results in a lighter, fluffier batter.
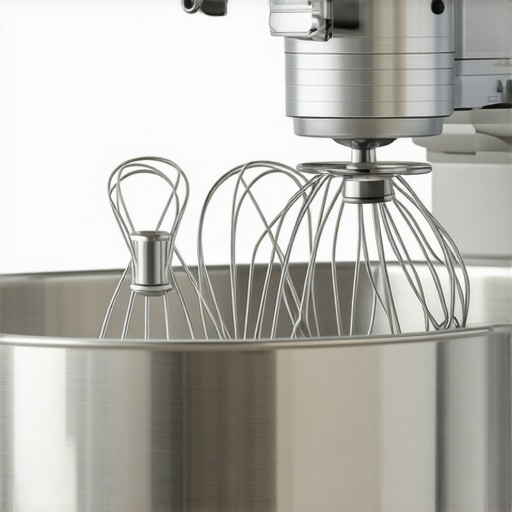
Choose the Right Attachment and Technique
Using the correct attachment is crucial—most recipes benefit from a balloon or wire whisk for incorporating air and blending ingredients seamlessly. Silicon-edged whisk attachments, like the ones you’ll find in the latest upgrades, are particularly effective for preventing lumps and ensuring even mixing. When starting, set the mixer to a low speed to combine ingredients gently, then gradually increase the speed to fully incorporate air and smooth out the batter.
Implement the Correct Mixing Motion
Think of your whisk as a dancer, circling and sweeping through the bowl. Use slow, deliberate movements, scraping the sides of the bowl periodically with a spatula to ensure no pockets of dry flour or unmixed ingredients remain. I once tried to speed through mixing without stopping, which resulted in uneven batter and clumps sticking stubbornly to the flour. Patience and mindful motion are your best tools for a lump-free mixture.
Adjust Mixing Time and Speed Carefully
Overmixing can cause gluten development, leading to tougher baked goods, but undermixing leaves lumps intact. The key is to mix just until ingredients are smoothly blended—usually a minute or two on medium speed is enough. Keep an eye on the batter’s texture; it should be velvety and uniform. If you still get lumps, pause and use a spatula to press them against the side of the bowl or stir by hand for final smoothing. Don’t forget that timing is vital—consult your recipe’s recommended mixing times or check out this comparison guide for more insights.
Finish with a Visual Check
Once your batter appears uniform, stop the mixer and inspect with a spatula. Run it across the bottom and sides of the bowl; if there are any streaks of flour or lumps, mix briefly by hand to incorporate. This ensures no dry pockets remain, preventing clumps in your final baked product. Remember, even the best mixer can’t fix batter that’s unevenly mixed at the end. Precision in these final steps results in a remarkably smooth and consistent mixture, making your baking process smoother and your results more delightful.
Many home bakers operate under assumptions that can hinder their results, especially when it comes to choosing between a stand mixer or a hand mixer, understanding dough handling, or selecting the right whisk attachments. One prevalent myth is that more powerful motors always lead to better baking outcomes. While strength is important, the nuance lies in how you use the equipment and the specific tasks at hand. For instance, a common mistake is assuming that a high wattage automatically guarantees smooth dough mixing. In reality, optimal performance depends on the attachment design and operational techniques, not just power.
What Do Advanced Bakers Know That Beginners Often Don’t?
Advanced bakers recognize that the type of whisk attachment significantly impacts the final texture of batters and doughs. Silicon-edged attachments, for example, are often overlooked but provide superior ingredient distribution and aeration, especially for delicate tasks like meringues or whipped creams. Studies from expert culinary engineers indicate that attachment shape and material can influence mixing efficiency more than raw motor power. This means that investing in quality attachments and understanding their specific applications can elevate your baking far beyond the basic tool set.
Another common oversight involves overmixing or undermixing at critical stages. Many don’t realize that timing and mixing speed are nuanced skills. Overmixing can activate gluten excessively, resulting in tough baked goods, especially in recipes like muffins or cookies. Conversely, undermixing leaves lumps and uneven textures. Mastering this balance is subtle but fundamental for professional results. Experts suggest paying attention to the batter’s texture and using visual cues rather than relying solely on timing. For more insights on achieving perfect dough consistency, check out this comprehensive guide.
Furthermore, many underestimate the importance of proper ingredient preparation, such as sifting flour or tempering eggs, which can dramatically affect the mixing process. Skipping these steps may seem minor but can lead to stubborn clumps and uneven batter even when using the best equipment. As I found out early in my baking journey, paying attention to these details is essential to prevent common pitfalls.
Finally, understanding the capabilities and limitations of different mixers influences baking success. While some believe that a hand mixer suffices for all tasks, specialized recipes requiring sustained high power or precise control often favor a stand mixer with the right attachments. For intricate doughs or delicate whipped toppings, knowing when to switch tools is the difference between a professional finish and a kitchen disaster. To help you choose the right equipment, I recommend reviewing this detailed comparison.
Make no mistake—appliance choice and usage habits greatly influence your baking outcomes. Avoid the trap of relying solely on raw power or generic attachments. Instead, focus on mastering techniques, selecting suitable tools, and paying attention to preparation details. Do you fall into common misconceptions? Let me know in the comments!

To ensure your stand mixer or hand mixer continues performing at its best, regular maintenance is essential. I personally recommend inspecting your whisk attachments for wear and tear every few months—look for bent wires or loose fittings that can compromise mixing efficiency. Lubricate moving parts with food-safe oils as per the manufacturer’s instructions to prevent squeaking and ensure smooth operation. Remember, a well-maintained mixer produces uniform batters, saving you time and frustration at the counter.
How do I maintain my mixer over time?
Establishing a routine is key. After each baking session, gently clean the attachments and wipe down the mixing bowl and the motor housing with a damp cloth. Avoid harsh abrasives that can damage surfaces. Periodically check power cords for fraying or damage, and replace any worn-out parts promptly to prevent electrical issues. For more detailed guidance, consult the ultimate guide to mixer maintenance. When you build this habit, your equipment will perform reliably for years, maintaining perfect dough consistency every time.
One tool I find indispensable in the long run is a digital caliper. It allows me to measure the wire thickness of whisk attachments precisely, ensuring I select replacements that fit perfectly, especially if I’m upgrading to newer models like the silicon-edged whisks from 2026. Precise measurements prevent unnecessary strain on your mixer motor and improve the aeration of delicate mixes like meringues. Investing in quality attachments compatible with your model is just as critical as regular maintenance.
Future of tool scalability and performance
Looking ahead, I predict that innovations like smart attachments with built-in sensors will revolutionize home baking. These tools could monitor mixing speed, batter temperature, and even provide real-time feedback via an app. Such advancements will make maintaining optimal performance easier, whether you’re a casual baker or a professional. Until then, following a vigilant maintenance schedule, choosing high-quality attachments, and using precise measurements will keep your mixer running smoothly and your baking outcomes consistent.
If you haven’t tried upgrading to silicon-edged whisk attachments yet, I highly recommend it. They drastically reduce lumps and improve aeration, making your batter smoother with less effort. Regularly inspecting and cleaning your mixer, combined with these advanced tools, will ensure your baking remains a joy rather than a chore. Ready to enhance your kitchen routine? Start with a detailed inspection of your attachments this weekend and see the difference in your next batch.
What I Wish I Knew Before My First Mixing Disaster
- Initially, I underestimated the importance of proper attachment choice. Upgrading to silicon-edged whisk attachments from 2026 transformed my baking by ensuring even ingredient distribution and aeration, something I never realized was crucial until I experienced lumps firsthand.
- Patience during mixing isn’t just a virtue—it’s a skill. I learned that gradually increasing speed and stopping to inspect the batter prevents overmixing and lumps, leading to a smoother finish every time.
- Regular maintenance of my mixer, especially inspecting and cleaning attachments with a digital caliper, has been a game-changer, preserving optimal performance and consistent results, unlike the shortcuts I used initially.
- Understanding that raw power isn’t everything shifted my perspective. Instead, I focused on the quality of attachments and technique, resulting in fluffier, more delicate baked goods that impressed everyone.
- My biggest lightbulb moment? Realizing that meticulous ingredient preparation, like sifting flour and tempering eggs, directly impacts batter smoothness—these small steps can’t be skipped regardless of how fancy your mixer is.
Tools That Elevated My Baking Game
For anyone serious about improving their batter consistency, I recommend investing in high-quality silicon-edged whisk attachments, as they are designed specifically for superior aeration and ingredient incorporation. The latest silicon-edge whisks have made my mixing smoother and faster.
To maintain my equipment, I rely on a comprehensive maintenance routine that involves inspection, cleaning, and precise measurements, ensuring my mixer performs reliably over years of baking adventures.
Improving my understanding of different mixers through detailed guides helped me choose the right tools for each recipe—whether a sturdy stand mixer or a versatile hand mixer. Knowing their strengths and limitations allows me to avoid common pitfalls and achieve professional results consistently.
Seize the Moment: Your Next Baking Wins Await
Now that I’ve uncovered these insider secrets, I encourage you to take your batter mastery into your own hands. With the right tools, techniques, and a little patience, you can elevate your baking from good to extraordinary. Remember, each small adjustment—like choosing the perfect whisk attachment or sifting your flour—makes a tangible difference. Ready to transform your kitchen routines? Dive into these tips and watch your baked goods become the stars of every gathering.
What’s been your biggest challenge when mixing batter, and how did you overcome it? Share your experiences below—I’d love to hear how your baking journey is progressing!
Leave a Reply