I remember the moment vividly—stirring a batch of thick, sticky bread dough with my old hand mixer. The motor sputtered, the smell of burnt rubber filled the air, and I knew I was pushing it beyond its limits. Frustration mounted as I realized my equipment was holding back my baking ambitions, and I couldn’t help but ask: is this really the best I can do? That lightbulb moment led me down a rabbit hole of researching mixer upgrades, and what I discovered about Silicon-Edge Whisk Attachments for 2026 has completely transformed my kitchen experience. If you’re tired of sluggish motors, inconsistent whisking, or just curious if there’s a better way, you’re in the right place. Today, we’ll explore how these innovative attachments can power up your baking and save you time and effort.
How Silicon-Edge Whisk Attachments Elevate Your Baking Experience
Secure the Right Equipment First
Begin by choosing between a stand mixer and a hand mixer, considering your baking needs. For intensive whisking tasks, a stand mixer with high horsepower often outperforms hand models. Check out this comparison for detailed insights: Stand vs. Hand Mixers for Whisk Attachments.
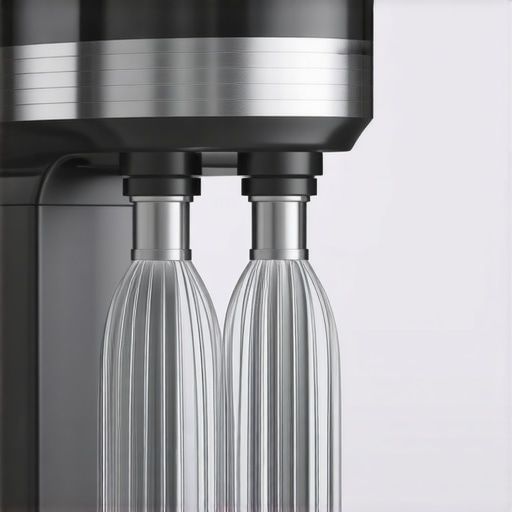
Attach the Silicon-Edge Whisk Properly
Remove the existing whisk attachment and align the Silicon-Edge Whisk securely onto the mixer’s socket. Turn clockwise until it clicks, ensuring no wobbling or looseness. I remember the first time I did this, I felt like assembling a rocket—tight, precise, and satisfying. It was crucial for optimal performance and safety.
Adjust Mixer Settings for Optimal Performance
Set your mixer to medium-high speed—around level 4 or 5—depending on your model. This speed generates enough vortex to incorporate air efficiently without causing splatters. When I whipped egg whites for a meringue, I increased the speed gradually, observing the texture change until stiff peaks formed—well worth the small adjustment for perfect fluffiness.
Monitor and Control Whisking Time
Start with short intervals, about 30 seconds, then pause to scrape down sides of the bowl. This prevents uneven mixing and ensures the silicon edges reach all ingredients. During my initial trials, I overmixed, causing deflation. Now, I watch for glossy peaks and stop immediately—saving electricity and keeping my batter light.
Clean and Maintain Your Whisk for Longevity
After use, detach the whisk and rinse with warm water immediately to avoid stain build-up. Use a soft brush to remove any residual batter from the silicon edges. Keeping your attachment clean preserves its effectiveness and extends its lifespan. When I neglected this step once, it took longer to clean, and the silicon edges lost some of their grip. Regular maintenance is essential.
Leverage Expert Tools and Resources
For advanced tips, explore detailed guides like Ultimate Guide to Choosing the Right Mixer and Pro-Grade Whisk Attachments. These resources help optimize your setup and troubleshooting, ensuring professional results every time.
Troubleshoot Performance Issues
If you notice uneven whisks or the motor struggling, it might be time to check if the Silicon-Edge is seated properly or if your motor is under strain. I once smelled a burnt rubber smell during heavy whipping—an alert that I was overloading the motor. Reducing speed and giving the motor a rest saved my equipment from damage. For stubborn issues, consult detailed troubleshooting guides or contact the manufacturer.
Experiment and Personalize Your Techniques
Don’t be afraid to tweak your speed, duration, and ingredient ratios. Personalizing your process leads to better results and confidence. When I experimented with different speeds during cream whipping, I discovered which setting produced the most volume without overworking the mixture. Precision and adaptation are your allies in baking mastery.
By following these concrete steps, incorporating Silicon-Edge Whisk Attachments becomes a seamless and rewarding part of your baking routine. Proper setup, operation, and maintenance ensure you get the most out of your equipment, turning everyday baking into a professional-grade experience.
Many home bakers operate under assumptions that might limit their results or even damage their equipment. One widespread myth is that more powerful mixers always produce better dough or quicker whisking. In reality, choosing a mixer with excessive power for small batches can lead to overworking ingredients and less tender baked goods. For delicate recipes, a more modestly powered mixer with appropriate attachments offers better control and results. Additionally, many assume that stand mixers are only for heavy doughs, but their versatility with various attachments makes them equally efficient for whisking meringues or whipping cream, provided you select the right speed and accessory. A common mistake is neglecting the importance of attachment compatibility; not all whisk or dough attachments fit all models, which can lead to inefficiency or even damage. For instance, attempting to use a generic whisk with a high-end stand mixer might result in poor performance or wear out your equipment faster. Have you ever fallen into this trap? Let me know in the comments.
Is It Truly Better to Use the Most Powerful Mixer for Every Task?
Many believe that a more powerful mixer is universally superior, but this is a misconception. Overpowered machines can overwhelm gentle ingredients, leading to overmixing or deflation of delicate mixtures like sponge cake batters. Studies suggest that optimal mixing depends more on proper technique and attachment selection than sheer motor capacity. For advanced bakers, understanding these nuances can make a noticeable difference in texture and appearance. Instead of chasing the highest wattage, focus on choosing a mixer that offers adjustable speeds and compatible attachments suited for your specific tasks. This tailored approach not only enhances results but also prolongs your equipment’s lifespan. For detailed guidance on selecting the right type, check out this comprehensive [ultimate guide to choosing the right mixer](https://mixers.kitchentechhq.com/ultimate-guide-choosing-the-right-dough-baking-mixer-hand-or-stand-in-2024).
Keep Your Mixer in Peak Condition
Regular maintenance is essential to ensure your stand or hand mixer continues performing at its best. I personally recommend checking the motor brushes and gear mechanisms every six months, especially if you frequently use your equipment for heavy doughs or multiple batches daily. Lubricating moving parts with food-grade oil prevents wear and keeps the motor running smoothly. Remember, a well-maintained mixer not only lasts longer but also produces more consistent results, making your baking more enjoyable.
Choosing the Right Tools for Long-Term Baking Success
Investing in high-quality attachments, such as the latest Silicon-Edge Whisk, pays dividends over time. I prefer whisk attachments with reinforced silicon edges because they align better with my mixing bowls and are less prone to damage or bending. For serious bakers, I recommend models compatible with multi-speed controls, allowing precise adjustments, especially when whipping delicate ingredients like egg whites or cream. Be sure to match attachments to your specific mixer model to avoid compatibility issues; check the manufacturer’s guidelines for compatibility details.
Monitoring Performance and Making Adjustments
Pay close attention to unusual noises or decreased power—they can indicate motor strain or buildup of residue. For example, after extensive use, I routinely disassemble my mixer’s attachments and wipe down internal components to remove any batter residue or grease buildup, which can hinder movement or cause overheating. Setting your mixer to the correct speed for each task is vital; overly high speeds when whisking tender ingredients can cause splattering, while too low may not aerate properly. Experiment with small adjustments and observe the texture to unlock the best results.
Future Trends in Tool Maintenance and Selection
As technology advances, expect more smart features in mixers, like diagnostic alerts for parts that need replacing or self-cleaning functions. AI-driven maintenance prompts could become standard by 2028, reducing manual checks and extending equipment lifespan. Keeping up with these innovations enables you to proactively care for your tools, saving time and money in the long run. Staying informed through trusted sources like expert reviews and manufacturer updates ensures you’re always equipped with the best practices.
How do I maintain my mixer and attachments over time?
Developing a routine of regular cleaning, inspection, and timely replacement of worn parts keeps your mixer performing optimally. For detailed step-by-step guidance, consult expert resources and manufacturer manuals. I personally schedule a quarterly deep clean using warm water and soft brushes, ensuring frictionless operation and hygiene. Incorporate routine checks of attachment compatibility and motor functioning, especially after heavy use. These practices can significantly extend your equipment’s lifespan and maintain baking quality—don’t overlook this crucial aspect of your culinary toolkit.
For example, applying manufacturer-recommended maintenance routines can prevent issues like motor burnout or attachment failure. Remember, even small neglects can lead to costly repairs or early replacements. So, take a proactive approach—schedule periodic inspections and don’t hesitate to replace worn parts promptly. This not only preserves your investment but also ensures every batch turns out perfect.
Try implementing this advanced tip: Set a calendar reminder to deep clean your mixer and inspect attachments monthly. A simple but effective habit that safeguards your equipment and enhances your baking consistency over the years. Want deeper insights? Check out the detailed advice in Ultimate Guide to Choosing the Right Mixer.
Lessons I Didn’t Expect to Uncover About Mixing Tools
- One of the most surprising insights was realizing that excessive power isn’t always beneficial. A high-wattage mixer can sometimes overwork delicate batters, leading to loss of fluffiness and moisture. Choosing a balanced motor with adjustable speeds allows for more nuanced control, which is essential for perfect results.
- I underestimated the importance of attachment compatibility. Using mismatched accessories not only hampers performance but can also damage your equipment. Always double-check that your whisk attachments are designed for your specific mixer model—I learned this the hard way when a poorly fitting silicon whisk caused wobbling and uneven mixing.
- Regular maintenance extended the lifespan of my attachments. A simple routine of cleaning and inspecting my Silicon-Edge Whisk after each use prevented residue buildup, which could diminish silicon flexibility and whisking efficiency. This small habit made a big difference in performance over time.
- Speed settings are more crucial than I thought. Initially, I believed higher speeds yielded quicker results, but I found that starting slow and increasing gradually yielded better aeration and stability, especially with whipped cream or egg whites. Patience and technique trump power here.
Leave a Reply