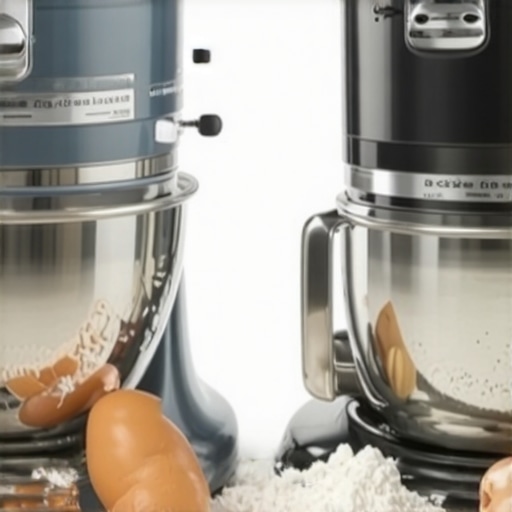
It was a frustrating afternoon in my kitchen, kneeling over a sticky mass of dough that refused to mix smoothly. Every few seconds, my hand mixer sputtered, struggling against the stubborn dough, making me question whether I had the right tool for the job. That lightbulb moment—realizing I was using the wrong type of mixer for my baking needs—changed everything. In 2024, selecting between a stand mixer and a hand mixer isn’t just about brand or price; it’s about understanding what truly suits your baking style.
Why Your Choice of Mixer Can Make or Break Your Baking Experience
The right mixer can turn a daunting baking session into a joyful, effortless activity. Conversely, using an ill-suited appliance can lead to frustration, uneven mixing, or even damaged ingredients. I’ve learned from personal missteps—like underestimating the power difference or not considering attachment compatibility—that making an informed choice matters. Whether you’re kneading dough for bread or whisking delicate batters, knowing which mixer aligns with your goals is essential. For a comprehensive comparison of these tools, I recommend checking out this detailed article: Stand vs. Hand Mixers in 2024.
Is the Hype Worth It or Just a Marketing Gimmick?
Early in my baking journey, I made the mistake of choosing a trendy, lightweight hand mixer because it seemed convenient. However, I quickly realized that power and durability are crucial for consistent results—especially with heavy doughs. I once tried to mix stiff bread dough with a basic hand mixer, and I nearly burned out the motor. That experience taught me to look beyond superficial features to understand the actual performance and quality. If you’re skeptical about whether investing in a quality stand mixer is justified, you’re not alone—many wonder if the benefits outweigh the costs. To better grasp this, read about the key differences here: Ultimate Guide to Choosing Your Baking Mixer.
Are you tired of wrestling with your current mixer or unsure if you’re getting the best bang for your buck? You’re not alone in facing this dilemma. The good news? With the right information, you can confidently pick the perfect tool to elevate your baking game this year. Let’s explore how to match your needs with the ideal mixer.
Set Up Your Equipment Properly
Before starting, ensure your mixer is clean and assembled correctly. For stand mixers, attach the paddle or dough hook securely. For hand mixers, insert the beaters firmly. When dealing with dense dough, a sturdy stand mixer provides more stability, preventing splashes and uneven mixing. I once attempted to knead a heavy bread dough with a hand mixer, quickly realizing it lacked the power—resulting in a frustrating mess. Always match your mixer’s capacity with your recipe to avoid overloading the motor.
Prepare Ingredients for Consistent Results
Measure ingredients precisely—baking is a science, and inconsistent measurements can lead to failures. For stiff doughs, start by mixing wet ingredients thoroughly with a hand mixer to prevent lumpy textures, then incorporate dry ingredients gradually. When working with delicate batters, gentle mixing with a stand mixer helps keep airy textures intact. I remember whisking a meringue by hand until my arm felt sore; a stand mixer with a whisk attachment would’ve saved time and effort. Properly prepared ingredients ensure your mixer works efficiently and your bake turns out perfect.
Adjust Mixer Speed According to Task
Use low speed for initial mixing to prevent ingredients from splashing out—especially with flour or powdered sugar. Increase speed gradually to develop gluten in bread dough or to whip cream. For delicate tasks like folding in whipped egg whites, switch to the lowest setting or use hand mixing to maintain volume. My favorite trick: start slow, then ramp up to high only when the ingredients are mostly combined. Different mixer models have specific speed settings; consult your manual or site like this guide for optimal settings.
Master the Art of Effective Mixing Techniques
Hold the mixer steadily, guiding it around the bowl for even mixing. For stand mixers, scrape down the sides occasionally to incorporate all ingredients. When mixing dough, let the machine work for a few minutes, then stop to check texture. Remember: overmixing can develop too much gluten in bread or deflate delicate batters, leading to dense outcomes. I learned this after overworking a cake batter, resulting in a tough crumb—so I switched to gentle, deliberate mixing with a stand mixer for my pièce de résistance.

Focus on smooth, uniform dough with no lumps or streaks. Use the paddle attachment for cookie dough and quick bread batters; the dough hook is better for bread. Whisk attachments are ideal for airy whipped toppings and meringues. Selecting the right attachment and technique makes all the difference, as described in this resource.
Finish and Clean Up Efficiently
Once your mixture meets the desired consistency, turn off the mixer and detach the attachments promptly. Scrape residue with a spatula to maximize ingredients and avoid waste. Clean attachments immediately—dried batter or dough becomes stubborn over time. For stand mixers, disassemble the bowl and attachments for thorough cleaning; for hand mixers, rinse the beaters under warm water. Proper maintenance ensures longevity and consistent performance. Remember: a well-maintained tool is your best partner in baking success.
Many home bakers believe that tossing ingredients into a mixer and hitting a button is all it takes to perfect dough. However, even experienced bakers often overlook critical nuances that can make or break their baking results. For instance, there’s a widespread myth that a higher-powered stand mixer will always produce better dough, but that’s not necessarily true. The key lies in understanding the specific features and how they align with your baking needs. In this comprehensive guide, expert advice emphasizes that correct attachment choice and mixing techniques are more vital than raw power alone.
Money Where Your Mixer Is: Maintaining Your Equipment Over Time
Investing in quality baking equipment is just the start; proper maintenance ensures these tools perform optimally and last for years. Regularly inspecting your stand mixer or hand mixer for loose parts, wear, or accumulated residue helps prevent breakdowns. Keep the attachments clean and dry after each use—dried dough or batter can corrode or clog moving parts, reducing efficiency. Lubricate moving joints occasionally with a light food-grade oil if recommended by the manufacturer; this prevents squeaking and loosening over time. Personally, I schedule a monthly deep clean for my stand mixer, including disassembling visible parts and wiping down the interior motor housing, which drastically reduces unexpected failures. Adopting this routine not only extends your equipment’s lifespan but also maintains consistent baking results, giving you peace of mind that your tools won’t hold you back.
How do I maintain my mixer and attachments over time?
Use gentle cleaning methods—avoid abrasive scrubbers that can damage finishes or blades. For heavy-duty cleaning, soak attachments in warm soapy water but ensure they are completely dry before reattaching or storing. Check seals and rubber gaskets periodically; replace if they show signs of cracking or deterioration. Consult your specific model’s manual for maintenance tips and compatible lubricants. As tools like whisk attachments undergo frequent use, especially for airy or delicate mixes, maintaining their condition ensures they perform at peak level every time. For advice tailored to your equipment, see expert recommendations in this comprehensive guide. Making these small, consistent efforts prevents costly repairs and keeps your baking smooth.
Which tools really stand the test of time?
In my experience, high-quality stand mixers with metal gears and sturdy motors outperform cheaper models, which can bog down or fail under heavy kneading. For whisk attachments, corrosion-resistant stainless steel is a smart choice—it’s durable and easy to clean. Power tools like dedicated dough hooks or whip attachments, when maintained properly, can handle decades of use. I personally prefer models with easily accessible service parts, allowing me to replace worn components instead of discarding the entire unit. Today’s trend leans toward modular, upgradeable mixers, predicting a future where repairs and parts replaceability will be commonplace, reducing waste and cost. In this evolving landscape, investing in a durable, well-maintained mixer becomes a financially wise decision that pays it forward by supporting sustainable practices.
Selecting the right tools to scale your baking efforts
If you plan to take your baking to the next level, consider tools designed for scalability, such as larger capacity bowls or more powerful motors. When transitioning from small batches to baking for friends or events, a high-capacity stand mixer with adaptable attachments will make a significant difference. Ensuring that your mixer can handle increased workload without compromising performance is crucial. Plus, advanced attachments like programmable timers or digital controls can streamline busy baking sessions. Personally, I’ve upgraded from a basic model to a professional-grade mixer, which has revolutionized my productivity. Exploring such options now sets the stage for long-term success—check out this resource to find the right fit for your growing needs. Embracing scalable solutions today ensures you’re ready for future baking projects with confidence.
Lessons That Didn’t Make the Recipe
- I once believed more power meant better bread kneading, but I learned that control and attachment choice matter more—trust me, a gentle touch often yields fluffier results.
- I used to think all whisk attachments are created equal, until I realized that the shape and material can drastically affect aeration—upgrading to stainless steel whisk attachments changed my baking game entirely.
My Top Picks for Baking Success in 2024
- Check out this comprehensive guide for an in-depth understanding of selecting the right baking mixer—it’s my go-to resource for making informed decisions.
- The stand mixer vs. hand mixer comparison helped me evaluate what truly suits my baking style and workload.
- For maintenance tips, this resource offers practical advice to keep my equipment running smoothly year after year.
- Lastly, exploring which attachment is best for specific doughs and batters ensures consistent, professional-quality results every time.
Leave a Reply