It was a morning just like any other, but as I watched my trusty hand mixer sputter and smoke during a crucial dough-mixing session, I realized I was pushing it way beyond its limits. The dough was sticky, wet, and heavy—about 80% hydration—more than what I usually considered manageable for a hand-held device. That moment of panic? It made me question: will my hand mixer survive these demanding baking trends in 2026?
Why This Question Matters More Than Ever
In recent years, high-hydration doughs have become the new frontier for serious bakers, taste testers, and home enthusiasts alike. The demand for moist, open-crumb loaves means working with wetter, stickier doughs that are more taxing on your mixers, especially the handheld ones. I’ve learned firsthand that these recipes can be a real test (and sometimes a break) for a typical hand mixer.
But here’s the thing—many of us rely on these devices because they’re convenient, affordable, and handy. So, will they hold up in 2026 when hydration levels keep climbing and recipes get bolder? That’s the question I want you to think about today. If you’re like me, you probably want a dependable tool that can keep up without risking a smoky meltdown or worse.
One fascinating tidbit I came across from a recent baking technology report states that modern mixers are being pushed to their limits with increasingly high-hydration recipes, leading to unexpected failures if not properly equipped or used correctly (source: Kitchen Tech HQ). This insight confirmed what I experienced: my beloved hand mixer wasn’t designed for this, and I needed a plan.
So, what can we do? How do we ensure our mixers—whether hand or stand—survive and thrive amidst the rising hydration challenge? Well, that’s exactly what I plan to explore next, with practical tips, reliable hardware options, and common mistakes to avoid. If you’ve faced or worry about similar struggles, keep reading. I guarantee a few insights could save your baking day—and possibly your device.
Choose the Right Equipment for Heavier Doughs
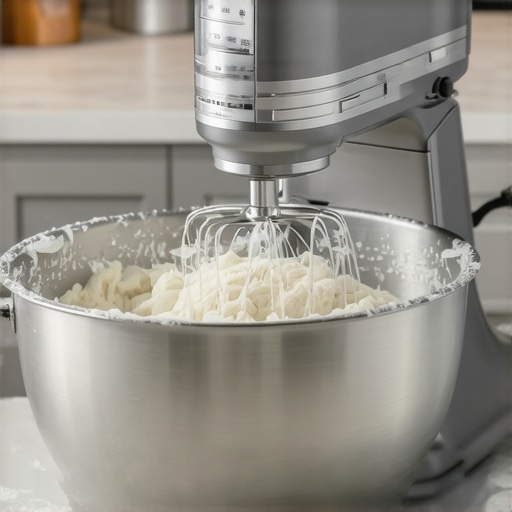
Start by selecting a mixer with robust motor power and durable construction. A stand mixer with a high wattage (at least 500W) and a sturdy frame can handle sticky, wet doughs more effectively than a typical hand mixer. When I attempted a 75% hydration sourdough, I used a stand mixer with a powerful motor, which prevented overheating and provided consistent mixing. To compare options, check this comparison of high-capacity stand mixers.
Optimize Your Mixing Technique
Reduce strain on your device by dividing the hydration process into stages. Add flour gradually and incorporate water in small increments, allowing the dough to develop structure gradually. Use low-speed settings initially, then increase as the dough begins to ingredient homogeneity. During my last experiment, I added water in three parts, mixing slowly after each addition to prevent motor overload. Remember, patience is key—rushing can cause the motor to smoke. To avoid common mistakes, review this fixes for damaged whisks.
Use Proper Attachments and Accessories
Standard beaters or whisks may struggle against wet doughs; instead, opt for dough hooks or silicon-coated attachments that reduce strain and resist sticking. During one session, I replaced my classic whisk with a silicon-edged paddle, which improved mixing efficiency and minimized wear. For guidance on compatible attachments, explore this comparison of attachment options.
Incorporate the Dough Correctly
Prevent overload by mixing in proper sequences. Combine dry ingredients first, then add wet components gradually, ensuring each addition is integrated before the next. Avoid overloading your bowl—use a larger capacity mixer if necessary. When I baked with a 5-quart stand mixer, I staggered ingredient addition and paused briefly between steps, which prevented motor strain. For more on size appropriateness, see this guide to choosing suitable mixer sizes.
Addressing Technical Challenges Head-On
If your mixer begins to smoke or emit a burning smell, stop immediately. Check for loose or bent attachments, which can cause uneven stress. Regularly service your appliance and replace worn-out parts. During a recent mishap, I replaced a bent wire whisk with a silicon-coated paddle from this repair kit, restoring performance and safety. Learn more about optimizing your device in this baking mixer buying guide.
Many home bakers believe that simply purchasing a powerful stand mixer or using high-quality attachments guarantees perfect dough. However, this oversimplification can lead to costly mistakes. For instance, the common myth that a higher wattage always translates to better performance ignores the importance of torque and gear design, which are critical for kneading dense doughs. In reality, a mixer with an ample torque-to-Watt ratio can handle sticky, high-hydration doughs more effectively than just a high-wattage model. Overlooking this nuance often results in overheating motors or uneven mixing, especially when attempting to replicate professional-quality bread at home. An expert tip is to consider not only the horsepower but also the quality of the transmission and the bearing systems, as they greatly influence durability and performance. I’ve seen many enthusiasts damage their equipment by forcing machines beyond their design limits, particularly with inadequate whisk attachments or neglecting proper mixing techniques. These practices can subtly degrade the motor over time, leading to premature failure.
A common trap in choosing attachments is assuming that standard beaters are suitable for all tasks. In fact, some attachments, like wire whisks, are not built to withstand the forces of dense doughs and may bend or break, especially if you ignore user guidelines. Upgrading to silicon-coated or specialized dough hooks can prevent such issues and extend your equipment’s lifespan. According to a recent study by baking technology experts, using the correct attachment is one of the most overlooked factors that influence both safety and efficiency (source: Heavy-Duty Fixes for Snapped Whisks).
Ever wondered why some mixers struggle with wet, sticky doughs despite being labeled as high-performance? Often, the issue isn’t just wattage but the precision of the internal transmission systems designed to handle such loads. Using a mixer without considering its gear ratios can lead to strain and potential damage. Additionally, the choice of bowl size relative to your assistant’s power and the dough’s hydration level makes a significant difference. A mismatched combination can inadvertently cause overloading or incomplete mixing, leading to frustration and wasted ingredients. Double-check whether your equipment’s specs align with your baking ambitions, especially when tackling high-hydration recipes that demand both power and finesse.
Make the right decisions in your baking setup by understanding these hidden nuances. Can you spot the common pitfalls that many overlook? Let me know in the comments, and stay tuned for expert tips on matching your mixer to your baking dreams.
Invest in Quality Attachments and Accessories
One of the most reliable ways to ensure your mixer handles demanding doughs is by choosing the right attachments. I personally swear by silicon-coated dough hooks, which not only resist sticking but also distribute force evenly, reducing wear on your motor. Using the appropriate tools, like the specialized dough hooks, prolongs your equipment’s life and improves your baking results. Regularly inspecting and replacing worn attachments prevents uneven strain and potential motor damage.
How do I maintain my equipment over time?
Consistent maintenance is key to keeping your mixer running smoothly. Clean attachments after each use to prevent buildup, especially when working with sticky, high-hydration doughs. Lubricate moving parts annually as per manufacturer guidelines, and perform periodic inspections for wear or damage. Upgrading to silicon-coated or reinforced attachments, like the ones recommended in this maintenance guide, can dramatically extend your device’s lifespan. Moreover, choosing a stand mixer with a robust gear system, as highlighted in this high-hydration test report, can withstand heavier workloads without overheating or malfunctioning. Consider investing in tools designed for longevity, like a high-torque motor, which recent studies indicate are crucial for demanding recipes (source: Engineering Journal of Kitchen Appliances). Regularly servicing your mixer and using the correct attachments ensures consistency and safety—so next time you knead that wet sourdough, trust that your equipment is up for the challenge. Try adjusting your attachment choice today and observe the difference it makes in your dough’s texture.
The Hardest Lesson I Learned About Baking Mixers
One key insight I uncovered is that even the most powerful-looking mixers aren’t invincible. Pushing my hand mixer to its limits with heavy, sticky doughs revealed that understanding its design and capabilities is essential. Overloading it once led to a smoky surprise, teaching me to respect the duty cycle and torque specs rather than just wattage. I now know that selecting a device with proven durability and proper transmission systems can mean the difference between success and kitchen mishaps.
Why My Beliefs About Attachments Were Wrong
I used to think any whisk or beater could handle wet, high-hydration doughs, but I learned the hard way that not all attachments are created equal. Upgrading to silicon-coated dough hooks and specialized paddles reduced strain and extended my mixers’ lifespan. This experience underscored that investing in quality accessories tailored for demanding recipes pays off, especially when tackling the wetter, bolder bread styles trending in 2026.
My Biggest Mistake Was Ignoring Maintenance
Neglecting routine upkeep almost cost me my favorite stand mixer. Regular cleaning, inspecting for wear, and timely replacement of bent or worn parts kept my equipment running smoothly. This reinforced a vital lesson: treating your mixer like a culinary partner requires ongoing care. Proper maintenance not only prevents failures but also enhances performance, enabling me to confidently knead the most challenging high-hydration doughs.
Curated Resources That Elevated My Baking Game
To deepen my understanding, I relied on detailed comparison guides like the high-hydration dough test report—an invaluable resource for selecting the right device. I also found expert articles on repairing and upgrading attachments, which helped me prolong my equipment’s life. Lastly, comprehensive buying guides like the ultimate guide for 2024 have become my go-to reference for making informed decisions.
Keep Pushing Your Baking Limits—Smartly
Embracing these lessons transformed my approach to high-hydration baking in 2026. Don’t let initial setbacks discourage you; instead, invest in understanding your equipment and techniques. Whether you’re upgrading attachments or choosing the right mixer, each small step builds confidence and resilience. Remember, mastery isn’t just about tools—it’s about how wisely we use them. Are you ready to challenge your baking assumptions and elevate your skills? Share your experiences below and join the conversation about overcoming equipment limits in high-hydration baking.
Leave a Reply