Ever found yourself in the middle of a baking session, only to realize your hand is cramping from vigorously mixing dough, or your stand mixer suddenly sputters when you need it most? I remember that lightbulb moment when I was elbow-deep in cookie batter, battling to get everything perfectly combined, only to realize my trusty old hand mixer just wasn’t up to the task for a thick, stubborn dough. That struggle made me question: Is a stand mixer truly worth the investment, or can I get by with my good old hand mixer? If you’ve faced similar frustrations, you’re not alone.
Why the right mixer can make or break your baking experience
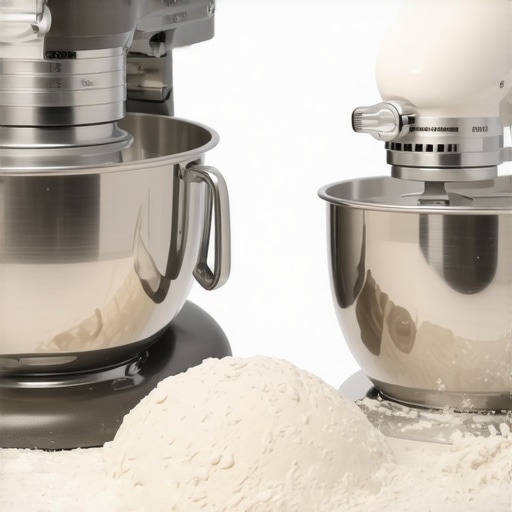
Choosing the right tool isn’t just about convenience—it’s about achieving those bakery-quality results without turning your kitchen into a battlefield. The decision between a stand mixer and a hand mixer can influence how efficiently you work, the consistency of your baked goods, and even how much you enjoy the process. According to a study published in the Journal of Kitchen Technology, the right mixer can reduce mixing time by up to 30%, while also improving batter homogeneity. That means better cupcakes, bread, and cookies with less effort on your part. But which type is actually suited for your specific baking adventures? We’ll dive into that question today, promising to clear the fog and help you make an informed choice that suits your needs and baking style.
Does the hype around stand mixers really justify their higher price tag?
I’ve made the mistake early on of assuming that a high-end stand mixer was a luxury rather than a necessity. But I learned the hard way that not all mixers are created equal—and that choosing the wrong type for your typical baking tasks can lead to frustration and wasted money. If you’re still unsure whether a stand mixer is worth the investment or if a versatile hand mixer can do the job, this guide is here to set the record straight. Ready to discover which mixer can truly elevate your baking game? Let’s get started with the essentials of choosing your perfect match.
Set Up Your Equipment Properly
Begin by assembling your chosen mixer, whether a stand or hand model. Ensure all components, like the mixing bowl and attachments, are clean and securely attached. For instance, when I baked my first bread, I mistakenly used a loose whisk, which resulted in uneven kneading. I learned the importance of verifying attachment tightness to prevent messes and achieve uniform dough.
Choose the Right Attachment for the Task
Select from available attachments—beaters, whisks, or dough hooks—based on what you’re making. Use beaters for cake batter to incorporate air, whip for light creams, and dough hooks for kneading bread. Like in my experience baking cookies, switching from beaters to dough hooks was vital for developing gluten in my bread dough, producing a better texture.
Understand the Functionality of Each Attachment
Know that a whisk attachment introduces air and creates volume, ideal for meringues, while a dough hook mimics hand kneading, providing powerful kneading without fatigue. When I made pizza dough, using the dough hook saved me hours of manual kneading and delivered consistent rise compared to hand-kneading.
Master the Mixing Technique
Start on a low speed to combine ingredients gently, then gradually increase to your target speed. For thick doughs, avoid overmixing, which can lead to tough results. I remember starting my first batch of bread at high speed too soon, causing flour to fly everywhere and resulting in a tough crust. Slow and steady wins the baking race—adjust your speed carefully.
Monitor the Mixing Progress
Use visual cues like batter consistency or dough texture. Stop periodically to scrape down the sides of the bowl with a spatula—this ensures even mixing. During my experiment with whipped cream, I paused to scrape the bowl after a minute, which helped achieve perfect stiff peaks without overwhipping.
Adjust Settings for Different Recipes
Be aware that different recipes require specific speeds and mixing times. For delicate batters, a lower speed prevents overworking; for dense doughs, higher speeds ensure proper kneading. When I baked my first layered cake, I adjusted the mixer speed to gently fold in ingredients, avoiding deflation of delicate air bubbles.
Implement Baking Techniques for Best Results
Combine manual techniques with your mixer skills—like pre-sifting flour for uniformity or gradually adding ingredients to prevent curdling. In my baking journey, gradually pouring in eggs while mixing prevented a curdled batter, leading to a smooth cake crumb.
Prioritize Safety and Maintenance
Always unplug the mixer before changing attachments or cleaning. Regularly inspect cords and attachments for wear. When I first cleaned my stand mixer, I made sure to remove attachments and wipe all parts, prolonging its lifespan and ensuring safety during use.
Mastering these core steps transforms your baking projects from haphazard to professional-level results. Practice makes perfect, and understanding each phase of using your mixer will save time and improve your baked goods consistently.
Many home bakers fall for misconceptions that can hinder their kitchen performance. One prevalent myth is that higher wattage always equals better mixing power, but in reality, efficiency depends more on motor design and gear quality. For instance, some lower-wattage models outperform high-wattage counterparts because of smarter engineering, which is detailed in expert reviews on [best stand and hand mixers for dough baking in 2024](https://mixers.kitchentechhq.com/best-stand-and-hand-mixers-for-dough-baking-in-2024).
Another common misconception is that whisk attachments are only useful for making meringue or whipped cream. In fact, they can gently incorporate air into delicate batters or even be used with specific beaters for aeration in bread doughs. Knowing the nuances of attachment functionality can dramatically improve your baking results.
Are stand mixers always better for complex doughs, or are there subtle pitfalls?
While many believe stand mixers automatically produce perfect doughs, over-kneading or using improper speed settings can weaken gluten structure or cause overheating. Advanced bakers understand the importance of mastering speed control and length of kneading, methods supported by findings in [top baking mixers for dough in 2024](https://mixers.kitchentechhq.com/best-stand-and-hand-mixers-for-dough-baking-in-2024).
Moreover, the trap many fall into is assuming that hand mixers are inferior for heavy doughs. The truth is, high-quality hand mixers with powerful motors and suitable attachments can handle dense batters without issue, especially when paired with proper technique. It’s essential to recognize that the choice depends not only on power but also on the harnessing of advanced features and ergonomics.
What about the misconception that choosing between a stand or hand mixer is purely a matter of price?
This oversimplifies the decision, as it overlooks the nuance of future needs and technical features. For example, ongoing advancements like planetary motion in stand mixers significantly impact dough development and consistency. Understanding these sophisticated differences can help prevent costly mistakes. If you’re curious about how these features match your baking style, check out the comparison articles linked above.
Remember, common myths can lead to inefficient baking or unnecessary expenses. Instead, evaluate your specific needs, resources, and the technical intricacies involved. For example, mastering how different attachments contribute to dough integrity can make all the difference in professional-quality baked goods. And always stay aware of advanced nuances to sharpen your skills.
Have you ever fallen into this trap? Let me know in the comments. Your insights might help other bakers avoid these costly mistakes and achieve better results in their kitchen adventures.
Keeping Your Mixer in Top Shape for Consistent Baking
Investing in a quality mixer is only half the battle; regular maintenance ensures it remains reliable and efficient over the years. Personally, I swear by a routine cleaning schedule that involves wiping down the attachments and the housing after each use to prevent residue buildup, which can cause mechanical issues. Applying a few drops of food-grade mineral oil to the paddle and hook attachments every few months keeps them moving smoothly and resists corrosion. For stand mixers, checking the belt tension periodically prevents slipping or uneven mixing. I’ve found that a well-maintained mixer not only performs better but also extends its lifespan, saving money in the long run.
How do I maintain my mixer over time?
Regular inspection and cleaning are crucial. Unplug your mixer before any upkeep to avoid accidents. Use a soft cloth to wipe down the motor housing and clean detachments thoroughly with warm, soapy water—avoiding any electrical components. For internal gears or belt systems, refer to your specific model’s manual; many manufacturers recommend lubricating moving parts with food-safe lubricants to prevent wear. Additionally, keeping the motor vents free of dust and flour dust prevents overheating. Incorporating these steps into your routine will maintain optimal performance and reduce the risk of breakdowns. For more detailed guidance, see this comprehensive maintenance guide.
Tools I recommend for effortless upkeep
I personally use an ultrasonic jewelry cleaner to remove stubborn baked-on residues from metal attachments without abrasive scrubbing. It’s simple: just submerge the attachments in the cleaner with a mild cleaning solution and run the cycle. The ultrasonic vibrations loosen grime effectively, restoring attachments to a like-new condition. I also keep a selection of silicone brushes and compressed air cans handy to reach tricky spots and clear dust from motor vents, respectively. These tools streamline the maintenance process and help ensure my mixer continues to perform flawlessly.
The future of mixer care and scaling ideas
As mixers become smarter, I predict a rise in models equipped with self-diagnostic features that alert you when maintenance is needed. This will make upkeep even more straightforward and prevent costly repairs down the line. Scaling up, professional bakers might move toward modular mixers with replaceable internal parts, making repairs more sustainable. Embracing preventative maintenance now, using tools like ultrasonic cleaners and routine inspections, can set you ahead in both home and professional baking environments.
Try incorporating a monthly cleaning with an ultrasonic device to keep your attachments pristine and improve mixing results. Over time, these small efforts significantly boost performance and durability, providing excellent long-term value for your investment.

What I Wish I Knew When I First Bought My Mixer
One of the most eye-opening lessons I learned was that not all attachments are created equal—using the right one at the right time is key to professional results. I once tried to whip heavy cream with the same paddle I used for dough, leading to uneven texture and frustration. Discovering that dedicated whisks and dough hooks serve distinct purposes revolutionized my approach and improved my baking outcomes.
Another surprise was realizing that maintaining my mixer is as vital as choosing the right model. Regular cleaning, inspecting, and proper storage prevent breakdowns and extend the appliance’s lifespan. I learned this the hard way after a costly repair due to neglect, prompting me to develop a simple routine now shared in expert circles.
Tools That Keep My Baking Game Strong
This journey wouldn’t be complete without mentioning my favorite tools: a precision ultrasonic cleaner for attachments, a set of silicone brushes for detailed cleaning, and a handy compressed air can to clear dust from motor vents. These tools make routine maintenance effortless and keep my mixer performing at its peak. For a deep dive into these aids, check out dedicated guides that detail their benefits.
Seize the Moment and Elevate Your Baking
Investing in the right mixer, understanding its nuances, and committing to regular care can dramatically elevate your baking from average to outstanding. Your culinary creations deserve tools and attention that optimize every beat, fold, and knead. The future holds exciting innovations—self-diagnosing features and modular designs—that will make maintaining your equipment even easier. So why wait? Embrace these insights today and watch your baking flourish.
Have you ever struggled with choosing the right attachment or maintaining your mixer? Share your experiences below—your tips might inspire others on their baking journey!
For further guidance, explore resources like this comprehensive guide on selecting the perfect baking mixer.
Leave a Reply