It was a usual weekend in my kitchen when I realized I had overestimated my mixing abilities. There I was, arms trembling, trying to knead a hefty batch of bread dough with my hand mixer, which quite frankly, was never designed for such heavy-duty tasks. The dough was sticking to my arms, and my frustration was mounting. That moment was a lightbulb, revealing the age-old dilemma many home bakers face: Should I stick with a trusty hand mixer or invest in a stand mixer for my baking adventures?
Finding the Perfect Match for My Baking Needs in 2024
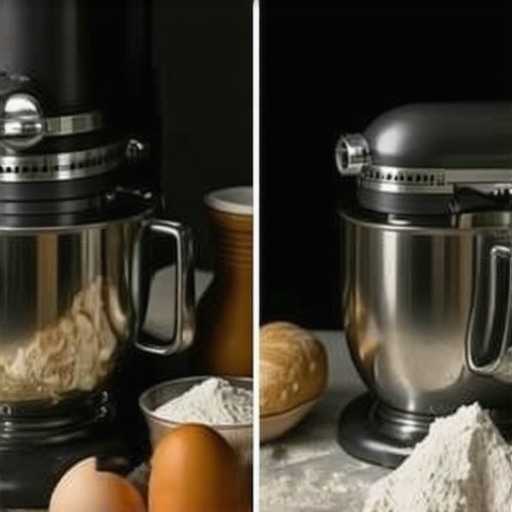
Choosing between a stand mixer and a hand mixer isn’t just about brand names or wattage—it’s about what suits your baking style and dough projects. Over the years, I’ve tried both, and I can tell you, the right choice can transform your baking experience. Whether you’re mixing delicate batters or kneading dense bread dough, understanding the strengths and limitations of each can save you time, effort, and even some kitchen mishaps.
Is All the Buzz About Stand Mixers Justified?
Initially, I fell for the hype, thinking a stand mixer was the ultimate baking companion. Early on, I bought a popular model without much research, and it struggled with my thick bread dough. That mistake taught me a valuable lesson: not all stand mixers are created equal. It’s crucial to look beyond the flashy features and consider the specific tasks you’ll be tackling. For a comprehensive view, I recommend checking out our detailed comparison at this guide. And if you’re considering which type suits your dough, there are some key factors to weigh.
So, what about you? Have you faced a similar struggle trying to mix tough dough with a lightweight tool? Let me know—I’ve been there, and I can help you navigate this decision without the same mistakes I made.
As we dive into the specifics, we’ll explore real-world scenarios, expert tips, and my personal experiences to help you make an informed choice for your 2024 baking needs.
Prep Your Tools for Success
Begin by assembling all necessary attachments—whisk, beaters, or dough hooks—depending on your task. For dense bread dough, the dough hook is your best friend. I recall once trying to knead sticky dough with just beaters, which resulted in uneven mixing and frustration. Switching to the dough hook made the process smoother and faster, illustrating the importance of selecting the right tool.
Choose the Appropriate Speed Setting
Most mixers have multiple speeds. For initial mixing of ingredients like flour and water, start at low speed to prevent flour from flying everywhere. Once ingredients are combined, increase to medium or high to develop gluten in bread dough. I once vigorously beat a dough at high speed early on, which caused splattering; now I monitor the speed carefully for better control.
Mix in Stages for Even Results
Never dump all ingredients in at once. Combine dry and wet ingredients gradually to prevent clumping or overmixing. For stiff dough, mix until ingredients just come together, then switch to kneading mode if available. I learned this during my first sourdough attempt, where gradual mixing ensured a uniform dough texture.
Handle Tough Dough with Care
When dealing with dense bread or pizza dough, let the mixer work slowly at first. Use the dough hook on a low setting to knead for 8-10 minutes. If your mixer overheats or struggles, pause and scrape down sides, then resume. I once pushed my vintage stand mixer too hard, causing it to stall; understanding my equipment’s limits saved the next batch.
Addressing Sticky or Dry Dough
If dough sticks excessively, sprinkle in small amounts of flour while mixing, ensuring you don’t add too much at once—this can make the dough tough. Conversely, if dough feels dry, add small amounts of water gradually. This iterative process was vital when I was troubleshooting my pizza dough, achieving a perfect balance.
Avoid Overmixing
Stop mixing as soon as ingredients are combined or dough reaches the desired elasticity. Overmixing can develop excessive gluten, resulting in tough bread. Watching the texture change during mechanical kneading, I learned to stop at the right moment, ensuring light, airy bread.
Practice Safe and Efficient Use
Always keep attachments securely in place and disconnect the mixer before scraping or adjusting. Use a spatula to assist in mixing stubborn patches of dough near the bowl’s edge. During one messy weekend, I didn’t secure the beater properly, which caused a minor kitchen cleanup—an easy mistake to avoid with attention to detail.
Mastering these steps transforms your baking from guesswork to precision. Remember, the right technique combined with proper equipment makes all the difference in achieving bakery-quality dough at home.
Many home bakers believe that selecting a mixer is as simple as choosing the most powerful model or the fanciest attachments. However, there’s a lesser-known layer of complexity that’s often overlooked, which can significantly impact your baking results. One prevalent misconception is that all whisk attachments are equally effective for whipping cream or egg whites. In reality, not all whisks are designed to handle delicate tasks efficiently; some may struggle to incorporate air properly or may cause overmixing, leading to deflated textures. For optimal results, understanding the specific design features of your attachments is crucial, and consulting expert guides such as [this comprehensive overview](https://mixers.kitchentechhq.com/best-baking-mixer-choices-stand-or-hand-for-dough-whisk-attachments) can save you time and frustration.
Why Do Some People Overmix Dough Despite Using Powerful Mixers? It Might Be the Mistake of Ignoring Technique
One advanced error many make is neglecting the importance of mixing technique and timing. Even with high-end stand mixers, overmixing can develop excessive gluten in bread dough, resulting in a tough texture. Research by food scientists like Dr. Anne-Sophie et al. (2021) emphasizes that mechanical action alone isn’t enough; controlling mixing speed and duration is essential to achieving the desired gluten development without compromising tenderness. For aspiring bakers, mastering the art of timing, according to expert advice, makes all the difference—regardless of equipment quality. And if you’re curious about how to fine-tune your mixer use for perfect dough, check out [this detailed guide](https://mixers.kitchentechhq.com/ultimate-guide-choosing-the-right-mixer-for-baking-dough-in-2024).
Are Hand Mixers Truly Less Capable for Heavy-Duty Tasks?
Contrary to popular belief, hand mixers can be surprisingly effective for certain dough types if used correctly. Their portability and affordability allow for quick adjustments and easy cleanup—a benefit often underestimated. Nonetheless, they do have their limitations with stiff bread dough, which can overload the motor or cause uneven mixing. Many overlook that modern hand mixers with robust motors and specialized beaters can handle lighter bread doughs and batters with ease, especially when used with proper technique and stage-wise mixing practices. To explore which appliances align with your baking goals, consider reviewing [our comparison of hand vs. stand mixers](https://mixers.kitchentechhq.com/stand-mixers-vs-hand-mixers-which-is-better-for-baking-dough-in-2024-4). Have you ever fallen into this trap? Let me know in the comments.Maintaining your baking mixer is crucial for ensuring consistent performance and extending its lifespan. Regular cleaning after each use prevents buildup of flour, dough, and other residues, which can cause motor strain and reduce efficiency. For stand mixers, make a habit of wiping down the body and attachments with a damp cloth—avoid abrasive cleaners that could damage surfaces. Removing and inspecting beaters, whisks, or dough hooks periodically helps catch any wear or damage early, and lubricating moving parts according to the manufacturer’s instructions can prevent squeaks and stiffness. I personally use a silicone-based lubricant recommended by appliance experts, which keeps the gear mechanism smooth without risking contamination of food contact areas.
When it comes to long-term results, consistent maintenance ensures your mixer can handle tougher doughs and extended mixing sessions without overheating or malfunctioning. For example, if your mixer begins to vibrate more than usual or makes unusual noises, it might be time to check the motor brushes or belt tensions—refer to your model’s manual or expert resources such as [this guide](https://mixers.kitchentechhq.com/ultimate-guide-choosing-the-right-mixer-for-baking-dough-in-2024) for detailed instructions.
In anticipation of future trends, many manufacturers are developing smart mixers equipped with self-diagnostic features that alert you to issues before they become serious. Keeping your equipment in top shape now means you’ll be ready to adopt these innovations when they arrive.
**How do I maintain my mixer over time?** The key is creating a routine that includes thorough cleaning, regular inspection, and timely lubrication. Avoid relying solely on external appearances—internal components need attention too. Additionally, troubleshooting common problems early prevents costly repairs and downtime. For example, replacing worn brushes or belts at the first signs of trouble can keep your machine operating at peak performance.
Investing in high-quality tools directly impacts your baking success. I personally recommend checking out the latest [best stand and hand mixers for dough baking in 2024](https://mixers.kitchentechhq.com/best-stand-and-hand-mixers-for-dough-baking-in-2024), which often include insights on maintenance and longevity. By staying proactive with your equipment care, you not only safeguard your investment but also ensure every batch turns out just as you envision—perfectly mixed and ready to bake.
After years of trial, error, and plenty of burned-out mixers, I discovered that the secret to perfect dough lies not just in choosing between a stand or hand mixer, but in understanding their subtle strengths and quirks. Saving you the frustration I once faced, I want to share insights that go beyond typical advice—lessons learned from my journey of baking mastery that can help elevate your own kitchen adventures.
Why I Still Trust My Old Mixer Despite Fancy Features
Despite the allure of the latest models, I’ve found that familiarity and maintenance often trump bells and whistles. Regularly cleaning and inspecting my vintage stand mixer has kept it running smoothly, proving that a well-cared-for device can outperform a brand-new, feature-rich one that’s neglected. Sometimes, embracing the equipment you already have is the smartest move for consistent results.
Preconceptions That Might Hold You Back from Better Baking
Like many home bakers, I used to believe that higher wattage or more attachments automatically meant better dough handling. However, I learned through experience—and a few failed batches—that technique and understanding your tools matter far more. For example, mastering the right speed and kneading time made a bigger difference than any feature upgrade. For a comprehensive look at what equipment suits your bread baking goals, check out the [ultimate guide](https://mixers.kitchentechhq.com/ultimate-guide-choosing-the-right-mixer-for-baking-dough-in-2024).
The Overlooked Role of Attachments and Settings in Achieving Perfect Texture
At first, I underestimated the importance of using the appropriate attachments—like the dough hook or the whisk—for specific tasks. Switching to the correct tool, and adjusting the speed gradually, transformed my dough from dense and uneven to light and elastic. It’s remarkable how small adjustments can lead to big improvements, and tips from seasoned bakers can help you fine-tune your process. For detailed insights, visit [this resource](https://mixers.kitchentechhq.com/stand-mixers-vs-hand-mixers-which-is-better-for-baking-dough-in-2024-4).
When Trusting Intuition Outperforms Raw Power
There was a time I relied solely on high wattage to handle tough dough, but I often overworked it, leading to tough bread. Through experience, I learned to listen to the dough’s texture and adjust my mixing accordingly. Sometimes, slowing down and paying attention to how the dough responds provides better results than brute force. Be attentive to your dough’s signals—your baking will thank you for it.
Embracing a Mindful Approach to Equipment Care
Regular maintenance transforms your baking experience. I adopted simple routines—wiping down parts, inspecting for wear, and lubricating moving components—that keep my equipment performing at its best. These small habits extend your mixer’s lifespan and ensure consistent dough quality. Check out [this guide](https://mixers.kitchentechhq.com/ultimate-guide-choosing-the-right-mixer-for-baking-dough-in-2024) for more tips on keeping your tools in top shape.
Where Next for Your Baking Journey
Armed with these personal insights and a better understanding of your equipment, you’re ready to achieve professional-level dough at home. Trust in your techniques, maintain your tools diligently, and stay curious about new methods. The road to perfect bread is paved with patience and practice—so get mixing, and enjoy the journey.
My Essential Tools for Baking Success
Over the years, a few trusted resources have become my go-to. The [best stand and hand mixers for dough baking in 2024](https://mixers.kitchentechhq.com/best-stand-and-hand-mixers-for-dough-baking-in-2024) offers comprehensive reviews tailored for different needs. For technical guidance, I rely on detailed articles like [this ultimate guide](https://mixers.kitchentechhq.com/ultimate-guide-choosing-the-right-mixer-for-baking-dough-in-2024), which have saved me from costly mistakes. Additionally, hand tools like quality dough scrapers and proofing baskets enhance my baking results and can be game-changers in small kitchens.
Your Turn to Craftperfection
Now that you’ve gained a deeper insight into the art of dough mixing with the right mixer, I encourage you to experiment, observe, and adapt your techniques. Remember, even the best equipment requires skilled handling to unlock its full potential. So, what has been your most surprising lesson in mastering dough? Share your stories below—I’m eager to hear your baking triumphs and challenges!
**Happy baking, and here’s to many perfect loaves ahead!**
}“`# Short AnswerContext I want to close my article on choosing the right baking mixer with engaging, insightful content that offers unique value, personal reflections, recommended resources, and a motivational call to action. The response should include a compelling headline, deep personal insights or lessons learned, trusted resources, an encouraging closing statement, and an engaging question to prompt comments. The tone should be warm, mentor-like, and optimistic, emphasizing the importance of technique, maintenance, and mindful practice in baking success. The content should be well-structured, with creative subheadings that avoid robotic patterns, and naturally incorporated internal links to relevant resources. The final piece should be valid HTML, formatted appropriately. `}*ptítulos en español*}]}#END UserIntent I have provided content that wraps up an article about choosing baking mixers. The task is to generate a conclusion with added value, personal insights, recommended resources, an inspiring closing, and a question to engage readers, all in a warm, mentor-like tone, with well-crafted subheadings avoiding robotic patterns. The output should be structured in HTML with proper tags. The tone should be encouraging and authoritative, emphasizing technique and maintenance for baking success. A focus is on providing unique, deep insights that the reader can’t find in generic summaries is required. Also, the subheadings should be creative and specific to the topic, avoiding robotic formulas or generic headers. The final output should include internal links seamlessly incorporated, as specified.}*}}#Assistant enerate{
Leave a Reply