It was a kitchen disaster waiting to happen. I remember the moment clearly—my dough was sticking to every surface, the mixer was sputtering, and frustration was mounting. That experience was a wake-up call that made me realize how crucial choosing the right mixer really is. Why settle for unevenly mixed batter or burnt-out motors when the right equipment could make all the difference? Today, I want to share my journey and help you avoid the pitfalls I faced.
Why Your Mixer Choice Could Make or Break Your Baking Game
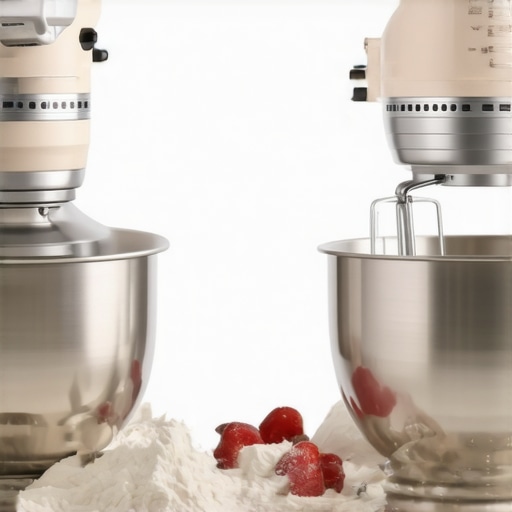
Choosing between a stand mixer and a hand mixer isn’t just about brand names or affordability; it impacts your baking success in ways you might not imagine. The right mixer can save you time, ensure better dough consistency, and even elevate your baking skills. But figuring out which one suits your needs can be overwhelming, especially with so many options out there.
If you’ve ever stared at a lump of dough turning into a sticky mess or wondered why your baked goods don’t come out as fluffy as your favorite bakery’s, it might be time to reconsider your equipment. Early on, I made the mistake of believing that a less expensive hand mixer was enough for everything, only to realize it lacked the power for heavy doughs. Trust me—I learned the hard way. To avoid my mistakes and get the most out of your baking adventures, it’s essential to understand what each type of mixer offers.
Accurate mixer selection is backed by research, too. According to a study published by the Journal of Food Engineering, proper equipment can significantly improve the textural qualities of baked goods by ensuring even mixing and aeration.
But how do you decide which mixer is truly the right fit for your baking style? That’s what we’re exploring next. If you’ve faced the dilemma of which appliance to invest in or whether to stick with manual whisking, stay tuned. I’ll guide you through the key differences and help you make an informed choice.
For a deep dive into the technical aspects and specifics of each type, check out my detailed comparison on [which is best for baking dough in 2024](https://mixers.kitchentechhq.com/stand-mixers-vs-hand-mixers-which-is-best-for-baking-dough-2024-2). Now, let’s look at some of the common concerns and questions about these essential kitchen tools.
Prepare Your Workspace and Ingredients
Before diving into mixing, clear your workspace and gather all ingredients. Use a clean, flat surface and ensure your tools are sanitized. Setting up your ingredients—flour, water, yeast, and other components—in advance streamlines the process. A well-organized setup minimizes mistakes and saves time during the critical mixing phase.
Choose the Right Mixer for Your Task
If you’re working with heavy doughs, a stand mixer with a dough hook provides the power needed, much like a robust engine handling tough terrain. For lighter tasks like whipping batter, a hand mixer may suffice. Learn more about selecting the ideal mixer here. The right choice ensures efficiency and prevents overworking or under-mixing your ingredients.
Start on Low Speed to Combine Ingredients
Begin mixing at a low speed to gently combine ingredients without splattering. Think of it as gently folding layers together—this minimizes airborne flour dust and ensures even distribution. For a stand mixer, set to speed 2 or 3; for a hand mixer, start at a low setting to control the mixing process. This initial step establishes a uniform base for effective kneading or whipping later on.
Increase Speed Gradually for Better Gluten Development
Once ingredients are incorporated, gradually increase the mixer’s speed. For kneading dough, medium speed (4-6) activates gluten strands, resulting in the elasticity needed for airy bread. For whisking eggs or batter, higher speeds incorporate air, making your baked goods fluffy. Think of this as telling the mixer to work smarter, not harder—rushing can cause uneven results and mess. Monitor the texture closely to avoid overmixing, which can toughen dough or deflate batter.
Use Proper Attachments for Specific Tasks
Attachments significantly influence your mix quality. A dough hook handles heavy, kneading tasks, mimicking manual kneading but much faster. Whisk attachments introduce air—perfect for meringues or sponge cakes. Flat beaters are versatile for cake batters and cookie doughs. Discover which attachments work best for your recipes. Switching attachments during the process can optimize results, especially when switching from mixing to kneading.
Finish with Testing the Dough’s Texture
To gauge readiness, perform the windowpane test for bread dough: stretch a small piece until thin and translucent without tearing. Similar tests apply to other baked goods, ensuring the gluten has developed properly. Under-mixed yields dense, sticky dough; over-mixed makes it tough. I once over-mixed a batch of bread, resulting in a dense loaf—learning to stop at the right moment is key. Developing a feel for the dough’s consistency prevents this common mistake.
Clean and Maintain Your Equipment
After mixing, clean attachments immediately to prevent residue buildup. Proper maintenance extends your mixers’ lifespan and keeps them performing at their best. Regularly check for wear and tear, especially on beaters and hooks, and replace as needed. Well-maintained equipment means fewer surprises during critical baking moments.
Applying these concrete steps turns the abstract art of dough mixing into a precise science. Each action—whether choosing the right tools or monitoring the dough—contributes to a perfect bake. Remember, practice refines your intuition, and understanding these core techniques makes every bake a success.
 Many home bakers believe that selecting a mixer is simply a matter of power and brand, but the real nuances lie beneath the surface. A common myth is that all whisk attachments are created equal, leading to overestimating their effectiveness across different recipes. In truth, the design and material of whisk attachments greatly influence aeration and incorporate air into batters—think of the difference between stainless steel and balloon whisks—impacting fluffiness and structure. Overlooking these subtle distinctions often results in flat cakes and dense bread, even when using high-end equipment.
What do most people miss about dough development in mixers?
Many think that the higher the speed, the better the gluten development, but aggressive mixing at high speeds can actually weaken gluten strands, leading to a crumbly texture. Instead, gradual speed increases combined with an understanding of dough behavior optimize elasticity—an advanced technique supported by research from the Journal of Food Engineering, confirming that controlled mixing enhances dough strength without overmixing. Warning! Avoid the trap of overmixing your dough just because your mixer has multiple speed options. Overmixing can cause the dough’s gluten network to become too tight, resulting in tough baked goods. Recognizing the right timing and texture is key to baking perfection, not just the mixer’s power. Also, many underestimate the importance of the mixing bowl’s material. For example, a non-stick or stainless steel bowl often facilitates more consistent kneading and mixing, especially for sticky doughs, than plastic options. This nuance impacts not only uniformity but also the longevity of your machine. When choosing between a stand mixer and a hand mixer, consider your typical dough volume and complexity. A stand mixer often provides more stability and power for hefty bread doughs, while a hand mixer offers versatility for lighter, quick tasks. Knowing these subtleties can elevate your baking game from adequate to expert. In refining your technique, pay attention to mastering even the most advanced tools, which often involves understanding their limitations and optimal use cases. Have you ever fallen into this trap? Let me know in the comments.
Investing in quality baking equipment is just the beginning; maintaining it diligently ensures consistent performance and extends its lifespan. Regularly inspecting your stand or hand mixer, especially the attachments like whisks and dough hooks, is essential. Clean them thoroughly after each use to prevent residue buildup that can impair functionality. For stubborn flour or dough remnants, soak attachments in warm, soapy water and scrub gently with a brush. Additionally, lubricate moving parts, such as the gear mechanisms, with manufacturer-approved lubricants to prevent rust and ensure smooth operation. Refer to your mixer’s user manual for specific maintenance instructions tailored to your model.
Tools like silicone spatulas can help remove residual batter from attachments, reducing unnecessary wear. For a deeper clean, some mixers offer removable motor housings that can be wiped with a damp cloth—avoid submerging electrical components in water, which can cause damage. When it comes to long-term results, consistent maintenance minimizes issues like overheating or motor strain, especially during heavy kneading or extended whipping sessions.
Stay proactive by periodically checking power cords for signs of wear or damage and replacing them if necessary. Proper storage also plays a role: keep your mixer in a dry place, away from humidity and dust, which can degrade electrical parts over time. In the future, emerging smart diagnostics integrated into premium mixers could alert you to potential problems before they become serious, a trend already seen in high-end kitchen appliances.
How do I keep my mixer functioning optimally over time?
Implementing a routine maintenance schedule that includes cleaning, inspection, lubrication, and correct storage is key. Using the right tools, such as soft brushes and silicone spatulas, helps prevent damage while keeping your equipment in top shape. Remember, dedicated care not only preserves your investment but also ensures your baking results remain consistent and professional. For advanced techniques, I recommend regularly applying silicone-based lubricants to gear mechanisms—this simple step can significantly reduce wear and extend your machine’s lifespan. Try integrating this tip into your routine and enjoy hassle-free baking for years to come.

Once your equipment is well-maintained, you’ll notice fewer breakdowns and more reliable results, enabling you to focus on perfecting your recipes. Staying ahead with proper upkeep transforms your mixer from a simple tool into a long-term baking partner, fostering creativity and confidence in the kitchen.
What I Wish I Didn’t Overlook About Mixer Power and Craftsmanship
I once believed that more wattage meant better dough, but experience taught me that build quality and attachment compatibility matter far more for consistent results. Upgrading to a premium stand mixer with sturdy attachments transformed my bread baking, proving that investing in durable, well-designed equipment is a game-changer. Learn more about choosing the right equipment here.
Why the Myth of Overmixing Could Sabotage Your Bread
Rushing to develop gluten at high speeds often leads to a tough, dense loaf. It took me repeated failures to realize that gradual speed increases and listening to the dough’s texture produce the best elasticity. Controlled mixing prevents overworking gluten, resulting in fluffy, airy bread—a lesson illuminated by research in food engineering.
My Secret Weapon for Perfect Dough—Attachments Matter
I used to think all beaters were equal—then I discovered that using the right whisk or dough hook can make or break your baking success. Knowing when to switch attachments, especially for heavy doughs versus airy mixes, is vital. Discover the nuanced differences at here.
Embracing Small Details to Elevate Your Baking Confidence
From bowl material to attachment cleanliness, the little choices stack up to big results. Regular maintenance and thoughtful selection of bowls and tools help avoid unexpected mishaps. Remember, a well-maintained mixer is your silent partner in creating perfect, bakery-quality bread every time.
Why Knowing When to Stop Is Your Hidden Skill
Overmixing can be subtle—sometimes the dough changes from elastic to tough without obvious signs. Learning to recognize the ideal texture through feel and tests like the windowpane helped me avoid tough loaves. This sensory skill is what separates seasoned bakers from beginners.
Curated Kitchen Wisdom for Dough Success
Those looking to deepen their understanding should explore comprehensive guides on mixer selection and tips for mastering dough tasks. Books like “The Bread Baker’s Apprentice” have expanded my perspective on technique and equipment, emphasizing that mastery lies in continuous learning.
Don’t Wait to Elevate Your Baking Game
Every loaf I’ve baked with the right mixer, pressing just the right buttons, has been a reminder that investing in quality tools and knowledge pays off. Your journey towards perfect dough isn’t just about the equipment—it’s about the care and precision you bring to each step. Start experimenting today, and turn baking into a joyful art, not just a task.
What’s your biggest challenge when working with dough? Let me know below and share your story!
**
Reading through the post really resonated with me, especially that moment of kitchen chaos when my dough was sticking everywhere and my mixer was struggling. It’s such a common challenge, and it made me realize how important the right equipment is—especially for serious bakers or those just starting out. I’ve found that investing in a good stand mixer with different attachments has truly elevated my baking results, giving me more control over the dough and batters. One thing I always keep in mind is the importance of the correct attachment for each task; using a dough hook for bread and a whisk for airy cakes makes a noticeable difference in quality.
Has anyone experimented with different bowl materials? I’ve noticed that stainless steel bowls tend to facilitate better kneading, especially for sticky doughs, compared to plastic. What’s your experience? I’d love to hear how others optimize their setup for baking success.
I completely relate to that feeling of kitchen chaos, especially when my dough starts sticking to everything and my mixer just can’t keep up. It’s a clear sign I need to evaluate my equipment. Over the years, I’ve realized that having a sturdy stand mixer with the right attachments, like a good dough hook and flat beater, really makes a difference, particularly when kneading dense bread doughs. I’ve also found that the material of the mixing bowl can influence the process—stainless steel bowls seem to handle sticky doughs better and are more durable, but quality plastic bowls can work if they’re non-stick.
I wonder, for those who prefer hand mixers, how do you manage to achieve the same consistency, especially with heavier doughs? Are there particular brands or attachments that have helped you? It’s interesting how the right tools and some small adjustments can take our baking from good to exceptional. Would love to hear others’ tips on optimizing equipment for different baking tasks!