Ever had that moment in your kitchen when your hand gets tired, your arm aches, and your batter still isn’t smooth enough? I remember the first time I tried to knead dough by hand after a long day—my arms felt like they’d been through a workout, and the dough was just not cooperating. That lightbulb moment made me realize: choosing the right mixer isn’t just about convenience; it’s about achieving the perfect bake without the frustration. If you’ve faced similar struggles, you’re not alone. Today, we’re diving into the age-old debate: stand mixers versus hand mixers and which one truly makes a difference in your baking game in 2024. We’ll explore the strengths and weaknesses of each, clear up common misconceptions, and help you decide which tool deserves a spot on your countertop.
Why the right mixer choice matters more than ever
With baking becoming more popular than ever, especially home baking, the right equipment can change everything. A good mixer can save you time, effort, and even improve your results. But with so many options, how do you pick the one that fits your needs? Are you a casual baker who just wants to whip up some cookies, or are you a serious bread-maker craving that perfect gluten structure? This is where the decision between a stand mixer and a hand mixer can feel overwhelming. I’ve been there—buying a mixer that didn’t quite match my baking style, leading to frustration and wasted money. Early on, I made the mistake of assuming all mixers are created equal. Now I know better. For instance, I wish I had known that a stand mixer with whisk attachments can handle everything from delicate meringues to heavy dough, making it a versatile investment. If you’re curious, check out the comprehensive guide on [choosing the right baking mixer](https://mixers.kitchentechhq.com/choose-the-right-baking-mixer-stand-or-hand-mixer-with-whisk-attachments).
Is hype around mixers justified or just marketing noise?
Honestly, when I first heard about stand mixers, I thought they were just fancy gadgets for serious bakers. But after struggling with my hand mixer for years, I finally invested in one, and it changed my baking life. The truth is, a stand mixer can do so much more than just mix—it’s about durability, power, and consistency. Yet, many beginners worry about whether it’s worth the investment, especially since some models are pretty pricey. I get it. I used to think my hand mixer was enough until I realized I was compromising on quality and efficiency. A common mistake I made early on was underestimating the importance of a good whisk attachment, which makes all the difference for whipping cream or beating egg whites. To avoid that mistake, I recommend reading up on [the ultimate guide to choosing the best baking mixer](https://mixers.kitchentechhq.com/ultimate-guide-to-choosing-the-best-baking-mixer-stand-or-hand-with-whisk-attachments).
So, what’s the takeaway? Your choice of mixer impacts your baking success more than you might think. Whether you’re aiming for perfectly smooth batter or fluffy whipped toppings, the right tool can elevate your results. Ready to find out which one suits your baking style best? Let’s explore the practical pros and cons of each, so you can make an informed decision and start baking with confidence.
,
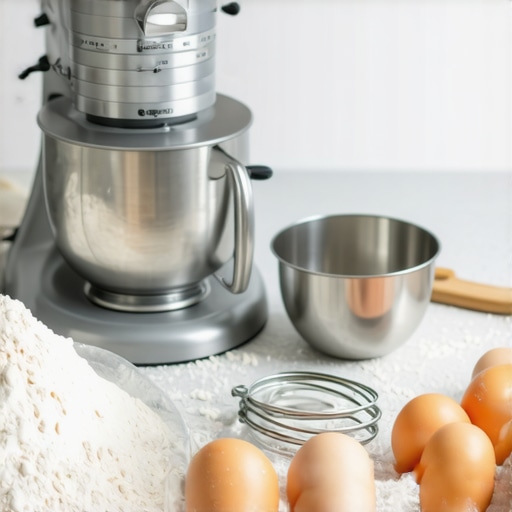
Set Up Your Equipment Properly
Before starting, ensure your mixer is clean and assembled correctly. For a stand mixer, attach the whisk, dough hook, or beaters securely. For a hand mixer, insert the appropriate attachments and check the power cord. This initial step prevents malfunction during mixing and guarantees safety. I once started mixing without properly attaching the beaters, causing a loud bang and a mess of flour on my counter. Once I fixed it, everything went smoothly.
Choose the Right Attachments for Your Task
Different recipes demand different attachments. Use the whisk for airy meringues or whipped cream, the dough hook for bread or heavy doughs, and the beater for cake batter or cookie dough. For example, I struggled with stiff bread dough using only the beater, which was inefficient. Switching to the dough hook made the process much easier and faster. If you’re uncertain about which attachments work best, check out this guide.
Mix in Stages for Best Results
Start slow to combine ingredients gently, then increase speed gradually. For instance, when making whipped cream, I began on low to prevent splattering, then increased to high once the cream thickened. This technique avoids over-mixing and mess. When kneading dough, begin at low speed to prevent flour from flying everywhere, then switch to medium or high for development. Remember, overmixing can ruin your batter or dough, so watch your mixture closely.
Monitor Consistency and Adjust Speed
Every recipe has a target texture. Use medium speed for most tasks, but don’t hesitate to switch to high for fluffiness or low for gentle mixing. I once used high speed for folding in delicate ingredients, which deflated my batter. Slow down and use a spatula for folding to maintain airiness. Keep an eye on the texture—your goal is smooth, uniform, and appropriately aerated batter or dough.
Clean and Maintain Your Mixer Post-Use
After finishing, disconnect the mixer, detach the attachments, and clean them thoroughly. Wipe down the mixer body with a damp cloth. Regular maintenance prevents buildup and prolongs your equipment’s life. I learned this the hard way when neglecting to clean my beaters, which caused rust and poor performance over time. Proper cleaning is essential, especially when switching between dough and whipped toppings to avoid cross-contamination.
Practice and Experiment
Try different speeds, attachments, and techniques to discover what works best for your recipes. For example, I experimented with various mixing speeds for my chocolate chip cookie dough, finding that a medium-high speed gave the perfect mix of creaminess and chunk distribution. Keep notes on your adjustments to refine your process. Mastery comes with practice, so don’t be afraid to get messy and learn from trial and error.

Many home bakers operate under misconceptions that can hinder their results. One prevalent myth is that more powerful always means better. While a high wattage stand mixer can handle heavy doughs with ease, it isn’t necessary for every task. For simple cookie batters or whipped cream, a less powerful model often suffices, and sometimes, a too-strong motor can lead to overmixing or damage if used improperly. Choosing the right power level requires understanding your typical recipes and frequency of use. For instance, if you bake bread regularly, investing in a high-torque stand mixer pays off. Otherwise, a mid-range model might be more economical and just as effective. You can learn more about matching your needs in this detailed comparison.
Another misconception is that hand mixers are only for light tasks. In reality, with the right attachments and technique, a good quality hand mixer can handle quite a bit—think dense cookie doughs or even small batches of bread dough. The key is to use proper techniques, like mixing in stages, and avoid overworking the motor. Many people underestimate the versatility of whisk attachments, which can whip meringues or emulsify dressings effectively. For advanced bakers, understanding how to leverage these attachments unlocks new baking possibilities.
Is a stand mixer really better for kneading dough?
This is a nuanced question. While stand mixers with dough hooks are designed for heavy-duty kneading, they are not always the best choice for every baker. For instance, over-kneading with a stand mixer can sometimes develop gluten too much, leading to tough bread. Conversely, manual kneading allows for tactile feedback, which some bakers prefer. Recent studies suggest that both methods can produce excellent results, provided you understand the dough’s characteristics and the limitations of your equipment. The choice boils down to your baking style, frequency, and whether you value control or convenience. Remember, even the most powerful stand mixer can’t replace proper technique and ingredient quality. Have you ever fallen into this trap? Let me know in the comments.
Maintaining your stand mixer, hand mixer, or baking mixer is essential to ensure they perform optimally for years to come. Over time, even the most robust appliances can face wear and tear, but with a few strategic practices, you can extend their lifespan considerably. I personally have found that regular cleaning, proper storage, and using the right attachments are game-changers in maintaining my equipment’s efficiency and safety.
How do I maintain my mixer over time?
First, always detach and clean your attachments immediately after use. For example, I rinse my whisk, beater, or dough hook in warm soapy water and dry thoroughly to prevent rust, especially on metal parts. For stand mixers, wipe down the body with a damp cloth—avoiding abrasive cleaners that could damage the finish. Regularly inspect the cord for signs of wear and replace it if necessary; a frayed cord can be a fire hazard. Additionally, lubricate the moving parts if your model requires it—consult your user manual for specific instructions. For whisk attachments, make sure they are free of flour or batter residue, which can cause corrosion over time. Learning to maintain your equipment not only prolongs its life but also ensures your baking remains consistent and safe.
Investing in high-quality tools like the best whisk attachments can make maintenance easier, as they are often designed with durability in mind. For instance, some modern whisk attachments feature corrosion-resistant coatings that simplify cleaning and reduce wear. When cleaning, avoid using harsh scrubbers on these parts to preserve their coating.
Tools I recommend for long-term results
One tool I swear by is a silicone scraper for mixing bowls. It helps incorporate ingredients thoroughly without scratching your bowls or damaging your attachments. Also, a small, soft-bristled brush is perfect for cleaning crevices in your mixer where flour or dough might accumulate. For storage, I recommend keeping your attachments in a dedicated drawer or container, labeled for easy access, which minimizes damage and keeps everything organized.
In the future, I foresee a trend toward smart maintenance features integrated directly into appliances—like self-cleaning modes or sensors that alert you when parts need replacing. While these innovations are still emerging, staying proactive with manual maintenance remains the best way to keep your mixers operating smoothly.
Try incorporating a regular cleaning schedule with quality tools, and you’ll notice the difference in your baking results and equipment durability. Remember, a well-maintained mixer isn’t just about longevity; it’s about ensuring every batch turns out perfect every time.
< >
>
Secrets I Learned from Baking Experts
One of the biggest lightbulb moments for me was realizing that my hand mixer couldn’t handle certain doughs without straining. Switching to a stand mixer with a dough hook transformed my bread baking, making it consistent and effortless. I also discovered that overmixing with a powerful stand mixer can toughen baked goods, so controlling speed and timing is crucial. Lastly, I learned that even high-end mixers need regular maintenance—cleaning attachments and checking the motor—because a well-cared-for tool performs better and lasts longer.
Tools That Elevated My Baking Game
My top recommendation is the best whisk attachments because they maximize versatility, whether whipping meringues or folding ingredients. A sturdy silicone spatula helps incorporate ingredients smoothly, especially when scraping bowls. For storage, I rely on dedicated containers for attachments, which keeps everything organized and ready for the next baking session. Lastly, investing in a quality brush for cleaning helps maintain my mixer’s performance over time.
Push Yourself to Experiment and Improve
Don’t be afraid to test different speeds and techniques—sometimes a slight change makes all the difference. I once overmixed a cake batter at high speed, resulting in a dense texture; slowing down and folding gently with a spatula fixed it. Keep notes of what works best for each recipe. Remember, mastering your mixer is about understanding its strengths and limitations, so keep practicing and refining your skills. The more you experiment, the more confident you’ll become in achieving perfect doughs and batters every time.
What Surprised Me About Mixing Equipment
- That a mid-range stand mixer often offers the best balance of power and control without breaking the bank—much better than the ultra-expensive models for most home bakers.
- That high wattage doesn’t always mean better results; it’s about torque and how the motor handles heavy doughs.
- That a good hand mixer with the right attachments can be surprisingly versatile, especially for small batches or quick jobs, if you learn how to use it properly.
Understanding these lessons has helped me avoid common pitfalls and make smarter choices about my baking tools. For comprehensive guidance, I recommend checking out this detailed guide to choosing the right mixer for your needs.
Ready to Elevate Your Baking Skills
Choosing the right mixer—whether a stand mixer or hand mixer—can truly transform your baking experience in 2024. With the right tools and techniques, you’ll be surprised at what you can create. Keep experimenting, stay curious, and enjoy every step of your baking journey. Remember, the best mixer is the one that inspires you to bake more often and with confidence.
Have you ever struggled with a specific dough or batter? Let me know below, and share your tips or questions!
Leave a Reply