Ever had that frustrating moment in your kitchen where your hand cramps up just trying to beat the dough, and you wonder if a stand mixer might have saved you from the struggle? I remember countless times battling with a tiny handheld mixer, only to realize halfway through that I’d underestimated how much effort baking truly requires. That lightbulb moment hit me hard—sometimes, the right tool makes all the difference, and other times, I’ve wasted money on gadgets I barely used. Today, I want to share my personal journey in figuring out whether a stand mixer or a hand mixer is the best choice for your baking adventures, especially when it comes to kneading dough and whipping up batter.
Why Your Kitchen Deserves the Right Mixer
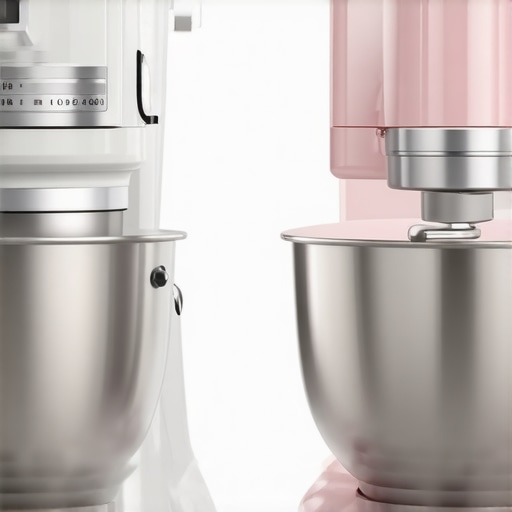
Choosing between a stand mixer and a hand mixer isn’t just about saving space or budget; it’s about how efficiently you can get your baking done without feeling exhausted or frustrated. I’ve learned that the right mixer can turn a tedious task into a breeze, encouraging me to bake more often and try new recipes. But the decision isn’t always obvious, especially when you see so many options claiming to be the best. If you’ve ever wondered whether investing in a stand mixer is worth it, or if a hand mixer can handle your dough needs, you’re not alone. This decision can significantly influence your baking results, from fluffy cakes to perfectly kneaded bread.
Interestingly, a study published in the Journal of Food Science highlights how using the correct mixer can improve dough consistency and reduce preparation time by up to 30%. That’s a game-changer for home bakers juggling busy schedules. But I admit, early on, I made the mistake of thinking a high-powered hand mixer could do everything a stand mixer does. Spoiler alert: it can’t. That’s why I want to help you avoid my rookie errors and make an informed choice.
Still Skeptical About the Hype?
When I first looked at stand mixers, I thought they were just fancy gadgets for serious bakers. My initial mistake was assuming they were only for professional kitchens and that a good hand mixer could handle all my baking needs. Turns out, that’s not the case. I’ve since learned that while a hand mixer is compact and versatile, it struggles with heavy doughs and longer mixing tasks. If you’re curious whether a stand mixer is really worth the investment, I’ll walk you through what I’ve discovered, including the key differences and which type suits specific baking tasks best. Want to know how I finally settled on the right tool for my kitchen? Keep reading, because I’ll share the practical steps I took to make the perfect choice, and how you can do the same.
If you’ve faced similar struggles in your baking routine—feeling overwhelmed by options or unsure about which mixer can handle your dough—this guide is here to help. Let’s explore the facts, the myths, and the real benefits of each type, so you can bake with confidence and ease. Ready to find out which mixer will become your new best friend in the kitchen? Let’s dive in.
Start with the Right Tool for the Job
When tackling dough, it’s crucial to choose the right mixer. I remember the first time I attempted to knead bread dough with my handheld mixer. It struggled, and I ended up with sore wrists and uneven kneading. That’s when I realized that a stand mixer’s powerful motor and sturdy paddle could handle heavy doughs effortlessly. To determine which mixer suits your needs, consider the types of recipes you bake most often. Heavy bread doughs demand a sturdy stand mixer, while light batters can be managed with a hand mixer. For more detailed comparisons, check out this guide on stand vs. hand mixers.
Prepare Your Ingredients and Equipment
Before mixing, gather all ingredients and your chosen mixer. For kneading dough, ensure your flour, water, yeast, and salt are ready. Attach the dough hook to your stand mixer or, if using a hand mixer, prepare beaters designed for dough. I once tried mixing bread dough with the beaters, which was a disaster—the dough was too heavy, and the beaters kept slipping. This experience taught me to use the appropriate attachments. Tip: Use the dough hook for stand mixers to simulate traditional kneading, which ensures gluten development and a better rise. For whisking batters, the wire whisk attachment is your best friend. Find the right attachment by visiting this resource on whisk attachments.
Execute Your Mixing with Precision
Start slow to prevent ingredients from splattering. For example, when making cake batter, begin at low speed and gradually increase. For kneading dough, set your stand mixer to a medium-low speed—around 2 or 3—so the dough doesn’t spin out of control. Remember, overmixing can damage gluten structure, leading to dense bread or tough baked goods. I once overmixed pizza dough, resulting in a tough crust. To avoid this, watch the texture closely and stop when the dough is smooth and elastic. If using a hand mixer, work in short bursts, and don’t force the motor—heavy doughs can burn out the motor if pushed too hard. This article offers more tips on optimal mixing speeds for various tasks.
Monitor and Adjust as Needed
Keep an eye on the consistency of your mixture. If the dough is sticking to the sides of the bowl, use a spatula to scrape it down periodically. For whipped cream or meringues, watch for stiff peaks—this is when the mixture holds its shape firmly. I remember whipping cream with my hand mixer, only to realize I needed to increase the speed after a few minutes. Patience and observation are key. Also, don’t hesitate to pause and check your progress; overmixing is a common mistake that can ruin your final product. For specific tips on dough handling, see this guide on dough mixing techniques.
Clean and Maintain Your Mixer
Once finished, detach the attachments and clean them thoroughly. A quick wipe of the stand mixer’s body keeps it in top shape. For dough hooks and beaters, soak in warm soapy water and scrub gently. Regular maintenance ensures your mixer lasts for years. I once neglected to clean my dough hook after baking bread, which led to crusty residue that was hard to remove later. So, I now make it a habit to clean immediately after use. Proper care not only prolongs your equipment’s life but also guarantees consistent results every time you bake. For more maintenance tips, explore this comprehensive review.
Many home bakers fall into misconceptions about what makes a stand mixer or hand mixer truly effective, often believing that power alone is the key to perfect dough and batter. However, the real nuances lie in understanding how to match the mixer with your specific baking needs and avoiding common pitfalls that can hinder your results. One widespread myth is that a powerful motor can compensate for poor technique or improper attachments, which is simply not true. A high wattage does not guarantee better kneading or whipping—it’s about how well the mixer integrates with your ingredients and the task at hand.
Another mistake I see often is misusing attachments. For instance, using the dough hook for light batters or the whisk for dense doughs can lead to inefficient mixing and even damage your equipment. It’s essential to understand which attachment is best suited for each task and to use the correct speed settings. For example, overmixing bread dough with a hand mixer or at high speeds can develop too much gluten too quickly, resulting in a tough texture. Conversely, under-mixing can leave your dough or batter uneven, affecting the final rise and texture. To get this right, I recommend following expert guidelines, such as those found in this resource.
One overlooked aspect is the importance of consistency in mixing technique. Many assume that the speed setting alone dictates success, but the critical factor is how you monitor and adjust during the process. For instance, stopping periodically to scrape down the sides ensures even mixing and prevents ingredients from sticking or clumping. This is especially crucial with heavier doughs, where uneven kneading can lead to inconsistent gluten development and poor oven spring. Remember, patience and observation are your best tools—don’t push your mixer beyond its capabilities; instead, learn to work within its strengths.
From an advanced perspective, understanding the physics of mixing can significantly improve your results. The study in the Journal of Food Science emphasizes how proper mixing techniques influence dough microstructure, affecting final texture and volume. For example, using the right speed and duration not only saves time but also optimizes gluten network formation, which is vital for bread and pastry quality. This nuance often escapes amateur bakers who focus solely on ingredients without considering how to effectively incorporate them with the right equipment.
What Are the Risks of Over- or Under-Mixing?
Over-mixing can lead to a dense, tough crumb in bread or a rubbery texture in cakes, because it overdevelops gluten or incorporates too much air prematurely. Under-mixing, on the other hand, results in uneven distribution of ingredients, leading to inconsistent texture and poor rise. The key is to recognize the visual and tactile cues—such as the dough becoming smooth and elastic or batter reaching stiff peaks—and to stop accordingly. For advanced bakers, mastering this balance is crucial for consistent results and is often overlooked by beginners who rely solely on timing.
Have you ever fallen into this trap? Let me know in the comments. Remember, choosing the right mixer and mastering its use is a blend of understanding technical nuances and applying mindful techniques. Don’t just follow recipes blindly—pay attention to how your equipment interacts with your ingredients, and you’ll elevate your baking to professional levels.
Investing in quality baking equipment is just the first step; maintaining your stand mixer, hand mixer, and their attachments ensures they perform optimally for years to come. Regular maintenance not only prolongs the lifespan of your tools but also guarantees consistent, professional-quality results every time you bake. I’ve learned that a little effort in upkeep makes a significant difference, especially when dealing with dough mixing and whisk attachments that endure heavy use.
Why Consistent Maintenance Matters
Just like any precision instrument, your mixer benefits from routine care. Over time, flour dust, dough residue, and grease can accumulate, impacting motor performance and attachment efficiency. Regularly cleaning and inspecting your equipment prevents buildup that could cause overheating or mechanical issues. For example, I make it a point to clean my dough hooks and beaters immediately after each use, soaking them in warm soapy water to remove stubborn residues. This simple habit keeps everything functioning smoothly and maintains the integrity of the attachments.
Tools I Trust for Long-Term Care
To keep my mixer in prime condition, I rely on a few specific tools. A soft-bristled brush helps me clean hard-to-reach areas around the motor housing and attachments without causing damage. For thorough cleaning, I prefer a microfiber cloth for wiping down the body of the stand mixer, avoiding abrasive materials that might scratch the surface. A small, silicone spatula is invaluable for scraping dough residue from the bowl, ensuring no bits are left behind that could affect future batches.
Additionally, I recommend investing in a silicone attachment brush designed for mixers. It’s perfect for deep cleaning dough hooks and beaters, especially after kneading dense bread dough, where residues can be stubborn. Regularly checking the power cord and switch for wear and tear is also essential; a loose connection can cause inconsistent mixing or electrical hazards. For detailed maintenance routines, I often consult expert guides like this comprehensive review.
Future Trends in Tool Durability and Maintenance
Looking ahead, I believe the trend will shift towards smarter, self-cleaning appliances with built-in diagnostic systems that alert you to potential issues before they escalate. Manufacturers are increasingly integrating materials that resist residue buildup and corrosion, reducing the frequency of manual cleaning. As technology advances, I predict more mixers will include removable, dishwasher-safe attachments and components designed for easy disassembly, making maintenance more straightforward than ever.
How do I maintain my baking tools over time?
My key strategy is consistency. After each baking session, I immediately wash and dry attachments, inspect the power cord, and store everything in a clean, dry place. Periodic deep cleaning with specialized brushes and gentle abrasives keeps the motor and attachments performing at their best. I also keep a maintenance checklist, so I never forget essential steps like checking for loose parts or signs of wear. This routine ensures my tools stay reliable, and I can focus on baking delicious bread and pastries without worrying about equipment failures.
Remember, taking care of your equipment isn’t just about longevity; it’s about ensuring every batch turns out perfect. Try implementing one advanced cleaning tip today—like using a silicone attachment brush—and experience the difference it makes in your baking process!
Lessons I Learned the Hard Way About Mixers and Dough
- One of my biggest lightbulb moments was realizing that a powerful stand mixer isn’t just a luxury but a necessity for heavy doughs like bread, whereas a hand mixer struggles and often overheats. This taught me that matching your equipment to the task saves time and frustration.
- I used to believe that more wattage meant better performance, but I found out that proper attachments and speed control are what truly matter—don’t rely solely on motor power. Check out this guide to understand how to choose wisely.
- Overmixing is a sneaky trap; I learned to watch textures closely and stop when dough is elastic and batter peaks are firm. Visual cues trump timers every time, especially for delicate recipes.
- Using the wrong attachment can sabotage your baking—dough hooks for heavy bread dough, wire whisks for meringues. Knowing which tool to use is half the battle. For more tips, see this article.
- Regular cleaning and maintenance aren’t glamorous but essential. I now soak my dough hooks and wipe down my mixer after each use, which keeps everything running smoothly and prevents residue buildup that can cause mechanical issues.
Curated Tools That Changed My Baking Routine
- Silicone attachment brushes: They make deep cleaning dough hooks effortless and prevent residue buildup that can hinder performance.
- Microfiber cloths: Perfect for wiping down the mixer’s body without scratching, prolonging its life and keeping it looking new.
- Expert guides like the ultimate guide to choosing the best baking mixer: They help me understand the nuances of different models and attachments, saving me from costly mistakes.
- Replacement attachments designed for durability: Investing in high-quality, dishwasher-safe parts ensures my equipment stays in top shape for years.
Your Next Step in Baking Excellence
Choosing the right mixer and mastering its use can elevate your baking from good to exceptional. Whether you’re kneading dough for bread or whipping delicate meringues, the right tools coupled with proper technique make all the difference. Don’t shy away from experimenting and maintaining your equipment—your baked goods will thank you. Ready to take your baking to the next level? Dive into the detailed guides and start experimenting today!
Have you ever struggled with choosing the right attachment or overmixed your batter? Share your experience below—I’d love to hear your baking stories!
Leave a Reply