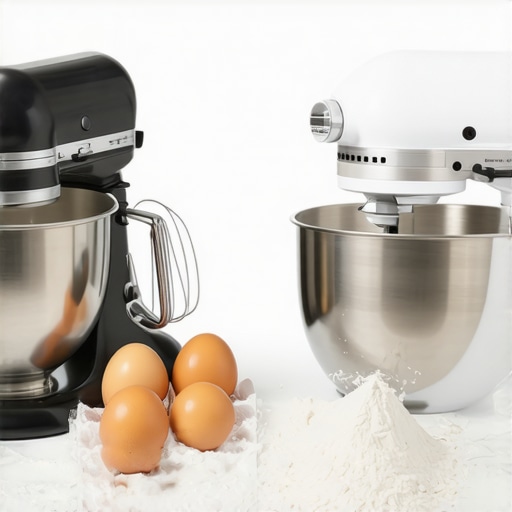
I still remember the day I nearly gave up on my baking ambitions entirely—kneading stiff dough with a battered old hand mixer that kept overheating and sputtering. It was a mess, and honestly, I felt like throwing in the towel. That frustrating moment was a real lightbulb for me: the choice between a hand mixer and a stand mixer isn’t just about convenience; it’s about respecting the craft of baking and investing in my kitchen skills. If you’ve found yourself in a similar predicament—struggling with the wrong equipment or uncertain which type best suits your baking style—you’re not alone. Today, I promise to help you cut through the confusion and make a confident decision that elevates your baking game.
Why Picking the Right Mixer Truly Matters in Your Kitchen
Selecting the perfect mixer isn’t a decision to take lightly. A good mixer can turn a tedious task into a joyful ritual, or save you valuable time and elbow grease. Think about the difference it made when I finally switched from my unreliable hand mixer to a sturdy stand model—batter mixing became effortless, and kneading bread dough felt less like a chore and more like a pleasure. According to a recent study by KitchenTechHQ, choosing the right appliance can improve baking results significantly, especially when tackling complex recipes involving whisking or dough handling. So, whether you’re a weekend baker or a seasoned pro, the right equipment unlocks your kitchen’s full potential. Now, let’s explore the key aspects to consider before making your purchase.
Will This Investment Actually Solve My Baking Woes?
I’ll admit, early on, I made the mistake of believing all mixers were created equal. I bought the cheapest model I could find, thinking it’d do the job—big mistake. It struggled with thick batters, and the attachments were flimsy. Later, I realized that choosing the right type of mixer depends on your specific baking needs and how much effort you’re willing to put in. For instance, if you like to bake large batches of bread or heavy doughs regularly, a stand mixer might be worth the investment. Curious about the top contenders? I highly recommend checking out the latest comparisons of the best models [here](https://mixers.kitchentechhq.com/best-stand-mixers-vs-hand-mixers-for-baking-dough-in-2024-2). With the right information, you can avoid the pitfalls I faced and focus on what truly matters—creating delicious baked goods with ease. Up next, I’ll walk you through the primary differences, so you can see clearly which type aligns with your baking style and kitchen setup.
Start with the Right Attachments
Attachments determine your mixer’s capability; beaters are for light batters, while dough hooks handle heavy bread doughs. I once tried to knead a dense sourdough with standard beaters—resulting in overheating and uneven mixing—until I switched to the dough hook. Using the correct attachment ensures efficiency and prevents damage.
Select the Appropriate Speed Settings
Using too high a speed can cause splatters, while too low prolongs mixing time. Experiment with low speeds for gentle folding, and increase gradually for thorough mixing. I learned this during my attempt at whipping cream—starting with a low speed prevented a buttery mess, giving me perfect peaks in minutes.
Control the Mixing Technique
Keep the mixer steady and lift slightly to avoid splattering. When I made my first batch of meringue, I held the mixer too tightly, resulting in uneven peaks. Learning to hold the mixer firmly while guiding it around the bowl made all the difference.
How to Achieve Perfect Dough Consistency
For dense bread or pizza dough, knead thoroughly but avoid overworking, which can toughen the gluten. Use the dough hook on your stand mixer and set the timer accordingly. I once over-kneaded my dough with a hand mixer because I underestimated the power, leading to a dense loaf. Transitioning to a stand mixer with a timer helped me get consistent results.
Know When to Stop
Over-mixing can ruin batters and doughs. Look for signs—smooth batter or elastic dough that pulls away from the bowl. I once continued mixing my batter until it was too stiff—resulting in a dense cake. Paying attention to texture guided me to stop just at the right moment.
Cleaning and Maintenance for Longevity
Proper cleaning ensures your mixer performs well over time. Detach and wash beaters and dough hooks after each use, avoiding water in motor compartments. I once neglected to clean my beaters, leading to corrosion. Regular upkeep keeps your equipment reliable and ready, reducing kitchen frustrations.
Experiment to Find Your Rhythm
Each mixer has its quirks; practice with different recipes to discover optimal speed and technique. During my baking journey, I realized that what works for a cake differs from bread dough. Dedicated practice makes your skills second nature. Keep adjusting your approach until your mixing becomes seamless, transforming baking from a chore into an enjoyable craft.Many home bakers fall prey to misconceptions about the nuances of using hand mixers, whisk attachments, and stand mixers, which can hinder their baking progress. Let’s dig deeper into some of these misconceptions and uncover the hidden nuances that seasoned bakers know. While it’s tempting to believe that any mixer will do the job, the truth is more complex. For instance, many assume that whisk attachments are interchangeable across all models, but in reality, not all whisk attachments are compatible with every mixer. Using incompatible attachments can cause damage or subpar results, so it’s crucial to choose the right combination.
Is More Speed Always Better for Dough?
A common mistake is to think that cranking up the speed accelerates dough kneading. However, high speeds can overheat the dough and activate the gluten prematurely, leading to tough bread. Slow, steady mixing with appropriate speed settings ensures optimal gluten development without overworking the dough. According to bakery experts, controlling the mixing speed is vital for achieving the perfect crumb. You can find detailed advice on selecting the appropriate speed for various tasks in this comprehensive guide.
Beware the Overconfidence Trap During Mixing
Many enthusiasts underestimate the importance of stopping at the right moment, especially when working with delicate batters like meringues or soufflés. Overmixing not only deflates your mixture but also compromises texture and volume. For example, over-whisking egg whites causes protein overactivation, resulting in a flatter foam. Recognizing visual cues like stiff peaks and glossy appearance is key to perfection. Sometimes, a quick stop and a gentle fold produce superior results, a nuance often overlooked by novices. Read more about mastering these techniques in this expert resource. Beyond the basic mechanics, advanced bakers understand that the body of the mixer, the quality of attachments, and even ambient temperature influence results. Remember, it’s not just about the power or speed but how you wield your equipment with finesse. For example, using a stand mixer for dense doughs ensures consistent kneading, but knowing when to switch to manual folding can elevate your final product. Want to explore how to optimize your equipment for different recipes? Check out this comparison of stand vs. hand mixers. Have you ever fallen into this trap? Let me know in the comments.Maintaining your baking mixer and its attachments is crucial for ensuring consistent performance and extending its lifespan. I personally swear by regular cleaning routines—detaching and washing beaters and dough hooks immediately after use prevents corrosion and buildup. For stand mixers, a gentle wipe of the motor housing with a damp cloth keeps dust and flour from accumulating, which can hamper motor efficiency over time. Investing in quality tools also makes a significant difference. I recommend using silicone scraper spatulas when dealing with sticky batter to avoid damaging the attachments and to get every last bit of mixture. Additionally, a belt or drive system check once a year—consult your manufacturer’s manual—can preempt motor strain and overheating issues. When I neglected this maintenance, my mixer started making odd noises, which was an early sign of belt wear. Regular inspection and replacing worn parts can prevent breakdowns and costly repairs. Looking ahead, technological advancements are integrating smart diagnostics into newer models, alerting you to maintenance needs before issues arise. To keep your mixer performing at its best, schedule monthly checkups and don’t overlook the small details. Want to know how to troubleshoot common issues? Check out this detailed guide from seasoned appliance technicians.
How do I maintain my mixer over time?
One effective practice is to keep detailed records of your maintenance schedule and any repairs. This habit helps identify recurring problems and ensures timely upkeep. For example, I mark a calendar each time I clean or replace parts, which has saved me from sudden, unexpected failures during critical baking moments. Moreover, using quality attachments from reputable brands ensures durability and better performance—I’ve found that OEM parts, though sometimes pricier, are worth the investment. Looking for the best tools to complement your mixer? I highly recommend exploring specialized accessories like the planetary attachment for thorough mixing or the splash guard to minimize messes. As the trend towards smarter kitchens grows, I predict more mixers will feature built-in diagnostic tools and IoT connectivity, allowing remote monitoring and maintenance alerts. Implementing these small but effective practices now will save you time and frustration in the long run. Take, for instance, my routine of inspecting the drive belt every six months—simple steps like this can avoid major repairs. Curious about optimizing your maintenance routine? Consider setting up a dedicated “baking station” with organized tools and clear schedules—it’s a game changer. Ready to try a comprehensive cleaning tip? Next time you wash your attachments, soak them in a vinegar solution to remove mineral deposits and ensure peak performance. Your baking equipment deserves this care for flawless results every time.
The Hardest Lesson I Learned About hand mixer,whisk attachments,stand mixer,baking mixer,dough mixing
One of my biggest revelations was realizing that not all mixers are created equal—and that the choice can make or break your baking success. I once impatiently used a small hand mixer for heavy doughs, only to see it sputter and struggle. That moment taught me to respect equipment suited to each task, and to understand that investing in the right tools fosters confidence and better results.
3 Myths About hand mixer,whisk attachments,stand mixer,baking mixer,dough mixing That Held Me Back
- Myth: All mixers can handle all tasks. I believed I could use one appliance for everything, but I soon learned that different recipes demand specific attachments and power levels. For example, a sturdy stand mixer with a dough hook is invaluable for bread, whereas a gentle hand whisk excels for meringues.
- Myth: Higher speed always means faster mixing. I used to crank up speeds thinking it saved time, but this often led to overmixing or splatters. Slow and steady, with observation, produces better texture.
- Myth: Cheap mixers are just as good. I underestimated the value of quality, and it cost me extra in failed batches. Quality attachments and motor reliability make a significant difference.
What Experts Won’t Tell You About hand mixer,whisk attachments,stand mixer,baking mixer,dough mixing
Many seasoned bakers keep a few secrets—like mastering the art of attachment compatibility and knowing the perfect mixing speed for each recipe. They also recognize that patience and observing textures are more critical than rushing through with high speeds. A well-maintained mixer with the right attachments, used thoughtfully, elevates your baking from good to extraordinary.
My Essential Toolkit for hand mixer,whisk attachments,stand mixer,baking mixer,dough mixing
- A top-rated stand mixer: Investing in a durable, versatile model ensures consistent results for all doughs and batters.
- The comprehensive guide to choosing your ideal mixer: It’s my trusted resource for comparisons and features to consider.
- A detailed look at attachments and compatibility: Ensures you select tools that truly fit your baking repertoire.
- Updated comparisons for 2024: Keeps me informed about the latest models and innovations.
Let Your Passion Flourish: Your Turn to Make It Happen
Choosing the right mixer isn’t just about equipment—it’s about embracing your baking journey with confidence and enthusiasm. With mindful selection, proper maintenance, and a willingness to learn, you can create culinary delights that wow family and friends alike. Remember, every great baker starts with the right tools paired with a passionate heart. So, dust off your mixer, experiment boldly, and let your baking dreams take shape.
What’s the one baking task you’re eager to master using your mixer? Share your goals below and let’s support each other’s progress!
Reading this really resonated with me. I used to rely solely on a basic hand mixer for everything, thinking it was enough. But I remember struggling with dense bread doughs or heavy cookie batters, often ruining my equipment or ending up with poor results. Switching to a good stand mixer made a world of difference, especially with the right attachments like the dough hook. It’s a lesson in patience—understanding that different tasks require specialized tools. One thing I learned the hard way was the importance of speed control; rushing at high speeds can be counterproductive, especially when working with delicate mixtures like meringues or whipped cream. Have others found that controlling and emulating expert techniques improves their results? I’d love to hear your experiences with different mixers and techniques—have you found ways to tailor your approach to your specific recipes? Sometimes, trial and error is the best teacher in baking.
Reading about the importance of the right tools in baking really struck a chord with me. Early in my baking journey, I used a basic hand mixer for everything, which often resulted in uneven batter or burnt-out motors when tackling heavy doughs. Upgrading to a reliable stand mixer with quality attachments dramatically improved my results and made baking far more enjoyable. I especially appreciate the mention of attachment compatibility—knowing which tools suit specific tasks saves so much frustration and time. One thing I learned that wasn’t highlighted much here is how crucial it is to pay attention to the mixer’s noise and heat during prolonged use; a quieter motor and proper cooling can extend the longevity of your equipment. Do others have tips for monitoring your mixer’s health over the years? Also, I find that experimenting with different speeds for specific recipes helps refine my technique. How do you balance speed and texture when working with delicate batters or dense doughs? Would love to hear everyone’s strategies and learn new tricks from this community.
This post really hits home for me. I used to think that a basic hand mixer was enough for all my baking needs, but I quickly learned that it’s not always the case, especially with heavy bread doughs or thick cookie batters. Upgrading to a sturdy stand mixer with a good dough hook has totally transformed my baking experience. Now, I can do large batches with ease, and the quality of my results has improved significantly. One thing I realized is how important it is to pay attention to the attachments and the speed settings; using the wrong combination can lead to poor texture or even damage. I’ve also started experimenting with different speeds for different recipes, and it really makes a difference. For example, starting slow when whipping egg whites helps achieve those perfect stiff peaks without overmixing. How do others find the best speed for delicate tasks like meringues or soufflés? I’d love to hear your tips and tricks for mastering these finer points in baking.