Ever had a baking session turn into a frustrating battle with your mixer? I sure have. There was this one time I was whipping up a batch of meringue, excited to finally get it perfect, only to realize my hand mixer was struggling to keep up, and my arm was about to fall off. That lightbulb moment made me question everything I thought I knew about mixers. Why is choosing the right one so tricky? And more importantly, how do I pick the best for my needs without wasting money or time? Today, I’ll share my journey from confusion to clarity and help you avoid the same pitfalls.
Why Picking the Right Mixer Can Make or Break Your Baking Experience
The truth is, your choice of mixer impacts not just your baking results but also your enjoyment in the kitchen. Whether you’re a weekend baker or a full-blown pastry chef, the difference between a hand mixer and a stand mixer can be night and day. I used to think all mixers were created equal—until I bought the wrong type for whisking delicate egg whites. It was a disaster. Since then, I’ve learned that understanding the specific benefits and limitations of each can save you hours and headaches. Curious if your current mixer is holding you back? Let’s explore the options together.
Is a Hand or Stand Mixer Worth the Hype for Whisking?
Early in my baking journey, I made the mistake of assuming that a powerful hand mixer could do everything a stand mixer could. Spoiler: It can’t. While hand mixers are portable and easy to store, they often struggle with thicker batters or long whisking tasks. Conversely, stand mixers excel at handling heavy doughs and continuous whisking without tiring you out. The key is matching your needs with the right tool. Want to dive deeper? Check out this comprehensive guide on choosing the right baking mixer.
Have you ever bought a mixer only to find it underwhelming or too bulky for your kitchen? I’ve been there. That mistake cost me time and money, but it also pushed me to do my homework. With the right info, I was able to select a mixer that’s perfect for my baking style, especially when it comes to whisk attachments. Now, I want to help you avoid those costly missteps.
Assess Your Baking Needs Carefully
Before diving into specific features, reflect on what types of whisk tasks you perform most often. Do you mostly whisk egg whites, whip cream, or mix delicate batters? If you’re frequently working with lighter, airy mixtures, a hand mixer with a powerful whisk attachment might suffice. However, for dense or large batches, a sturdy stand mixer will save you time and effort. I remember a time I attempted to whisk a massive meringue with my old hand mixer — it struggled, and I ended up switching to my stand mixer, which handled it effortlessly. This real-world experience taught me to evaluate my typical workload before choosing.
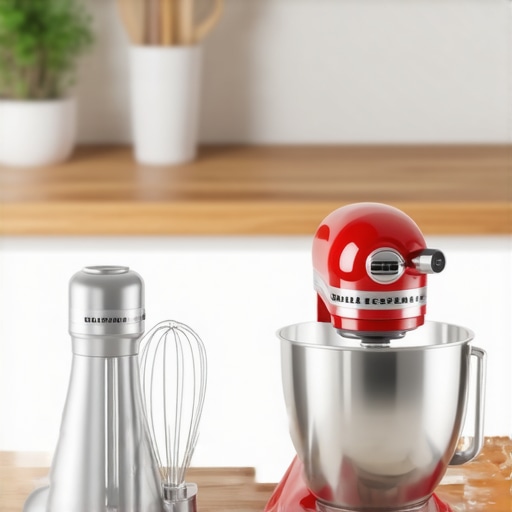
Match Your Mixer Type with Your Baking Style
Think of your mixer as an extension of your arm. A hand mixer is like a steady hand — portable and quick for small jobs. A stand mixer acts more like a reliable machine — designed for high-volume, consistent results. To decide, compare your typical batch sizes and the complexity of your whisk tasks. If you often bake for family and use small recipes, a hand mixer with excellent whisk attachments can be enough. Conversely, for professional-level or large-scale baking, a stand mixer with multiple whisk options is more appropriate.
Evaluate Power and Speed Settings
Power is essential for efficient whisking. A weak motor will struggle with stiff egg whites or whipped cream, leading to inconsistent results. During my last purchase, I tested a hand mixer’s maximum speed — and it still barely whipped my cream. The lesson: look for a model with at least a 200-watt motor for hand mixers, and higher for stand mixers. Also, check the speed settings; multiple speeds give you better control, especially for delicate tasks. To get a sense of what works best, review guides like comprehensive comparisons.
Inspect Compatibility of Whisk Attachments
Not all whisk attachments are created equal. Some mixers come with universal attachment ports, making it easier to swap parts. Others may require proprietary accessories, limiting your options. When I upgraded my stand mixer, I made sure its whisk attachments were compatible with a variety of brands, which expanded my versatility. Check the manufacturer’s specifications and reviews to ensure you can find the right attachments for your needs. For detailed advice, visit this guide.
Prioritize Ease of Cleaning and Storage
A mixer with removable, dishwasher-safe whisk attachments saves time and effort. I once owned a model with complicated, hard-to-clean parts, which became a hassle after every use. Now, I prefer simpler designs that allow quick disassembly. Consider how much space your mixer and attachments will occupy in your kitchen. Compact models or those with foldable parts make storage easier. Think of it like choosing a tool that fits seamlessly into your workflow, not just one that looks good on the countertop.
Read User Reviews and Expert Opinions
Nothing beats real-world feedback. Look for reviews on how well the whisk attachments perform over time, their durability, and ease of use. Experts often highlight models with superior build quality and innovative features. During my research, I found that models praised for their stability and attachment versatility consistently delivered better whisking results. Use resources like in-depth reviews to inform your decision.
By carefully matching your baking style, evaluating power, checking attachment compatibility, and reading reviews, you can confidently choose a mixer that makes whisking tasks easier and more enjoyable. Remember, investing time in this step ensures your baking adventures are powered by the right tool for the job.
Many bakers operate under the misconception that all mixers are created equal, especially when it comes to whisking tasks. The truth is, there are nuanced differences and common pitfalls that even seasoned bakers often overlook. Let’s dig deeper into what most people get wrong about selecting and using mixers for whisking, and how understanding these hidden nuances can elevate your baking game.
Why Bigger Isn’t Always Better When Choosing a Mixer
A frequent mistake is assuming that a more powerful or larger mixer automatically means better performance. While power matters, it’s not the sole factor. For example, a high-wattage stand mixer can handle dense doughs effortlessly, but if it’s bulky and difficult to maneuver, it might not be the best choice for small kitchens or delicate whisking tasks. Conversely, a lightweight hand mixer with a modest motor can struggle with stiff egg whites or large batches, leading to uneven whipping and frustration. The key lies in matching your specific needs—don’t be swayed by marketing hype or the size of the motor alone. Instead, consider detailed specifications like torque and attachment compatibility, which are often overlooked but critical for optimal whisking performance.
Beware of Attachment Compatibility and Quality
Another common misconception is that any whisk attachment will do. In reality, not all attachments are created equal, and compatibility issues can sabotage your efforts. Cheaper or proprietary attachments may wobble, spin unevenly, or fail to produce the desired airy texture. Some bakers fall into the trap of buying an inexpensive mixer with the assumption that the attachments will work seamlessly. This is where doing your homework pays off. Look for models that support universal or high-quality attachments, and read reviews about their durability and performance. Remember, investing in a good set of attachments and ensuring compatibility can make all the difference in achieving perfect whipped cream or meringue.
Advanced Question: How Do Motor Speed and Torque Interact in Achieving Perfect Whisking?
For the more experienced baker, understanding the interaction between motor speed and torque is crucial. High speed is not enough if the torque—the rotational force—is insufficient. A powerful motor with high torque ensures that the whisk attachment can spin steadily through thick mixtures without bogging down or overheating. This balance is especially important when whisking large quantities of egg whites or cream, where inconsistent speed can lead to deflation or uneven texture. Expert sources emphasize that looking at motor specifications holistically—combining high wattage with good torque—is essential for professional-level results. For further insights, see this detailed guide.
Finally, be cautious of the hidden trap of over-specifying. Buying a high-end mixer just for whisking can be unnecessary if your typical tasks are small or infrequent. Focus on what suits your baking style, and don’t fall into the trap of thinking bigger and more powerful always means better. Instead, prioritize compatibility, build quality, and specifications that align with your needs. Have you ever fallen into this trap? Let me know in the comments!
Keeping your baking mixer in top shape is crucial for consistent, professional results. Over time, even the most durable equipment benefits from regular maintenance and smart tool choices. When I first started baking seriously, I underestimated the importance of caring for my mixer. Now, I can confidently say that proper upkeep extends the lifespan of your device and ensures optimal performance every time you whip up a batch. Today, I’ll share the tools I rely on and the practices I follow to keep my mixers working flawlessly for years to come.
How do I maintain my mixer over time?
Regular cleaning is the foundation of maintenance. After each use, I disassemble the whisk attachments, beaters, and dough hooks, then wash them with warm, soapy water. For stand mixers, I wipe down the body with a damp cloth—avoiding abrasive cleaners that could damage the finish. It’s also essential to check the power cord periodically for signs of wear. If you notice any fraying or damage, replace or repair it immediately to prevent electrical hazards. Lubricating the moving parts, as recommended in the manufacturer’s manual, helps prevent squeaks and ensures smooth operation. For detailed guidance, review the official maintenance tips.
Tools that make maintenance easier and more effective
Investing in a few specific tools simplifies ongoing care. A small brush or toothbrush helps remove stubborn flour or batter from crevices around the attachments and motor housing. I keep a set of microfiber cloths handy for wiping down surfaces without scratching. For deep cleaning, I use a soft, damp cloth with a mild detergent, and I avoid harsh chemicals that could degrade plastic or rubber parts. Additionally, a silicone spray or food-grade lubricant applied periodically to moving joints can reduce wear and extend component life. These tools are inexpensive but make a significant difference in keeping your mixer functioning smoothly over time.
Anticipating future trends in mixer durability
As technology advances, I predict more manufacturers will incorporate self-diagnostic features and smarter materials that resist wear and tear. Innovations like corrosion-resistant metals and improved sealing techniques will reduce maintenance needs further. Moreover, modular designs will become more popular, making it easier for users to replace worn parts without buying a whole new device. Staying updated with these trends can help you select mixers that are not only powerful but also built to last. For example, some high-end stand mixers now include diagnostic lights indicating when lubrication or part replacement is needed, which is a game-changer for long-term care.
Don’t overlook the importance of quality attachments
Quality attachments are an often-overlooked aspect of long-term mixer maintenance. Using high-quality, compatible whisk attachments reduces strain on the motor and minimizes wear. I personally prefer attachments made from stainless steel because they are durable and easy to clean. When replacing or upgrading, always ensure your attachments support your mixer model—compatibility is key. To find the best options, I recommend reviewing this guide on attachment compatibility. Investing in reputable accessories minimizes maintenance issues and improves whisking results.
Start implementing these simple maintenance routines and tools today to ensure your mixer remains a reliable partner in your baking adventures. Regular care not only extends the lifespan of your equipment but also guarantees consistent, high-quality results. Don’t wait until your mixer struggles—be proactive and enjoy trouble-free baking for years to come!
Three Lessons That Changed My Approach to Mixing
- Size Isn’t Everything: I used to assume that a larger, more powerful mixer would always outperform a smaller one. Turns out, matching the mixer to your typical tasks matters more than sheer size. Understanding the nuance between power and practicality was a game-changer.
- Attachments Are Key: I once bought a cheap set of whisk attachments that wobbled and failed midway. Investing in high-quality, compatible attachments not only improved my results but also extended my equipment’s lifespan. Compatibility and build quality are worth prioritizing.
- Don’t Overlook Maintenance: Regular cleaning and proper care kept my mixer running smoothly for years. Simple routines like disassembling, washing, and checking the cord saved me from costly repairs and downtime.
My Go-To Resources for Serious Mixing Tips
- The ultimate guide on choosing the right baking mixer: A comprehensive resource that clarified many doubts about mixer types and features, helping me make informed decisions.
- Compare stand vs. hand mixers: A detailed comparison that highlighted the pros and cons based on different baking needs.
- Best attachments for whisking: An excellent source for understanding attachment compatibility and quality.
Embrace Your Baking Journey Today
Choosing the right mixer isn’t just about equipment—it’s about empowering your baking confidence. With the insights and tools I’ve shared, you’re now equipped to select a mixer that truly supports your whisking ambitions. Remember, the best tool is the one that fits your style and helps you create delicious memories. So, don’t wait—start experimenting and enjoy every whisked batch along the way. Your perfect baking companion is out there—go find it!
Leave a Reply