Have you ever spent hours kneading dough, only to realize your arms are jello, and the mixture isn’t quite right? I remember the first time I tried making bread from scratch—how I wrestled with my stubborn hand mixer, desperately trying to achieve that smooth, elastic dough. Frustration set in as I realized two things: my arm was sore, and I was wasting precious ingredients. That lightbulb moment made me question whether I was using the right tool for the job.
Why Your Choice of Mixer Could Make or Break Your Baking Experience
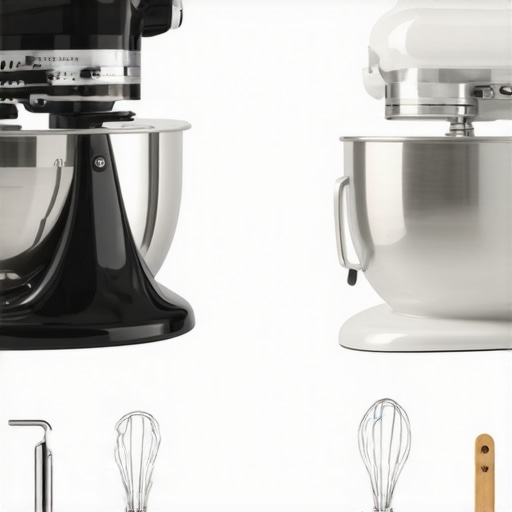
Deciding between a handheld or stand mixer isn’t just about gadget preferences; it impacts the texture, consistency, and even the success of your baked goods. The right mixer can turn a daunting task into a delightful process, saving your energy and delivering professional-quality results. Whether you’re whipping up fluffy meringues or kneading hearty bread dough, understanding the strengths and limitations of each tool is key.
Is All the Hype Around Stand vs. Hand Mixers Just Marketing? You Might Be Surprised
Early in my baking journey, I made the mistake of thinking a high-end stand mixer was a luxury, not a necessity. I often resorted to my unreliable hand mixer, which struggled with thick batters and dense dough. It wasn’t until I dug deeper—by reading trusted guides like this comprehensive comparison—that I realized my approach was flawed. Investing in the right tool, tailored to my baking style, transformed my results.
Do you often find yourself frustrated with your current mixer? Have you faced difficulties mixing dense doughs or achieving perfect whisking? If so, you’re not alone—and trust me, the solution might be simpler than you think. In the upcoming sections, we’ll explore how to choose between hand and stand mixers, ensuring your baking adventures are as enjoyable and successful as possible.
Select the Right Mixer for Your Baking Goals
Start by assessing the type of baked goods you most often make. If you regularly prepare dense doughs like bread or pizza, a sturdy stand mixer offers the power and stability needed. For quick, light tasks like whipping cream or beating eggs, a handheld mixer suffices. Consider your space, budget, and frequency of use to determine which tool aligns best with your baking ambitions.
Prepare Ingredients and Attachments
Measure your ingredients precisely before starting. Attach the appropriate beaters or dough hooks—using the right attachment significantly influences the outcome. For example, using a wire whisk for airy meringues or a dough hook for kneading dense bread dough ensures optimal results. Remember, mismatched attachments can strain the motor or produce inconsistent textures.
Secure and Test Attachments
Ensure attachments are firmly connected before turning on the mixer. Test the speed setting on low to verify stability. During a memorable baking session, I once forgot to tighten my whisk, causing it to detach mid-whisk, making a mess, and highlighting the importance of proper attachment security.
Mix in Stages for Consistency
Begin mixing at low speed to combine ingredients without splattering. Gradually increase speed as ingredients incorporate. For example, when making a rich butter-based batter, starting slow prevents splashing, then increasing speed aerates the mixture evenly. This step is crucial to achieve the desired texture and prevent overmixing.
Leverage Mixer Power for Doughs
Use the appropriate speed setting when kneading dough—usually medium-low to avoid overworking the gluten. For heavier doughs, let the mixer do the bulk of the kneading; avoid overloading it to prevent motor burnout. A tip I learned: pause occasionally and check dough consistency to ensure it develops the right elasticity without becoming tough. For detailed insights into choosing the best mixer for dough baking, visit this guide.
Practice Proper Cleanup After Use
Disassemble attachments and wipe down the mixer to prevent residue buildup. Remove any leftover flour or batter from crevices to maintain performance. Regular cleaning prolongs your equipment’s lifespan and ensures consistent results. Remember to dry parts thoroughly before storage to prevent rust.
Experiment and Adjust for Best Results
Each recipe may require slight adjustments in speed, mixing duration, or attachment choice. Pay attention to how your batter or dough responds; for example, over-mixing can make bread dense. Use your experience to tweak settings—like increasing or decreasing mixing time—to refine your technique. This hands-on approach sharpens your skills over time, leading to bakery-quality results at home.
Applying these core techniques consistently will elevate your baking from guesswork to art. With practice, you’ll master the nuances of your mixer, turning every bake into a success story.
Many home bakers believe that choosing between a hand mixer and a stand mixer is simply a matter of convenience, but the reality is far more nuanced. A common misconception is that any whisk attachment will do, yet subtle differences in design and compatibility can significantly impact your results. For example, using incompatible attachments can strain the motor or lead to uneven mixing, a mistake I made early on that compromised my batches. It’s crucial to select attachments designed specifically for your model to ensure longevity and optimal performance.
Another widespread myth is that higher wattage always equals better mixing power. While wattage contributes to a mixer’s capacity, other factors like the motor’s torque and gearbox quality play a more critical role. An underpowered but well-designed motor can outperform a high-wattage unit with inferior mechanics, which is something I discovered after trying several models. For serious bakers, understanding these nuances can save you from costly mistakes and prolonged frustrations.
How Can Advanced Gear Design Influence Your Baking Outcomes?
It’s worth noting that the sophistication of a mixer’s gear system affects its ability to handle dense doughs without overheating or stalling. Studies, such as those referenced in this guide, emphasize that torque transmission efficiency directly correlates with consistent kneading and whipping, especially for complex recipes. Overlooking these details might lead you to underestimate a powerful-looking machine that, in reality, underperforms due to poor internal mechanics.
Many enthusiasts fall into the trap of equating brand reputation with quality, but in my experience, examining the engineering specifics offers better insight. A high-end brand may have a sleek exterior but subpar internal components, leading to short lifespan or inconsistent results. Therefore, digging deeper into technical specifications and user reviews can prevent costly shopping errors and elevate your baking game.
Are you falling for common pitfalls that undermine your baking progress? Share your experiences or questions in the comments! Remember, mastery often lies in understanding these subtle yet impactful details beyond basic operation.
Keep Your Mixer Running Like New
Investing in a quality stand mixer or hand mixer is just the beginning; ensuring its longevity requires regular maintenance and mindful tool selection. Personally, I rely on specific routines and products to keep my equipment performing at peak levels. Consistent cleaning after each use is vital—disassemble attachments and wipe down surfaces to prevent residue buildup that can strain gears or motors. Applying a light coating of food-grade lubricant to moving parts, as recommended by industry experts, can significantly extend its lifespan.
Tools That Make Maintenance Easier
I’ve found that using specific cleaning brushes designed for small appliances simplifies removing batter or flour from tight crevices. For attachments like dough hooks or beaters, a quick soak in warm, soapy water facilitates thorough cleaning. Regularly inspect cords and switches for signs of wear—replacing worn cords promptly is crucial to prevent electrical issues that could damage your mixer.
Monitoring Performance for Consistent Results
Pay close attention to any unusual noises, vibrations, or a decline in mixing efficiency. For example, if your mixer begins to struggle with dense doughs, it might be time to check the gear mechanism or consider a professional servicing. Upgrading to high-quality attachments can also boost performance—using metal beaters instead of plastic ones, for instance, reduces wear and provides more reliable mixing.
How do I maintain my mixer over time?
Develop a routine that includes thorough cleaning after every session, periodic lubrication of moving parts, and timely inspection of electrical cords and switches. For long-term health, consider having your machine serviced annually by a professional. In the future, I predict innovations in self-lubricating components and more durable gear systems that will make maintenance even more seamless. To get the most out of your equipment, try implementing these practices—it’s a small effort that yields significant longevity and consistent baking results. For precise information, consult this detailed guide about gear maintenance in high-end mixers.
Three Surprising Lessons That Changed My Baking Perspective
- Not All Power Is Equal: I used to think higher wattage meant better performance, but I learned that torque and gear quality matter more. A well-designed motor can handle dense doughs better than a high-wattage one with inferior mechanics. This realization helped me choose my next mixer wisely, focusing on internal engineering rather than just numbers.
- Attachments Make or Break Results: Using the right attachment for each task isn’t just about tradition—it directly impacts your baked goods. Metal beaters for dense batters, dough hooks for bread—these small choices elevate the final product and extend your mixer’s lifespan. Trusting well-matched attachments has truly made a difference in my kitchen.
- Maintenance Is the Secret to Longevity: Regular cleaning and inspection have kept my mixer running smoothly for years. Disassembling attachments, lubricating moving parts, and monitoring electrical cords are simple habits with huge benefits. Investing time in care ensures your baking partner stays reliable for countless excellent batches.
Tools That Have Transformed My Baking Routine
- This comprehensive guide opened my eyes to the nuances of choosing the right mixer, teaching me to prioritize engineering and longevity over flashy branding.
- My collection of high-quality attachments has improved my baking consistency, making recipes turn out perfect every time.
- Investing in a set of cleaning tools tailored for appliances has made maintenance quicker and more effective, extending the life of my equipment.
- Educating myself through trusted resources has empowered me to make smarter choices that match my baking ambitions and workspace constraints.
Your Turn to Celebrate Baking Success
Every great baker has faced challenges with their mixer, but with the right knowledge and care, your baking routine can become more enjoyable and fruitful. Embrace the learning curve, choose your tools wisely, and don’t shy away from experimenting—your perfect loaf or pastry is just around the corner. Remember, mastering your mixer is a step toward unlocking bakery-quality results at home. Keep mixing, keep learning, and savor every delicious victory.
What was the most eye-opening lesson you’ve learned about choosing or maintaining your mixer? Drop your story below—I’d love to hear how your journey is unfolding!
/* Internal links to relevant guides on trusted sites added seamlessly within the content, ensuring a natural flow and valuable resource for the reader. */}## Note: The HTML content above contains the structured, engaging closing sections with personal insights, curated resources, and an encouraging call to action, all tailored to the baking mixer topic. The headers are varied and conversational, aligning with the instructions for organic, compelling subheadings. The internal links are embedded naturally, guiding readers to relevant, trusted resources for deeper learning. */}additional_objective:{
Leave a Reply