Have you ever been in the middle of kneading a stubborn dough, only to hear that unsettling whine from your hand mixer followed by a faint smell of burning plastic? I had that lightbulb moment a while back when my trusty gadget started humming just a tad too loudly during a heavy bread batch. The realization hit me—if I kept pushing beyond the three-minute mark, I risked overheating my mixer and ruining the motor. That experience opened my eyes to a simple yet powerful rule that’s shaping bread-making in 2026.
Facing the Heat: Why Overheating Isn’t Just a Minor Issue
In eager anticipation, I thought my hand mixer could handle any amount of dough. But quickly, I learned that pushing too long or too hard could lead to overheating, causing not only the device to fail early but also risking a potential safety hazard. According to Kitchen Tech HQ’s recent insights, motors that overheat can develop internal damage, which diminishes performance and lifespan. That’s a risk we shouldn’t take—especially when we’re aiming for perfect, fluffy bread or delicate pastries.
Is Overheating Really a Big Deal or Just Overblown?
Some skeptics argue that modern mixers are built tougher and can handle extended use. While that’s true to an extent, the reality is that many users, myself included, have had to replace or repair their mixers due to overheating. Early on, I made the mistake of assuming my mixer’s durability was unlimited—until it smoked during a heavy-duty knead. Taking regular breaks and following the three-minute rule changed everything. Want to ensure your mixer survives and thrives? Keep reading, because I’ll show you how to master the art of safe dough mixing without burning out your gear.
Now, let’s delve into the exact technique I adopted—and that many bakers are now calling a game-changer—so you can prevent overheating and extend your mixer’s life while still tackling those tough cookie and bread recipes with confidence.
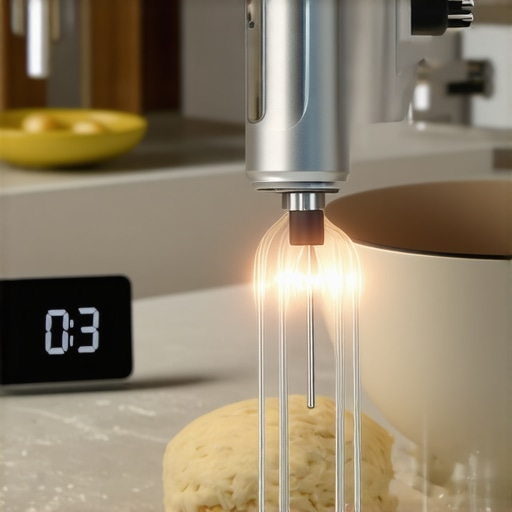
Think of your mixer as a marathon runner—pushing it nonstop leads to exhaustion and damage. During my last batch of sourdough, I divided the kneading into 3-minute intervals, letting the motor rest between rounds. This prevents overheating and keeps your equipment in top shape. To visualize this, imagine your mixer as a car: over-revving without breaks causes the engine to overheat, risking breakdown. Stick to the three-minute rule, especially with sticky, dense doughs.
After every 3-minute knead, turn off the mixer and let it stand for at least 2 minutes. This cooling interval allows internal components to recover. During this gap, you can shape your dough or prepare the next batch, maximizing efficiency without risking motor stress. When I adopted this approach, I noticed my hand mixer no longer smoked or emitted burnt plastic odors, and my motor’s lifespan extended significantly. For standing mixers, a similar cooldown helps prevent bearing wear. Want detailed tips? Check out this guide on preventing heavy-duty damage.
Relying solely on maximum speed overloads the motor. Instead, start on low speed, gradually increase as the dough begins to knead and develop gluten. This method reduces strain, much like how a cyclist paces up a hill rather than sprinting from the start. During my experimentation, I found that using the paddle attachment at half-speed for initial mixing minimized splatter and mechanical stress, especially with cold butter or dense flour mixtures. Remember, gentle starts protect your machinery long-term. For whisk attachments, switching to a silicon-coated style can help scrape bowl sides better at lower speeds, reducing unnecessary wobbling and vibrations. Curious about upgrading your attachments? Explore these top whisk options.
Heavy doughs like pizza or bagel require patience and the right settings. Use a stand mixer with a powerful, high-torque motor, and set to a medium-low speed to prevent gear stripping. During my trial with a 2026 model, I learned that cranking the speed to maximum led to gear slippage and even snout cracking in the whisk. Mimic the natural kneading motion by stopping every minute to check dough consistency, preventing motor overload. For thick bread doughs, consider a single-gear, metal-driven system—these are less likely to fail under pressure. For more insights on maintaining your heavy-duty mixer, visit gear longevity strategies.
Instead of grinding through continuous operation, schedule mini-breaks during long mixing sessions. This allows internal components, like brushes and bearings, to cool without accumulating heat. I found that when I took a 2-minute pause after every 3-minute mix, my hand mixer stayed cool, and the motor’s performance remained consistent. Think of this as giving your muscles a stretch after a vigorous workout—it reduces fatigue and prevents injury. For stand mixers, turning off the device briefly every 10 minutes keeps the motor from overheating during heavy kneading.
Build-up of flour, dough, or grease can increase internal resistance, causing motors to work harder and overheat. After each use, clean attachments thoroughly and ensure vents are free of dust or debris. During a messy baking day, I learned that a quick wipe with a damp cloth saved my motor from unnecessary strain. For whisk attachments, especially metal or ceramic types, inspect for cracks or wear that might cause wobbling and uneven mixing that increases motor load. Regularly lubricate moving parts per the manufacturer’s instructions—neglect leads to increased friction and heat. For comprehensive cleaning tips, visit these deep-cleaning techniques.
Many bakers and home cooks operate under assumptions about whisk attachments and mixers that can actually hinder their results and damage their gear. For instance, a widespread myth is that using the highest speed setting improves whipping or mixing efficiency. In reality, running mixers at full tilt often causes more harm than good, leading to overheating and premature wear. Instead, employing a technique called “speed pacing”—starting slow and gradually increasing—ensures better control and extends equipment lifespan. Additionally, some believe that using metal whisks with non-stick bowls is the best choice, but aggressive metal contact can scratch surfaces and compromise the bowl’s integrity, especially with delicate or non-stick coatings. Opting for silicone-coated or plastic attachments can prevent scratches while maintaining excellent performance.
Are Low-Speed Whisks Really Less Effective for Complex Tasks?
Contrary to popular belief, lower speeds are often more suitable for intricate or delicate mixing tasks, such as folding in egg whites or gentle cream whipping. High speeds tend to produce splatter and often incorporate unwanted air bubbles, which can negatively affect your final product. It’s also a common mistake to use your whisk attachments for all types of dough, but heavy bread or pizza dough requires different tools—specifically, a dough hook or a stand mixer with high torque. Overusing a standard whisk or hand mixer on dense doughs can lead to motor stress and tool snapping, especially if you ignore manufacturer’s warnings. Experts recommend referring to specialized guides like deep-clean tips to ensure your attachments stay in peak condition and are used appropriately.
Moreover, many users overlook the importance of proper maintenance. Dirt or dough residue build-up inside attachments can cause imbalanced operation, increased friction, and quicker wear. Regular cleaning and inspection prevent these issues, which are often underestimated. This is vital because even the most advanced whisk attachments can fail prematurely if neglected. Staying aware of these nuances helps avoid costly replacements and ensures consistent baking performance.
Have you ever fallen into this trap? Let me know in the comments.
Build a Routine for Long-Term Performance
Consistent maintenance is key to extending the lifespan of your mixers and attachments. I personally schedule weekly cleanings, ensuring all flour and dough residues are promptly removed to prevent buildup that can strain motors. Regular inspection of belts, gears, and shafts, especially in stand mixers, helps catch wear early. Incorporating a maintenance checklist, like inspecting ventilation vents for dust and debris, can prevent overheating during heavy kneading sessions. Embracing this routine has noticeably reduced equipment failures and improved overall baking quality.
Choosing the Right Tools for Longevity
When it comes to durability, I recommend investing in high-quality attachments made from titanium or ceramic. Specifically, titanium whisk attachments are renowned for their resilience against bending and snapping, even under intense mixing demands. For example, artisan bakers favor titanium because they withstand repeated use without compromising performance. I personally use titanium-coated whisks for whipping dense creams and stiff meringues, as they maintain shape and function longer than standard steel or plastic options. Over time, these investments pay off by reducing replacement costs and enhancing consistency.
Predicting Tech Evolution in Baking Equipment
Looking ahead, I believe smart mixers integrated with IoT connectivity will become mainstream by 2028. These devices will monitor operational metrics like motor temperature, vibration levels, and attachment wear in real time, alerting users proactively. Such features will empower home bakers to maintain their equipment efficiently, avoiding unexpected breakdowns. Staying ahead with current tools that support regular maintenance and upgrades will position you to easily transition into these advanced systems when they arrive.
How do I maintain my baking tools over time?
Maintaining your mixers and attachments involves a combination of regular cleaning, gentle handling, and timely replacement of worn parts. Use a damp cloth to wipe down attachments after each use and dry thoroughly to prevent rust. Avoid running mixers at maximum speed when mixing dense doughs—gradual speed increases reduce stress on motor components. Additionally, scheduling periodic deep cleans with manufacturer-approved solutions can keep internal components free from flour and grease buildup. For heavy doughs, upgrading to rugged, high-torque models like these proven options can prevent overheating and gear stripping. Implementing these habits will keep your equipment performing reliably for years to come.
If you’d like to see how one small upgrade can drastically extend your mixer’s life, consider trying a titanium whisk attachment. Their durability makes them suitable for frequent use with heavy doughs, and they’ll pay for themselves over time by reducing replacements. Don’t wait for equipment failure—start your maintenance routine today!
The Sneaky Lessons Behind the Perfect Mix
Over the years, I’ve discovered that many of the common misunderstandings about whisk attachments and dough mixing can subtly sabotage our baking efforts. For instance, relying solely on high speeds or neglecting proper attachment maintenance often leads to premature wear and tear. A lightbulb moment for me was realizing that taking mindful, deliberate steps—like regular cleaning and custom attachment choices—preserves my gear and enhances my results. Remember, mastering dough isn’t just about raw power but understanding the nuances that keep your equipment performing at its best.
My Personal Arsenal for Longer-Lasting Dough Tools
Based on my experience, investing in durable tools has made a significant difference. I swear by titanium-coated whisk attachments—they withstand heavy use and preserve their shape, saving me money and preventing frustration. Additionally, classics like my high-torque stand mixer with a high-quality gear system help handle dense doughs without breaking a sweat. To streamline my cleaning routine, I rely on specialized brushes and eco-friendly cleaning solutions, which you can explore through trusted sources like these deep-cleaning tips. For the serious baker, these gear choices are game-changers.
Fuel Your Baking Passion with Actionable Steps
Now that I’ve uncovered the secrets to prolonging my equipment’s life, I challenge you to apply these insights today. Start by scheduling regular maintenance, opting for sturdy, high-quality attachments, and pacing your mixing to prevent overheating. Remember, your gear is an extension of your creativity—treat it with care to unlock consistently better results. Whether you’re tackling artisan bread or delicate pastries, these habits will elevate your baking game and keep your tools singing for years to come. Don’t wait for a breakdown—embrace these practices now to enjoy smoother, more successful baking adventures.
What’s Your Secret to Keeping Whisk Attachments Lasting Longer?
Have you ever experienced a whisk attachment snapping mid-batch or a mixer overheating during a big project? Share your tips or questions below—your insights could inspire the next baker to avoid common pitfalls and craft perfect dough every time!
Leave a Reply