Ever been in the middle of baking your favorite cake, only to realize that your whisk attachment looks more like a breeding ground for residue than a tool for fluffy meringues? I remember the first time I spotted stubborn gunk caked onto mine after a particularly ambitious batch of cookies. That lightbulb moment made me question just how clean my trusty mixer really was. Turns out, neglecting this tiny but crucial part can sabotage your baking efforts, lead to lingering odors, or worse—contaminate your delicious creations.
Why Deep Cleaning Your Whisk Attachments Matters More Than Ever in 2026
Today, caring for your kitchen tools is not just about hygiene; it’s about maximizing performance and longevity. As mixers become more advanced, with specialized attachments, the buildup of grime, grease, and baked-on dough can gradually diminish their efficiency. In fact, a recent study highlights that neglected attachments can harbor bacteria and reduce mixing power, making your baked goods less perfect each time (source: Kitchen Tech Insights, 2026).
But here’s the thing—deep cleaning can seem daunting. I used to dread the thought of dismantling and scrubbing those tiny crevices. Early on, I made a costly mistake: I relied solely on dish soap and water, assuming that was enough. It wasn’t. That oversight left residual grease, scars from dried dough, and a few disappointments in the oven. If you’re tired of battling stubborn residue, this guide is your solution.
So, if you’ve faced those pesky, hard-to-clean whisk attachments, stick around. I’ll share practical, tried-and-true methods to restore your tools’ shine and performance, inspired by my own experience and expert advice. Ready to leave grime behind and elevate your baking game? Let’s dive into the solutions.
Will these cleaning tricks really make a difference?
I know what you’re thinking—can a bit of scrubbing really change the game? Trust me, neglecting this step is a common mistake I made early on, but once I adopted these deep-cleaning tips, I noticed my attachments worked like new, and my baked goods improved dramatically. Curious? Keep reading, and I’ll show you how to keep your whisk attachments spotless and ready for action at all times.
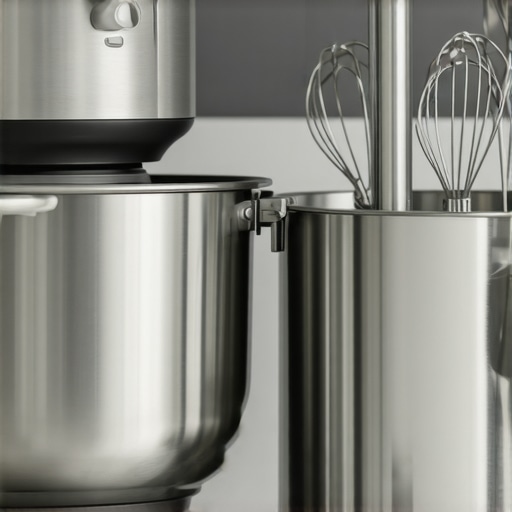
Disassemble and Prepare Your Tools
Start by unplugging your mixer to ensure safety. Remove the whisk attachments carefully, noting how they connect for reassembly. Rinse off loose debris under warm water, just as you’d rinse bread dough from your hands after kneading. Use a small brush or toothbrush to remove baked-on residues from the metal or silicone parts, focusing on crevices and joints where grime hides. If your attachments are dishwasher safe, place them on the top rack for a thorough clean. If not, proceed with manual cleaning.
Soak in Effective Cleaning Solutions
Prepare a soaking solution with warm water and a degreasing dish soap, or opt for a vinegar and baking soda mixture to cut through grease and residues. Submerge the attachments completely, allowing the solution to loosen stubborn dirt — similar to how you soften hardened dough before kneading. For heavy buildup, let them soak for 15-30 minutes. I recall a time I accidentally left mine overnight, and the next day, scrubbing was significantly easier, leaving my tools gleaming and ready for the next baking session.
Scrub and Rinse Thoroughly
Use a soft brush or non-abrasive sponge to scrub away loosened residues, paying close attention to the edges and small holes where dough and grease accumulate. For silicone parts, gentle rubbing is enough; avoid scratching the surface. Rinse thoroughly under warm water to wash away soap and loosened grime. Ensure no cleaning solution remains, as residues can affect your baked goods or cause odors.
Dry and Reassemble Carefully
Pat dry with a clean towel or air dry completely to prevent rust or corrosion, especially on metal parts. Leaning on thorough drying helps maintain the integrity of the attachments over time. Once dry, reassemble following your initial notes, securing all parts tightly. Proper reassembly ensures optimal performance during your next baking run, reducing the risk of parts wobbling or detaching mid-use.
Maintain Regular Cleaning Routine
To prevent stubborn buildup, clean your whisk attachments after every few uses. Think of it like a workout regimen for your tools—consistent effort yields better results and prolongs their lifespan. If you want to explore more about preserving your mixer and attachments, this guide on heavy-duty fixes offers additional tips.

While many home bakers believe that any mixer or whisk attachment will suffice for their dough, the truth is far more nuanced. A common misconception revolves around the idea that all mixers—be they hand or stand models—are interchangeable for every dough type. But in reality, the intricacies of dough consistency, mixer design, and attachment material can significantly influence your baking results. For instance, relying solely on a standard whisk attachment for heavy bread dough can lead to motor burnout or uneven mixing, especially if you overlook the importance of using the appropriate attachment or technique. To truly master dough creation, understanding these finer points is essential.
Another myth I frequently encounter is the belief that higher wattage always translates to better dough handling. While wattage matters, it doesn’t guarantee performance if the mixer lacks the torque or gear design suited for thick yet elastic doughs. Modern *heavy-duty fixes* highlight that gear durability and torque distribution are just as critical as raw power. Using a low-quality or under-spec’d appliance for challenging doughs often results in premature wear or motor failure, a costly mistake many make unknowingly.
Is Your Mixer Optimized for High-Hydration Doughs?
This question trips up many advanced bakers who assume their equipment is ready for anything. High-hydration doughs—think sourdoughs with 80% hydration—demand more from your mixer than just a robust motor; they require attachments designed for flexibility, like silicon-coated whisks, which prevent dough adherence and tearing. Moreover, as experts explain, using improper tools can distort gluten development, compromising texture and crumb. Have you ever fallen into this trap? Let me know in the comments.
Furthermore, many bakers underestimate how vital the shape and material of their whisk attachments are. Rigid metal wires might be ideal for whipping egg whites, but for kneading or heavier doughs, more flexible or silicone-coated options reduce stress on your mixer’s motor and extend attachment lifespan. Bypassing these nuances can lead to frequent replacements or inconsistent results, despite following standard recipes. For insight into durable accessories, check out pro-grade whisk options.
Finally, the misconception that cleaning and maintenance are optional contributes to premature attachment failure. Residue buildup not only hampers mixing efficiency but can also cause corrosion or damage to sensitive components. Regularly inspecting, cleaning, and replacing worn parts ensures your mixer performs at its best, especially when handling doughs that demand consistent torque and stability. Remember, investing in quality attachments and understanding their specific use cases—like those detailed here—can dramatically upgrade your baking game.
Invest in Quality Tools for Long-Term Reliability
Opting for high-quality mixers and attachments is fundamental to ensuring longevity and performance. I personally prefer the heavy-duty fixes recommended by experts, which involve choosing stainless steel or ceramic-coated whisks that resist bending and corrosion. These materials withstand regular use and the rigors of dense dough, saving you money over time. When selecting a stand mixer, I lean towards reputable brands like KitchenAid or Ankarsrum because their durable gear mechanisms and motor warranties provide peace of mind. Remember, investing in the right equipment isn’t just about performance—it’s about minimizing maintenance costs and preventing early failure.
Regularly Maintain and Troubleshoot Your Mixers
Consistent upkeep is key to maintaining your tools’ effectiveness. I recommend establishing a weekly cleaning routine where you disassemble, soak, and scrub attachments. For instance, soaking your whisk in a vinegar-baking soda mixture not only removes stubborn residues but also kills bacteria, as detailed in recent specialist guidance. Additionally, paying attention to motor sounds can alert you to impending issues; a whining or overheating motor may indicate grease build-up or misalignment. Using tools like a small brush for crevices and a microfiber cloth for exterior maintenance can significantly extend your equipment’s lifespan. Remember, addressing minor problems early prevents costly repairs later.
Scaling Up for Continuous Baking Success
As your baking projects grow, so does the demands on your equipment. Upgrading to a more robust stand mixer with features like planetary rotation and larger bowls can streamline baking large batches without sacrificing quality. Planning for potential future needs, I suggest reviewing comparative analyses like stand versus hand mixers in 2024. These insights help you choose equipment that adapts to your evolving skills and volume requirements. Additionally, consider modular attachments such as silicone-coated whisks or dough hooks, which can be easily swapped and cleaned, ensuring versatility and reducing downtime.
Question: How can I maintain my tools to handle thick doughs without failure?
Implementing a cleaning regime that includes inspecting gear teeth for wear and ensuring attachments are properly lubricated can make a big difference. Regularly examine the gear mechanisms as suggested in this comprehensive guide. One practical tip is to apply a light coat of food-grade lubricant on gear parts to reduce friction and prevent stripping. Moreover, avoid overloading your mixer beyond its recommended capacity—doing so stresses the motor and gears, leading to premature failure. By combining diligent cleaning, proper use, and strategic upgrades, you’ll keep your equipment performing flawlessly for years to come. Try applying these maintenance strategies today, starting with a detailed inspection of your current attachments, and see the difference it makes in your baking consistency.
What My Mistakes Taught Me About Dough Do’s and Don’ts
One of the most surprising lessons I learned was how crucial it is to match your attachments to the dough you’re working with. Using the wrong whisk or neglecting to clean it thoroughly can sabotage your baking, leading to inconsistent textures or even motor strain. The lightbulb moment came when I realized that my stubbornly sticky dough was a sign I hadn’t optimized my tools or cleaning routine. This understanding transformed my approach, saving me time and elevating my baked goods.
From Junk Drawer to Baking Arsenal: My Curated Tools for Success
Over time, I assembled a selection of top-tier attachments and accessories that I trust deeply. The stainless steel whisk from this resource has proved resilient against dense doughs while maintaining excellent performance. Silicone-coated whisks from these brands help prevent dough from clinging and reduce wear on my gear. Invest in durable, well-designed tools, and you’ll find baking becomes less about battling equipment and more about creativity.
Planting Seeds of Confidence for Your Baking Journey
Remember, the journey to mastering dough isn’t a sprint but a series of small, confident steps. Whether you’re experimenting with high-hydration sourdough or perfecting a delicate meringue, your tools and their maintenance are the foundation of success. Each clean, well-chosen attachment adds a layer of consistency and joy to your baking routine. So, don’t shy away from caring for your gear; it’s your secret weapon for baking excellence. Ready to refine your technique and discover new heights in baking? Take action today by inspecting your attachments and exploring the tools I’ve mentioned to see the difference they make.
Leave a Reply