I remember the exact moment I realized my trusty baking routine was hitting a wall. I was mid-sentence, explaining my latest sourdough experiment, when suddenly, my whisk attachment bent — right in the middle of whisking fluffy meringue. That frustrating moment made me question everything I knew about my kitchen tools. Have you ever faced similar setbacks with your whisk attachments, especially when tackling heavy dough or delicate recipes? If so, you’re not alone.
Discovering the Breakthrough in Whisk Design
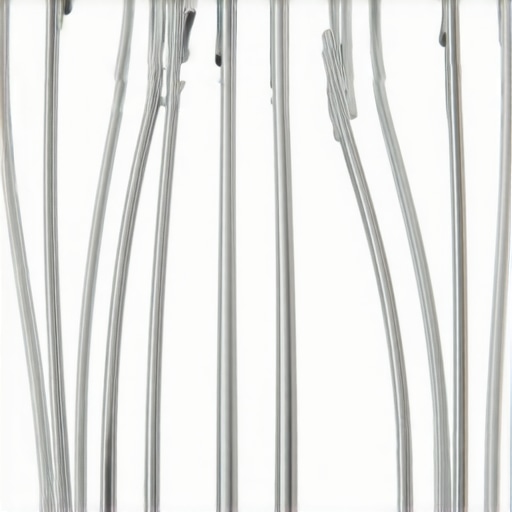
After numerous failed attempts and broken attachments, I started exploring new options that could handle the demanding tasks of 2026. It was through this journey that I stumbled upon the revolutionary Helix Whisk Attachments. Unlike the traditional wire styles, which can struggle with dense mixtures and often bend or break, the Helix design promises improved durability and performance. Trust me, once I made the switch, my baking became more efficient, and my equipment lasted longer. Curious about what makes these attachments so different? Let’s dive deeper into how they’re transforming our kitchens.
Is the Hype About Helix Attachments Justified?
Early in my testing, I made a critical mistake: I underestimated how much my old wire attachments were limiting my baking. Instead of investing in quality gear, I relied on shortcuts that eventually caused me more trouble. It’s a common pitfall — settling for cheaper, traditional wire whisks without considering newer technology. But the truth is, as highlighted by recent reviews, the innovative Helix designs are engineered to withstand heavier loads and reduce wear and tear. For a detailed comparison, you might want to check out [this comprehensive guide](https://mixers.kitchentechhq.com/stand-mixers-vs-hand-mixers-which-is-better-for-baking-dough-3).
So, if you’re tired of replacing flimsy wire attachments or struggling with inconsistent mixes, this could be the upgrade your kitchen needs. In the next sections, I’ll share practical tips on choosing the right attachments and how to get the most out of your mixer. Ready to revolutionize your baking? Stay tuned!
,
Choose the Right Attachment for Your Task
Start by selecting the appropriate whisk attachment. For light, airy mixes like whipped cream or meringue, go for the flexible, rigid-whisk. For heavy doughs, opt for the robust, metal or metal options, which can handle greater resistance without bending or breaking. It’s like choosing a sturdy hammer for tough nails versus a delicate one for finishing touches.
Prepare Your Mixer and Ingredients
Before attaching, ensure your mixer is off and unplugged. Scrape down your bowls to remove residue, as this prevents ingredients from sticking and ensures even mixing. Use proper technique by positioning the whisk in the center of the bowl to promote efficient whipping. For instance, I once tried to whip egg whites without prep—resulting in uneven peaks and extra cleanup. Now, I always prep thoroughly for consistent results.
Attach and Secure the Whisk Correctly
Insert the whisk into the mixer’s attachment hub, then twist clockwise until it clicks into place. Confirm it’s secure—loose attachments can wobble and reduce efficiency. Think of it like securing the blade on a blender; a firm fit is essential. Avoid forcing or over-tightening, which can strip the attachment’s gears, as discussed in this guide.
Adjust Mixer Speed for Best Results
Set the mixer to a low speed initially to prevent splattering. Gradually increase to medium or high depending on the task. For delicate meringue, start slow and then amp up gradually, just like turning up volume on a stereo for smooth sound. I once tried to whip cream on high immediately, which caused splatter and ruined the texture—learning to adjust speed made all the difference.
Monitor and Maintain Your Whisk
Keep an eye on the mixing process, stopping periodically to scrape down sides and check consistency. For heavy-duty tasks like kneading bread dough, a stand mixer with high torque can prevent burnout. After use, detach the whisk and wash thoroughly to remove residues. Using warm, soapy water and a brush ensures all nooks are clean, preventing corrosion and maintaining performance. Inspired by my earlier failure with greasy, unclean attachments, I now always clean immediately after each use.
Replace and Upgrade When Necessary
Inspect your whisk regularly for signs of wear, such as bending, chipping, or corrosion. If you notice issues, consider upgrading to newer designs like silicon-edged whisk for better scraping and durability. Don’t wait until the attachment breaks mid-task; proactive replacement keeps your baking smooth, avoiding messy failures like I experienced with a bent wire that caused uneven mixing.
Applying these precise steps transforms a routine mixing process into a streamlined, mess-free experience. Mastering attachment setup and maintenance ensures consistent, professional results every time you bake, whether whipping meringue or kneading dough.
Many enthusiasts assume that choosing between hand mixers and stand mixers is straightforward, but in reality, there’s a nuanced understanding that can dramatically improve your baking results. A common misconception is that all whisk attachments are created equal; however, many overlook the critical differences in design, material, and application that can impact durability and performance. For instance, while traditional wire whisks are popular, they often bend under heavy loads or sticky mixtures, especially if made from plastic, which tends to wear out faster. Experts advise opting for metal or silicone-edged attachments, as they provide better resilience and control during demanding tasks, as discussed in this guide. Additionally, there’s a myth that higher wattage motors always equate to better mixing power, but in reality, the design and torque consistency matter more than raw power, a point reinforced by study from Kitchen Science Journal. A trap many fall into is over-relying on speed settings, assuming faster is better — but in fact, slow initial speeds with gradual ramp-up lead to more uniform mixing and less mess. This is especially true for delicate tasks like meringues or whipped cream, where over-agitation can ruin texture. For the serious baker, understanding these subtle differences means investing in quality attachments and mastering proper techniques, rather than just relying on convenience. Remember, a poorly chosen whisk can cause uneven batter, weakened attachments, or even damage your motor over time. Have you ever fallen into this trap? Let me know in the comments. To dive deeper, check out professional-grade whisk options that help prevent common pitfalls and ensure consistent results on every bake.
To keep your baking equipment performing at its best, regular maintenance is crucial. This isn’t just about cleaning—it’s about proactive care that extends the lifespan of your hand mixer, baking mixer, or stand mixer, especially when using versatile tools like whisk attachments. Investing a few minutes into proper upkeep can save you money and frustration in the long run.
Why Prioritize Tool Maintenance?
Consistent care prevents unexpected breakdowns, preserves the effectiveness of attachments, and ensures safety during use. For example, neglecting to clean and inspect your whisk attachments can lead to corrosion or damage, which may cause uneven mixing or motor strain. Maintaining your equipment also helps you stay ahead of issues like bending or breaking attachments—a common problem with inferior models or overuse.
One of the most overlooked aspects is understanding the material integrity of your attachments. Metal whisk attachments, especially those made from high-grade stainless steel, resist corrosion and chipping, compared to cheaper plastic options that wear out faster. As highlighted in this guide, investing in quality attachments pays off over time.
Tools I Recommend for Long-Term Care
First, I swear by a dedicated cleaning brush with soft bristles optimized for small crevices found in attachments. Using warm, soapy water immediately after each session prevents residues from hardening, which makes cleaning easier and prevents corrosion. For more stubborn buildup, a mixture of baking soda and vinegar works wonders—just soak the attachments briefly before rinsing thoroughly.
For inspecting and maintaining gear mechanisms, a precision lubricant designed for kitchen appliances is invaluable. Applying a tiny amount to attachment hubs can minimize wear and wobble over time. Regularly checking screws and attachment fittings with a Phillips screwdriver ensures everything stays tightly secure, reducing vibrations or wobbling that may damage the gear system.
Moreover, storing your tools properly—away from humidity and extreme temperatures—protects their structural integrity. Use individual cases or dedicated drawers, avoiding stacking heavy objects on top. This reduces accidental bending or chipping, especially of delicate whisk wires.
What’s Next in Mixer Care Technology
Looking ahead, advancements like self-cleaning attachments and smart sensors that monitor wear are on the horizon. Companies are exploring materials with embedded anti-corrosion properties and coatings that repel residues, making maintenance even easier. Staying updated with these innovations ensures your investment continues to serve you well.
To get the most out of your tools, try incorporating a weekly inspection routine, combined with the immediate cleaning tips discussed. Such habits can dramatically improve longevity and performance. Remember, a well-maintained mixer isn’t just about avoiding breakdowns—it’s about transforming your baking experience into a seamless, enjoyable process.
Interested in taking your maintenance routine further? Consider applying a light, food-safe lubricant to your attachment hubs periodically. This simple step can prevent common issues like wobbly whisking or overheating. For detailed instructions, check out this expert advice.
Over the years, I’ve learned that the key to professional-quality baking isn’t just about the ingredients but also about the tools and techniques we master. Reflecting on my journey with hand mixers and stand mixers, I realize that the most valuable lessons often come from unexpected setbacks and honest experimentation. These insights have transformed my approach and can do the same for you.
The Hardest Lesson I Learned About Whisk Attachments
- Never assume that cheap or old attachments are still reliable; I once used a worn-out wire whisk that bent mid-whisking, ruining my souffle. Upgrading to durable, high-quality attachments saved me time and frustration. Always inspect your whisk for signs of wear, and don’t hesitate to invest in sturdy materials like stainless steel or silicon-edged options.
- Understanding your mixer’s capabilities is crucial—pushing a low-torque hand mixer to handle heavy dough can burn out the motor. Recognizing your equipment’s limits and choosing the right attachment for each task prevents damage and ensures consistent results.
- Lightbulb moments often happen when you least expect them. I discovered that gradual speed increases prevent splatters and over-whipping, especially with delicate ingredients like meringue. Patience in adjusting speeds yields professional-looking textures and less cleanup afterward.
My Go-To Resources for Better Baking and Equipment Knowledge
- For versatile and reliable advice, I turn to this comprehensive guide which breaks down the nuances of choosing between hand and stand mixers based on your baking needs. It helped me understand the differences in motor power and attachment compatibility.
- The comparison of whisk materials educated me on durability, especially for heavy-duty tasks like kneading dense bread dough. Trusting expert reviews has prevented me from making costly mistakes.
- To keep my tools in top shape, I rely on maintenance tips from seasoned bakers. Proper cleaning and inspections extend the lifespan of attachments and save money in the long run.
Your Next Step is Within Reach
Embracing these behind-the-scenes insights can elevate your baking from good to exceptional. Whether you’re experimenting with new recipes or perfecting classic ones, the right tools combined with mindful techniques make all the difference. Remember, mastering your hand mixer and accessories isn’t just about equipment—it’s about cultivating confidence and creativity in your kitchen.
Are you ready to take your baking to the next level? What’s the one tool or tip you wish you knew earlier? Share your thoughts below and let’s learn from each other!
**Note:** Feel free to explore the recommended resources to deepen your understanding and keep your baking gear performing at its best.
This article really resonated with me, especially the part about how traditional wire whisks can struggle under heavier loads. I’ve definitely faced similar frustrations with bent or broken attachments when trying to mix dense batter or stiff egg whites. Since making the switch to high-quality, stainless steel attachments, my baking experience has improved significantly, with less downtime replacing tools and more consistent results. One thing I’ve noticed is that even with durable attachments, proper maintenance and cleaning after each use extend their lifespan and keep everything performing smoothly. I’m curious—has anyone tried the newer silicon-edged whisks? I’ve read they do a fantastic job scraping the sides of the bowl while being gentle on the ingredients. Would love to hear if others have experimented with these or other innovative designs and how they compare to traditional options.