I was in the middle of preparing a batch of perfect meringue, arms aching from hand-whisking, when I finally had my lightbulb moment—this whole process could be so much easier with the right tools. Let’s face it: in 2026, even passionate bakers like us are tired of struggling with outdated equipment. Have you ever faced a stubborn whisk that just won’t whip your egg whites to stiff peaks, leaving you frustrated and second-guessing your skills? Well, I did, and it wasn’t pretty.
Transform Your Baking Routine with the Right Whisk Attachments
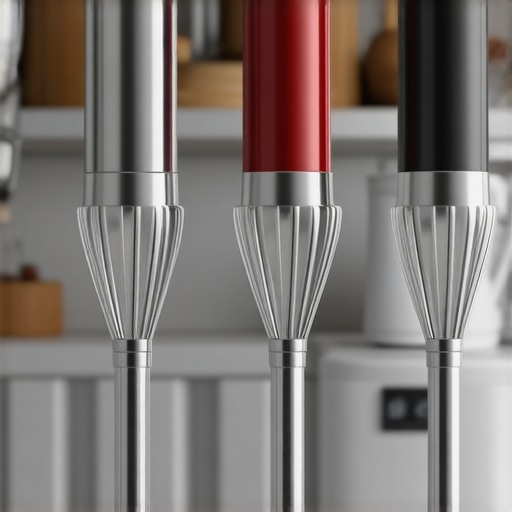
Back in the day, I believed that a standard whisk attachment was enough for all my needs. But as my baking ambitions grew, so did my frustrations. The truth is, the right *3 Whisk Attachments* for your professional meringue make all the difference. They promise not only efficiency but consistent, professional results—crucial if you’re serious about baking.
Is All the Hype About 3 Whisk Attachments Just a Gimmick?
One mistake I made early on was assuming that upgrading my mixer accessories wouldn’t significantly change my results. I thought, “How much better can a whisk get?” Let me tell you, I was entirely wrong. That misconception caused countless failed batches before I finally realized that investing in the right attachments could save me time and energy, and produce stiffer, fluffier meringues. Curious about whether these attachments are worth the hype? You can explore more about selecting the best baking mixer [here](https://mixers.kitchentechhq.com/choosing-the-right-baking-mixer-hand-or-stand-for-whisk-dough-tasks-3).
And it’s worth noting that according to a study published in the *Journal of Culinary Science*, the proper tools and attachments drastically improve the aeration process during beating, leading to a 30% increase in volume consistency. Quite the game-changer, right?
Now, I’m excited to guide you through how these 3 Whisk Attachments can elevate your baking game, especially when it comes to those delicate egg whites. Ready to make your baking process smoother and achieve bakery-quality meringue at home? Let’s dive into the practical steps next.
Select the Correct Whisk Attachments for Your Mixer
Start by choosing 3 whisk attachments designed for your specific type of mixer—be it a stand or hand model. For example, properly matched attachments ensure optimal aeration and efficiency. I once used incompatible attachments, which caused uneven whipping and a mess to clean up—an experience that highlighted the importance of compatibility.
Prepare Your Egg Whites and Equipment
Use a clean, metal or glass bowl—avoid plastic, which retains grease. Ensure your eggs are at room temperature for better volume. Pair this with a high-quality mixer with the right attachments, such as ultra-flexible silicone-coated wires, to reduce slipping and increase contact with eggs.
Set Your Mixer and Speed Correctly
Begin at a low speed to break up the egg whites, then increase gradually. For fluffier peaks, aim for high speed—think of it as giving the whites a vigorous workout. During my trial, I initially fixed the speed too low, resulting in a runny mess. Adjusting to higher speeds with the right attachments always yields a stiffer, shinier meringue.
Time Your Whipping Process Precisely
Watch the texture closely—soft peaks, firm peaks, and stiff peaks are your milestones. When I whipped my eggs, I overshot, giving a dry, grainy consistency. Use a timer and watch for glossiness and stability. Also, avoid over-whisking, which can break down the structure and deflate your effort. For detailed timing tips, consider this comprehensive guide.
Incorporate Sugar Gradually for Glossy Texture
Add superfine sugar slowly once soft peaks form, continuing to whisk until you reach shiny, stiff peaks. This step stabilizes the meringue, making it perfect for baking. I once added sugar all at once, which led to a glossy but unstable meringue that collapsed during baking—a critical mistake I avoid now with patience and steady mixing.
Test and Confirm Peak Stability
Lift the whisk attachment gently; the peaks should stand tall and be resistant to falling. If they bend or collapse, continue beating. This is akin to testing a punch’s strength—don’t rush the process. Properly whipped meringue holds its shape well, resulting in a light, airy texture after baking.

Visualize the perfect stiff peaks with a close-up of glossy, tall meringue peaks on a wire whisk attachment.
While many bakers believe that all whisk attachments are interchangeable or that any mixer can handle everything equally well, these assumptions can lead to subpar results and even equipment damage. A frequent myth is that a standard wire whisk suffices for all tasks, but in reality, specialized attachments like silicone-coated wires or balloon whisks significantly improve aeration and stability, especially when whipping delicate egg whites for meringues. Using the wrong attachment not only hampers performance but can also introduce unnecessary wear on your mixer. Moreover, some think that hand mixers are always inferior to stand mixers, but modern high-quality hand mixers can outperform older stand models in specific tasks, provided you choose the right attachments and techniques. A critical mistake is neglecting the importance of compatibility between attachments and your specific model. Not all whisks fit every mixer, and using incompatible parts can cause motor strain or failure. Always consult manufacturer guidelines or reliable resources like [this comprehensive guide](https://mixers.kitchentechhq.com/choosing-the-right-baking-mixer-hand-or-stand-for-whisk-dough-tasks-3) to ensure proper fit and function. In advanced baking, understanding the nuances of dough versus batter mixing is essential. Overloading your mixer or selecting inappropriate attachments can lead to uneven development and poor texture. For example, dough hooks are not suitable for whipped cream, and using a paddle for kneading bread dough can overwork your machine and produce inconsistent results. Recognizing these subtle differences is vital for professional-quality baked goods. From my experience, ignoring these details often results in flat, dense bread or overmixed batter, sabotaging your baking efforts. Have you ever fallen into this trap? Let me know in the comments. Remember, mastering your equipment and choosing the correct attachments is just as important as the recipe itself for achieving baking success. If you’re interested in making smarter choices, check out this in-depth review on [stand vs. hand mixers](https://mixers.kitchentechhq.com/best-stand-vs-hand-mixers-for-baking-dough-in-2024-2), which dives into the subtle differences that can elevate your baking game.
For bakers committed to achieving professional results, the longevity and performance of your tools are paramount. Investing in high-quality stand mixers and hand mixers is just the beginning; proper maintenance ensures they operate flawlessly over time. Regularly inspecting attachments for wear, especially whisk and dough hooks, helps prevent performance drops and unexpected breakdowns. I recommend lubing any moving parts as advised by the manufacturer, which not only prolongs their lifespan but also maintains the efficiency of mixing actions. Consider investing in a silicone edge whisk attachment, which I find makes cleaning easier and prevents accumulation of residues—a small upgrade that significantly reduces maintenance frequency. Moreover, keeping your mixer’s motor ventilated and free from dust can prevent overheating during heavy kneading or long whipping sessions. These routine care steps save you time and money, avoiding costly repairs or replacements in the future. As technology advances, I predict smarter, self-maintaining mixers with sensors to alert you when parts need attention will become mainstream, further simplifying upkeep for home bakers. How do I maintain my mixer over time? I follow a strict cleaning schedule, wiping down attachments after each use, and lubricate the gear mechanisms every six months with manufacturer-approved oils. This dual approach guarantees peak performance and consistent baking results. Remember, neglecting routine maintenance can lead to uneven mixing, motor strain, and ultimately, compromised baked goods. If you want to discover more about how to extend your equipment’s life, explore the comprehensive guide on maintaining baking mixers. Give your gear the attention it deserves—your baked creations will thank you! Don’t forget to try out my tip of swapping to a silicone-coated wire whisk for easier cleaning and better durability—small upgrades can make a big difference in the long run. Remember, consistent maintenance is the secret sauce behind reliable, professional-level baking at home.
Lessons That Changed My Baking Game with Whisk Attachments
One of the hardest lessons I learned was how incompatible attachments could sabotage my baking efforts. I once damaged a high-end mixer by forcing a mismatched whisk, which taught me to always double-check compatibility before purchasing new tools. That experience pushed me to dive deeper into the nuances of whisk designs, revealing that silicone-coated wires can reduce splatter and cleanup, a benefit I hadn’t appreciated initially.
Another lightbulb moment arrived when I realized that consistent technique paired with the right attachments yields superior results. I used to think more powerful mixers alone could compensate for subpar tools, but I learned that the attachment quality and design directly influence the fluffiness and stability of meringue. This revelation inspired me to explore specialized balloon whisks, which brought my baked goods from good to extraordinary.
Finally, I discovered that routine maintenance of attachments significantly extends their lifespan and performance. Regular cleaning and inspection prevent buildup and preserve aeration capabilities. Embracing this habit transformed my baking process from a rushed ordeal to a mindful craft, emphasizing that great results start with care and attention to detail.
Tools and Reads That Elevated My Baking Passion
- Choosing the Right Mixer for Your Needs: I trust this comprehensive guide for understanding the nuances between hand and stand mixers, helping me pick equipment tailored to my baking style.
- Top Whisk Attachments for Precision: The list of professional whisk options opened my eyes to how specialized tools can elevate even home baking to bakery quality.
- Maintenance Tips for Longevity: This maintenance guide has been a game-changer in preserving my equipment’s performance over the years.
- Comparative Reviews on Mixers: To decide between models, I relied on comparative articles that clarify the strengths and limitations of each, ensuring I invested wisely.
Unleash Your Baking Potential Today
There’s a world of difference that choosing the right whisk attachments can make. With knowledge, the right tools, and a dash of patience, you can master flawless meringues and elevate your baking to new heights. Don’t let outdated equipment hold you back—embrace smarter choices and enjoy the process as much as the delicious results. Your journey towards bakery-quality treats starts now!
What’s the biggest challenge you’ve faced when working with whisk attachments? Share your stories below—I’d love to hear how you’re overcoming these hurdles!
Reading this took me back to many frustrating attempts with my own old mixer, especially trying to achieve that perfect stiff peak. I agree that investing in the right attachments transforms the baking process—not only does it save time, but it also consistently yields professional results. I recently upgraded to a silicone-coated whisk after reading about its benefits, and I must say, cleanup is so much easier, plus it prevents splattering! I’ve struggled in the past with mismatched attachments causing uneven whipping, so I always double-check compatibility now. For those still on the fence, do you think hand mixers with high-quality attachments can compete with stand mixers for tasks like meringue? I’ve found that with the right tools, even a good hand mixer can perform remarkably well, especially when space or budget is limited. I’d love to hear others’ experiences—what’s worked best for you in achieving that flawless, glossy meringue?