Have you ever stood in your kitchen, desperately trying to mix a stubborn ball of dough with a hand mixer that keeps jamming, only to realize you’re spending more time wrestling than baking? I’ve been there. That frustrating moment when your hand mixer stalls mid-whisk, promising to deliver perfect batter, but instead leaves you dripping in sweat and dough. It was a lightbulb moment for me—realizing I needed a reliable, powerful tool to turn my baking disasters into successes.
Why Choosing the Right Mixer Changes Your Baking Game
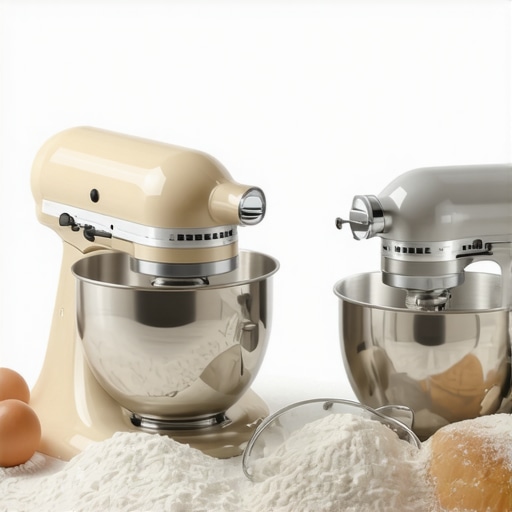
Deciding between a stand mixer and a hand mixer isn’t just about how much space they take up. It’s about how you bake, the kinds of recipes you love, and how much effort you want to invest. Early in my baking journey, I made the mistake of thinking a hand mixer was enough for all my needs. That bought me endless frustration when dealing with dense bread dough or thick cookie batter. I wish I’d known then what I know now—that understanding their strengths and limitations can save you time, effort, and a lot of mess. Want to avoid the same pitfalls? I’ll guide you through the essentials to match your baking style with the best tool. Want to dive deeper into this topic? Check out this detailed [Ultimate Buying Guide for 2024](https://mixers.kitchentechhq.com/stand-mixers-vs-hand-mixers-ultimate-buying-guide-2024) to help you make an informed decision. Before we get to the practical comparisons, let me address a common doubt:
Is investing in a stand mixer really worth it?
Many of us worry about the cost and whether it’s just another appliance gathering dust. I was skeptical too, until I realized how much a good stand mixer could streamline my baking process—turning what used to be a chore into a joy. Just remember, the best choice depends on your baking habits. If you’re curious whether you’re making the right pick, explore this [comprehensive guide](https://mixers.kitchentechhq.com/choosing-the-best-baking-mixer-stand-or-hand-mixer-for-perfect-dough). Now, let’s get into the details and find your perfect match in the world of mixers.
Prepare Your Ingredients and Equipment
Begin by gathering all your ingredients and ensuring your mixer attachments are clean and properly assembled. For dense doughs, a sturdy stand mixer with a dough hook is ideal, but for lighter tasks, a hand mixer may suffice. I once started making a bread dough with my hand mixer, only to find the dough climbing up the beaters—highlighting the importance of choosing the right tool for the task.
Choose the Correct Attachment for the Job
Use a dough hook for kneading bread or pizza dough; it mimics the hand-kneading motion and provides better gluten development. Whisk attachments are suited for incorporating air into lighter batters. When I made my first batch of brioche, switching to the whisk attachment allowed me to achieve a fluffy, airy texture quickly—something that would have taken forever with a standard spoon.
Set the Mixer to the Appropriate Speed
Start slow to combine ingredients without spattering, then gradually increase speed for thorough mixing. For sticky doughs, keep the speed low to prevent ingredients from flying out. I once cranked the mixer too high while combining cookie dough, resulting in a flour cloud that settled everywhere—so, patience and gradual speed increases matter.
Monitor and Adjust as You Mix
Keep an eye on the dough’s consistency. If it appears overly sticky or too dry, adjust by adding small amounts of water or flour. This attention to detail ensures the right gluten structure. Using visual cues—like the smoothness of the dough or its pullability—can guide your adjustments. I once added a bit of extra water to my dough, which made kneading easier and resulted in a better texture.
Ensure Proper Mixing Time
Follow recipe guidelines for mixing duration; under-mixing can lead to dense baked goods, while over-mixing may result in tough texture. Using a timer or observing the dough’s appearance helps maintain consistency. I recall mixing a batch of Italian bread, where I stopped just as the dough became elastic and smooth—achieving perfect results.
Clean and Store Attachments Promptly
After mixing, clean the attachments thoroughly to prevent residue buildup. Store your gear properly to prolong its life. I once neglected cleaning my dough hook, which led to gum and residue hardening—making future cleanups more challenging. Regular maintenance keeps your equipment performing at its best.
Implementing these steps with your chosen mixer—whether a versatile stand model or a manageable hand device—can significantly improve your dough results. Remember, selecting the right equipment and mastering these core techniques are fundamental. For detailed comparison and advice tailored to your specific needs, explore this guide on choosing the best mixer for dough.
While many home bakers believe that all mixers and attachments serve the same purpose, there’s a common misconception about how whisk attachments function across hand and stand mixers. Many assume that using a whisk guarantees a fluffy batter every time, but in reality, the effectiveness depends on several subtle factors like attachment design, speed settings, and mixing technique. One graduate of culinary science even pointed out that a poorly designed whisk can introduce unwanted air bubbles, leading to dense or uneven textures, especially in delicate recipes like soufflés or mousses.
Are All Whisk Attachments Created Equal for Complex Baking Tasks?
Contrary to popular belief, not all whisk attachments are optimized for every task. Scientific studies suggest that the material, shape, and size of the whisk influence how thoroughly air is introduced and mixed, particularly when combining ingredients at different stages. For more detailed insights, check out [this expert guide](https://mixers.kitchentechhq.com/choosing-the-best-baking-mixer-stand-or-hand-mixer-for-perfect-whisk-attachments), which explains how selecting the right whisk can make a significant difference.
A common trap many fall into is upgrading their mixer without considering attachment compatibility or neglecting the importance of technique. For instance, over-reliance on high speed to compensate for a suboptimal whisk design can lead to splattering or inconsistent mixing. Additionally, many overlook that the type of ingredients and their temperature can affect how well the whisk performs; cold egg whites whip differently than room temperature ones, even with the same equipment. Explore [this comprehensive guide](https://mixers.kitchentechhq.com/ultimate-guide-to-choosing-the-best-baking-mixer-stand-or-hand-in-2024) to understand how nuanced these choices can be.
Let’s dig deeper into why the myth of universal whisk suitability persists. Some marketers claim that their attachments work perfectly with regardless of mixer type or task, but seasoned bakers know that specialized design matters—especially for complex textures. An overly simplistic approach involving just a quick turn of the speed dial often leads to ‘oops’ moments like collapsing whipped peaks or incorporating too much air, ruining delicate recipes. Remember, mastering these subtleties can elevate your baking from average to professional-level results.
Have you ever fallen into this trap? Let me know in the comments. The key takeaway: paying close attention to attachment quality, compatibility, and technique is crucial. Why settle for generic when the right choice can bring consistency and excellence to your baked goods? Choose wisely, and your kitchen will thank you.
Choosing Tools That Last
Investing in high-quality attachments and accessory tools is crucial for long-term baking success. I personally prefer stainless steel dough hooks and whisks because they resist corrosion and maintain optimal performance over years of use. When selecting attachments, ensure they are compatible with your specific mixer model—many brands now offer universal fittings, but double-check compatibility by consulting manufacturer specifications or reliable reviews. Using the right tools not only enhances efficiency but also reduces wear and tear on your equipment, saving you money in the long run.
Maintaining Your Mixer for Peak Performance
Regular upkeep is key to keeping your mixer functioning smoothly. After each use, promptly detach and wash attachments with warm, soapy water or run them through a gentle dishwasher cycle if dishwasher-safe. Wipe down the body and control panel with a damp cloth, avoiding abrasive cleaners that can damage the surface. Periodically check and tighten any loose screws or fittings, and consider lubricating moving parts according to the manufacturer’s guidelines—this prevents operational issues and extends equipment lifespan. For detailed maintenance routines, many experts recommend referring to your unit’s user manual or trusted appliance maintenance resources.
How do I maintain my mixer over time?
Establish a routine cleaning schedule after every baking session—this prevents dough residue from hardening and causing operational hiccups. Additionally, keep the motor vents free of dust and crumbs to prevent overheating. Saving your mixer from exposure to extreme temperatures and avoiding overloads are simple yet effective strategies. For instance, never attempt to mix extremely dense doughs beyond your machine’s recommended capacity, as this accelerates wear. A good practice I follow is to periodically inspect the power cord and plug for damage, replacing them if necessary to ensure safe operation. Incorporating these maintenance habits will ensure your investment continues to deliver reliable performance for years to come.
Tools I recommend for long-term baking success
Personally, I swear by the Kitchenaid Commercial Series Stand Mixer. Its robust construction and powerful motor handle dense doughs effortlessly, and the variety of attachments available—like the heavy-duty dough hook and wire whip—enable versatility without compromising durability. Upgrading to a model with a planetary mixing action ensures even ingredient incorporation, reducing mixing times and frustration. If space is a concern, compact models like the KitchenAid Artisan Mini offer excellent performance in a smaller footprint, but regular maintenance remains essential regardless of size. To stay ahead, I regularly update myself with expert reviews and manufacturer updates—check out the detailed guide on choosing durable mixers.
Looking to optimize your dough preparation? Try applying a light coating of food-grade lubricant to your mixer’s gear mechanisms every few months. This small step can significantly reduce operational noise and extend parts’ life, according to technical manuals from reputable appliance manufacturers. Incorporating this advanced tip can prevent unexpected breakdowns, especially if your mixer sees frequent heavy-duty use.
Remember, the longevity of your baking gear hinges on strategic selection, regular upkeep, and knowing when to upgrade. Keep these principles in mind, and you’ll enjoy consistently perfect doughs and batters with less frustration and more fun in your kitchen.
The Hardest Lesson I Learned About whisk attachments,hand mixer,stand mixer,baking mixer,dough mixing
One of my most eye-opening experiences was realizing that not all whisk attachments are created equal—and that their design can dramatically affect my baked goods’ texture. I once used a generic whisk with my hand mixer, only to find my meringues coming out flat and dense. That taught me the importance of selecting purpose-built attachments that match the recipe’s delicate requirements. Additionally, I learned that rushing to increase mixer speed to speed up the process often leads to splattering and uneven mixing, especially with sticky doughs or airy batters. Patience and understanding the nuances of each attachment can make all the difference in achieving professional results.
3 Myths About whisk attachments,hand mixer,stand mixer,baking mixer,dough mixing That Held Me Back
Myth 1: All whisk attachments perform equally across machines. Actually, their effectiveness relies heavily on the design and fit, making compatibility and quality crucial. Myth 2: Using the highest speed shortens mixing time. In truth, overspeeding can compromise texture, especially with fragile ingredients like egg whites or whipped cream. Myth 3: Upgrading to a more expensive mixer automatically improves results. Not necessarily—choosing the right attachments and mastering technique often yields better outcomes than simply paying more.
What Experts Won’t Tell You About whisk attachments,hand mixer,stand mixer,baking mixer,dough mixing
Most professionals agree that selecting the optimal whisk attachment involves understanding the material, shape, and size, which influence air incorporation and ingredient integration. For instance, balloon whisks made from polished stainless steel are excellent for delicate tasks like folding egg whites, but may be less effective for heavy doughs. Another insight is that regular maintenance—like cleaning and inspecting attachments—ensures consistent performance over time. I’ve come to trust specialist brands that emphasize engineering quality, like KitchenAid’s premium options, which I personally use for their durability and perfect fit. Exploring this guide helped me understand how nuanced the choice of attachments truly is— and how it can dramatically elevate your baking projects.
My Essential Toolkit for Whisking and Dough Making
To consistently achieve perfect textures, I pair my KitchenAid Artisan stand mixer with high-quality attachments like the stainless steel balloon whisk and durable dough hook. These tools have stood the test of time and helped my confidence grow in tackling complex recipes. I also keep a few specialty tools, like silicone spatulas and scraper attachments, which facilitate ingredient folding without deflating airy components. For comprehensive advice on selecting high-performance tools, I recommend checking this trusted resource. Investing in the right equipment isn’t just about convenience— it’s about baking with joy, consistency, and pride.
Your Turn to Try
Now that you’re equipped with insider wisdom and curated tool suggestions, it’s your chance to put these insights into practice. Remember, mastering your whisk attachments and choosing the right mixer can transform your baking experience from frustration to celebration. Don’t shy away from experimenting with different speeds, techniques, and tools—that’s where real growth happens. The future of your baking success starts today, and I believe in your ability to create delectable, flawless treats at home.
What has been your biggest challenge when using whisk attachments or choosing between a hand and stand mixer? Share your story below—I’d love to hear how you’re elevating your baking game!
,
Leave a Reply