I remember the first time I attempted to knead a dense bread dough by hand. My arms ached, my patience waned, and I started questioning my entire baking endeavor. That lightbulb moment made me realize: there’s a reason these kitchen gadgets exist. The right mixer can transform a time-consuming chore into a joy, but choosing between a stand mixer and a hand mixer isn’t always straightforward. This dilemma isn’t just about convenience; it impacts the quality of your baked goods and your overall baking experience. Today, I’ll help you navigate this choice based on real-world insights and personal trials.
Why Choosing the Right Mixer Matters for Your Baking Success
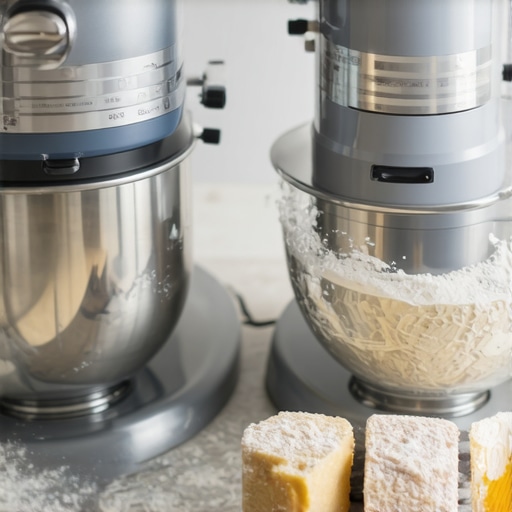
When I began baking more seriously, I underestimated the importance of the right equipment. I used a basic hand mixer for everything, from whipping cream to kneading heavy doughs. Initially, it seemed sufficient, but I quickly hit its limits. My mixtures were inconsistent, and I often found myself doubling the effort or switching tools mid-recipe. It wasn’t until I invested in a good stand mixer that I saw a dramatic improvement. According to expert advice, the right mixer can make all the difference in achieving perfect textures and consistent results. For more detailed comparisons, you might want to check out the comprehensive guide on [stand mixers vs hand mixers](https://mixers.kitchentechhq.com/stand-mixers-vs-hand-mixers-which-is-better-for-dough-baking-success).
Is a fancy, expensive mixer actually worth the hype?
I once hesitated to splurge on a stand mixer, fearing it was just another kitchen gadget that would collect dust. My early mistake was assuming that a cheaper model would do the job — spoiler: it didn’t. Cheap mixers often lack power and durability, especially for tasks like kneading stiff bread or large batches of dough. Investing in a quality mixer pays off in the long run, and it’s worth considering the most versatile options to match your baking needs. Curious about what models stand out in 2024? You might find this [ultimate guide to choosing the right mixer](https://mixers.kitchentechhq.com/ultimate-guide-to-choosing-the-best-baking-mixer-hand-or-stand-in-2024) helpful.
So, what’s the best choice for you? Are you still wrestling with your manual whisk, or ready to upgrade your baking game? Let’s explore how to select the perfect mixer for your kitchen adventures.
Selecting the Right Mixer for Your Dough
Begin by assessing your baking frequency and dough types. If you knead bread weekly or make heavy doughs, a stand mixer with a powerful motor (look for wattage above 300W) is ideal. For occasional baking or lighter tasks like whipping cream, a hand mixer suffices. To test a stand mixer, place a small batch of bread dough and run it at medium speed—listen for the motor’s steadiness. Poor performance here indicates insufficient power and potential overheating during prolonged kneading.
Choosing Attachments That Match Your Needs
Focus on whip, dough hook, and paddle attachments. The dough hook is like a sturdy arm that twists through dense bread; it often features spiral or C-shaped designs for optimal kneading. The wire whip is best for egg whites and cream, incorporating air efficiently. Be aware that some mixers come with universal attachment hubs, allowing you to expand functionality with optional accessories, which is useful if you plan to diversify your baking repertoire. An example: I used a stand mixer with a planetary action that ensures thorough mixing—no more spots left unmixed, especially when handling large batches.
Mastering Dough Mixing Techniques
For kneading bread dough, the key is consistency and avoiding under or over kneading. Use the paddle attachment for initial mixing and switch to the dough hook once ingredients combine. When using a stand mixer, set it to medium-low speed—speed 2 on most models—to mimic manual kneading. During my own experience, I started a batch of sourdough by hand, but after 10 minutes and tired arms, I switched to my stand mixer, which kneaded smoothly for 8 minutes—saving time and effort while achieving gluten development.
Managing Mixing Time and Temperature
Overmixing leads to dense bread or tough dough. Use reliable timers or the mixer’s built-in indicators to avoid this. Keep in mind, warm environments accelerate gluten development; chill your ingredients or work in cooler spaces if your dough becomes too sticky or elastic. During a humid summer, I increased mixing time slightly and noticed my dough was more elastic but still manageable without sticking excessively.
Maintaining and Troubleshooting Your Equipment
Regularly clean attachments and wipe down the motor housing. If your mixer starts making unusual noises or vibrates excessively, check that attachments are correctly seated and not worn out. For prolonged use, periodically oil moving parts if your model permits. I once neglected to tighten the dough hook properly—resulting in a wobble—and quickly learned the importance of attachment security. Consult your model’s guide (see the ultimate guide) to troubleshoot specific issues and optimize performance.
When it comes to mixing ingredients with various kitchen tools, many enthusiasts fall prey to misconceptions that can hinder their baking results. One pervasive myth is that the type of whisk attachment used doesn’t significantly impact aeration or texture. In reality, the design and purpose of each attachment—whether a balloon whisk, wire whip, or paddle—are nuanced, and choosing the wrong one for a specific task can lead to dense or uneven outcomes. For example, believing that any bowl and whisk will suffice for whipping egg whites overlooks the importance of gentle motion and proper equipment, which can result in insufficient volume and stability. It’s a common trap to assume that hand mixers can replace stand mixers for heavy dough kneading; however, as highlighted in expert sources, attempting to substitute these tools can strain your motor and produce inconsistent gluten development.
Advancing beyond basics, many bakers underestimate the importance of motor power and speed control. Using a low wattage hand mixer on dense bread dough often leads to overheating and burnt-out motors, especially if the attachments aren’t matched properly. Recognizing these nuances is critical. For instance, a stand mixer with a planetary mixing action ensures thorough incorporation, reducing the risk of pockets of flour or underdeveloped gluten. Not aligning your mixer’s capabilities with your baking demands is an advanced mistake that can compromise your results.
Are you aware of the common pitfalls that even experienced bakers fall into with dough kneading? One sophisticated question is how to optimize mixing techniques when working with gluten-sensitive recipes. The answer involves precise control of mixing time and speed to prevent over-gluten development, which can make bread tough. Studies in food science suggest that mixing at too high a speed or for too long increases gluten elasticity excessively, leading to dense bread with poor crumb structure. Using a timer and understanding your equipment’s optimal settings—like medium-low speeds for kneading—are subtle but crucial aspects often overlooked.
Avoiding these advanced mistakes can markedly elevate your baking game. Don’t rely solely on intuition; instead, familiarize yourself with your equipment’s capabilities and limitations. For example, check out expert guides on [choosing the right mixer](https://mixers.kitchentechhq.com/ultimate-guide-to-choosing-the-right-mixer-hand-or-stand-for-baking-success) to ensure your tools support your recipes perfectly. Have you ever fallen into this trap? Let me know in the comments.
Maintaining your mixers and related tools in top condition is key to consistent baking success. I rely on a few specific practices and equipment to keep my gear functioning smoothly over the long haul. One crucial tip is regular attachment cleaning. After each baking session, I disassemble my stand mixer, carefully wash the paddle, dough hook, and wire whip, and ensure all residues of flour and dough are thoroughly removed. This prevents buildup that can hinder performance or cause wear over time. For this task, I use a soft brush and warm, soapy water, emphasizing gentle cleaning to preserve the integrity of the attachments.
Another vital aspect is motor health monitoring. I occasionally inspect the motor housing for dust and debris, using compressed air to blow out any particles that could affect cooling. If your mixer begins to vibrate excessively or makes unusual noises, these are signals to check for attachment misalignment or worn-out parts. Regularly tightening screws and replacing worn components, such as rubber feet or belts, can extend the device’s lifespan significantly. To facilitate proper maintenance, I keep a dedicated toolkit with small screwdrivers, replacement belts, and lubricant recommended by the manufacturer.
Tools I recommend include a soft silicone spatula for scraping batter from the bowl without damaging the coating, and a quality silicone brush for applying lubricants or cleaning solutions. For more detailed maintenance routines tailored to specific models, consult this comprehensive guide.
How do I keep my mixing equipment working flawlessly over time?
Adopting a proactive maintenance approach is my secret to longevity. Follow the manufacturer’s guidelines for lubrication and replacement intervals, and schedule a quarterly checkup of your device’s vital parts. Keep an eye on heat buildup during prolonged kneading sessions; if your mixer gets unusually warm, it may need a rest or a cooling period. As technology progresses, new models include smart diagnostic features—future trends suggest integrated sensors that alert you to upcoming maintenance needs, a feature worth considering for serious bakers.
Remember, consistent care not only extends the life of your baking tools but also ensures your dough gets the perfect treatment every time. Don’t forget to practice these habits and consider investing in quality attachments designed for durability, like spiral dough hooks and planetary mixing heads, which are built to handle intense tasks reliably. For the best results, try implementing a scheduled cleaning routine after each use—your future self will thank you!
In the meantime, explore the ultimate guide to choosing the right baking mixer to ensure your equipment remains a trusted part of your kitchen arsenal. Remember, a well-maintained mixer is the backbone of consistent, professional-quality baked goods.
What I Wish I Knew About Whisk Attachments and Dough Kneading
One of the toughest lessons I learned was that not all mixer attachments are created equal. Early on, I believed a basic wire whip was sufficient for whipping egg whites, but I overlooked how the design impacts volume and stability. It took experimenting with different attachments to realize that choosing the right tool can drastically improve your baking results. The finer details—like proper attachment speed and timing—made me appreciate the nuances that dictate perfect meringues and airy batters.
Another insight came from realizing that heavy-duty doughs demand more than just a powerful motor—they require compatible accessories. I once pushed my old hand mixer beyond its limits with stiff bread dough, only to cause motor burnout. Upgrading to a stand mixer with a durable dough hook taught me that investing in quality equipment pays off, especially for recurring baking projects. Recognizing the importance of the right tools has transformed my approach to kneading and mixing, leading to more consistent and delicious outcomes.
Finally, I discovered that mastering dough development isn’t only about equipment—technique matters immensely. Overmixing can ruin the texture of your bread, making it dense and tough. Using timers and observing gluten development visually helped me refine my process. It’s a delicate balance, and understanding how to control mixing speed and duration, especially during manual versus mechanical methods, is a skill that elevates any baker’s craft. These lightbulb moments confirmed that thoughtful equipment choice combined with attentive technique creates baking success that’s both rewarding and reliable.
Tools That Elevated My Baking Journey
For me, having a versatile set of attachments has been a game-changer. A planetary whisk with adjustable speeds allows precise aeration, making recipes like soufflés and cake batters turn out beautifully. I trust the ultimate guide to choosing the right mixer to help identify models equipped with durable attachments that suit multiple tasks. Additionally, I rely on quality spatulas and cleaning brushes to maintain my gear in prime condition, ensuring longevity and performance.
The book Best Stand Mixers vs Hand Mixers for Baking Dough in 2024 opened my eyes to the subtle strengths and limitations of each, reinforcing that the right match can streamline my baking process and improve results. When selecting tools, I prioritize durability, ergonomic design, and compatibility—traits I found essential through hands-on trials and trusted reviews.
Take Your Baking to New Heights
Now that I’ve uncovered these lessons, I encourage you to embrace the learning curve. Your best baking begins with thoughtful equipment choices paired with attentive technique. Whether you’re kneading rich dough or whipping delicate creams, remember that mastery comes with patience, practice, and the right tools. Ready to elevate your baking adventures? Dive into the ultimate guide to selecting a baking mixer and start turning your culinary dreams into reality. What’s one equipment lesson that changed the way you bake? Share your story below.
Reading this post really resonated with my own baking journey. I used to rely solely on a basic hand mixer for everything, but I soon realized its limitations, especially with heavy bread doughs. Upgrading to a quality stand mixer completely transformed my results—dough development became more consistent, and I saved so much time. One thing I learned the hard way is that not all attachments are created equal; a good dough hook made a huge difference for dense recipes. Also, I think maintaining your mixer regularly can extend its lifespan and keep performance at its best. I’d love to hear from others: what’s been your biggest upgrade in baking equipment that made a significant difference in your results? Has anyone found certain attachments particularly useful for specific recipes?
This post really hits home for me, especially the part about choosing the right mixer based on your baking habits. I started with a basic hand mixer, thinking I could manage everything, but I quickly ran into issues when trying to knead dense bread doughs. I finally invested in a sturdy stand mixer with a powerful dough hook, and it changed my baking game entirely. Now, I can tackle larger batches without the struggle, and my doughs come out with better gluten development. I’ve also learned that maintenance is key—regularly cleaning attachments and checking the motor can prolong the lifespan of your equipment. It makes me wonder, for those who bake infrequently, do you think a high-quality hand mixer still holds enough value, or is a stand mixer a better long-term investment even with less frequent use? I’d love to hear others’ thoughts on balancing budget, storage space, and baking needs.