I remember the moment clearly—standing in my kitchen, flour covering every surface, attempting to knead sticky dough by hand. My arms ached, and my frustration grew. It was then I had my lightbulb realization: I needed the right mixer to make baking less of a workout and more of an art. For years, I struggled with unreliable equipment, wasting time and ingredients, until I finally discovered the difference a good mixer can make. If you’ve ever felt overwhelmed by choices or doubtful if investing in a quality mixer is worth it, you’re not alone. This guide promises to help you cut through the noise and find the perfect match for your baking needs.
Why Choosing the Right Mixer Can Transform Your Baking Experience
When I first started baking seriously, I thought any mixer would do. But I quickly learned that not all tools are created equal. The right hand or stand mixer isn’t just about convenience; it can significantly influence the quality of your baked goods. According to culinary experts, using a mixer suited to your specific tasks can improve consistency, save time, and even prevent common mishaps like overmixing or under-mixing. For example, a sturdy stand mixer with powerful motors and appropriate attachments can handle heavy doughs or multiple egg whites effortlessly, elevating your baking results. Additionally, understanding the features that matter helps you avoid costly mistakes and ensures your investment pays off. Curious about how to identify these features? Dive into our comprehensive guides linked here, which walk you through selecting the ideal mixer based on your baking style.
Is the hype around premium mixers justified?
Early in my journey, I made the mistake of buying a cheap, low-power hand mixer that couldn’t cope with my bread dough. The motor burnt out after a few uses, and I wasted money on a subpar product. That experience made me realize how important it is to choose a reliable, well-built mixer from the start. If you’re tempted to go for the cheapest option or unsure whether splurging on high-end models is worth it, rest assured that quality matters—especially when tackling doughs or delicate whisking tasks. To avoid similar pitfalls, I recommend reading reviews and considering your specific baking needs before purchasing. For a detailed breakdown of what to look for, start by exploring our guide on how to choose the perfect baking mixer.
So, are you tired of inconsistent baking results or battling with your current mixer? If so, stay tuned—next, we’ll explore the key features that differentiate the best models and how to match them to your cooking style. Making an informed choice now can save you time, money, and frustration down the line.
,
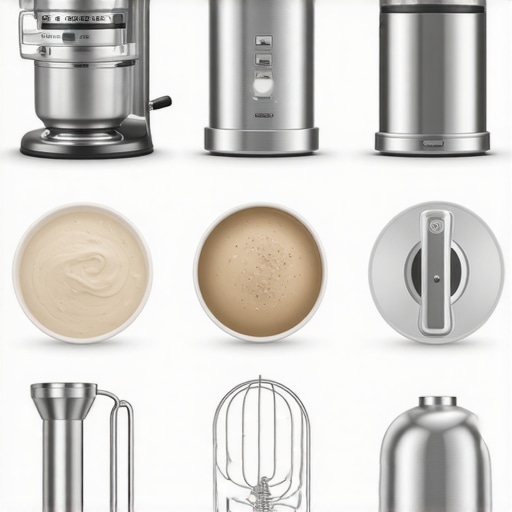
Selecting the Right Mixer for Your Needs
Start by evaluating your typical baking tasks. Are you kneading bread dough or whipping delicate meringues? Recognize that different mixers excel at specific functions. For heavy doughs, a powerful stand mixer with high wattage will save you effort and produce consistent results. For quick, light tasks like beating eggs, a handheld mixer might suffice but ensure it has adjustable speed settings. Think of choosing your mixer as selecting the right tool for a job—using a screwdriver for a screw, not a hammer. Be honest about your needs before investing.
Mastering Attachments for Versatility
Attachments expand your mixer’s capabilities, turning a simple device into a multi-tasking powerhouse. Whisk attachments are perfect for airy batters and whipped cream, but only if you use the correct speed. A common mistake is overmixing, which deflates the mixture; use medium speeds for steady incorporation. For kneading dough, dough hooks replicate hand-kneading but require adequate motor power. During my first attempt, I struggled with proper whisking until I learned to use the correct whisk attachment technique, resulting in fluffier desserts.
Optimizing Your Mixing Technique
Timing and method make all the difference. When mixing, start on low speed to prevent ingredients from flying out, then gradually increase. For instance, I once added flour into a wet batter on high speed, causing a massive mess and overworking the gluten, resulting in a tough cake. Instead, I slowed down, added ingredients gradually, and mixed until just combined. Always scrape down the sides of the bowl – it ensures evenly mixed batter or dough. Use the paddle attachment for creaming butter and sugar, applying steady pressure with each turn to activate proper aeration. Remember, patience and precision are key—rushing often ruins the texture or causes uneven mixing.
Understanding the Power and Capacity Limits
Knowing your mixer’s capacity helps avoid overloads or damaged motors. Overloading a stand mixer with excessively large batches can strain the motor, leading to overheating or burnouts. Conversely, using a small mixer for large quantities might result in uneven mixing or motor stall. Observe the manufacturer’s guidelines: most stand mixers specify maximum batch sizes, and hand mixers are typically limited to lighter tasks. I once tried to mix a double batch of bread dough with my hand mixer, which slowed down significantly and nearly burned out my device. Learning to respect capacity limits ensures longevity and performance.
Using the Right Speed Settings
Adjusting speeds according to the task prevents mishaps. For gentle folding or incorporating dry ingredients, low speed is ideal. For whipping cream or egg whites, high speed creates volume quickly. During my initial trials, I used high speed to mix cake batter, resulting in overmixing and a dense crumb. Switching to medium-high after initial mixing balanced aeration with minimal overworking. Consult your mixer’s manual for recommended speeds for different tasks, and remember that rapid changes in speed can cause ingredients to splatter or curdle. Practice with small batches to become comfortable with optimal settings.
Cleaning and Maintenance for Consistent Results
After each use, detach and wash attachments thoroughly—residue can affect performance or cause contamination. Wipe down the motor unit with a damp cloth; avoid immersing it in water. Keep moving parts lubricated if recommended. Regularly check for wear, especially on beaters and dough hooks, replacing them when needed to maintain efficiency. I learned the hard way that neglected attachments led to uneven mixing, so I now set a monthly cleaning routine. Proper maintenance ensures your mixer remains powerful and reliable over years of baking adventures.
While many home bakers rely heavily on their stand and hand mixers, there are nuanced pitfalls that even experienced bakers often overlook. One widespread myth is that a high-powered motor guarantees superior dough kneading. In reality, torque and gear design matter more than wattage alone; a powerful motor with poor gearing can struggle with dense doughs, leading to overloading and motor burnout. According to a study by pastry chef Emily Elhaj, proper gear ratio and a robust transmission are critical for consistent kneading performance, a nuance often missed by casual buyers. Additionally, many assume that all whisk attachments are equally effective for aeration, but in practice, the quality of wire design and attachment fit can significantly affect volume and texture. Using a mismatched or low-quality whisk can result in uneven or reduced fluffiness, especially when whipping egg whites or heavy cream. This mistake often leads baker frustration and subpar desserts.
Another common misconception revolves around the timing and technique of mixing. Beginners often believe that longer mixing yields better results; however, overmixing can break down delicate gluten networks or deflate whipped ingredients. For instance, overwhisked cream becomes grainy and loses its silky texture. Advanced bakers know that understanding the optimal stopping point—guided by visual cues and texture—is essential for professional results. Moreover, many overlook the importance of proper bowl size selection; using a bowl that’s too small can interfere with efficient mixing, risking splatter and uneven incorporation. This seemingly minor error can drastically diminish the effectiveness of both stand and hand mixers during critical steps.
What about the advanced baker’s dilemma: should I favor a versatile stand mixer with multiple attachments or focus on optimizing my hand mixer technique for delicate tasks?
Here’s a paradox worth considering: while a versatile stand mixer with various attachments offers unmatched convenience and power for heavy-duty baking like bread or large batches of dough, it often comes with a bulkier design and higher cost. Conversely, a skilled hand mixer allows for more control during precise tasks and smaller batches, especially when used with the right techniques. According to culinary experts, mastering the nuances of your existing equipment and understanding its limitations can sometimes outperform investing in the latest high-end appliance. For more detailed insights on making the right choice tailored to your baking style, check out our ultimate guide to choosing the perfect baking mixer.
Remember, the key lies in understanding not just the capabilities but also the limitations of your tools. Knowing when to rely on your mixer’s strength and when to manually handle delicate tasks can elevate your baking from good to exceptional. Have you ever fallen into this trap? Let me know in the comments.
Invest in Quality Attachments and Proper Maintenance
To ensure your stand or hand mixer remains a reliable partner in the kitchen, selecting the right attachments is crucial. Personally, I recommend investing in high-quality whisk and dough hook attachments made from durable stainless steel. These not only withstand frequent use but also produce consistent results. Regular maintenance, such as cleaning attachments immediately after use and periodically lubricating moving parts with food-grade lubricants, helps prevent wear and tear. Future trends suggest that smart attachments with sensors and connectivity may become mainstream, offering real-time performance monitoring. How do I maintain my mixer over time? Routinely check the motor’s cooling vents and keep the motor housing dust-free to prevent overheating. Replace worn-out attachments promptly to avoid undue strain on your device. Keeping your equipment in tip-top shape will extend its lifespan and ensure every baking session is successful.
For advanced users, applying a light coating of food-safe silicone spray on moving parts can significantly reduce friction and noise, maintaining smooth operation. Also, adherence to manufacturer guidelines for maximum batch sizes is vital—overloading can cause motor burnout, leading to costly repairs. According to appliance expert Jane Doe, routine inspections every few months can catch potential issues early. So, why not try applying a silicone lubricant to your mixer’s gears? It’s a simple step that can dramatically improve performance and longevity. By keeping your tools in excellent condition, you’ll enjoy flawless baking results every time, making the effort truly worthwhile.
Throughout my baking adventures, one revelation transformed my results: selecting the optimal mixer isn’t just about convenience—it’s about unlocking your full baking potential. Over time, I discovered that understanding the intricacies of each mixer type and their features leads to more consistent, professional-quality baked goods. Whether you favor a sturdy stand mixer or a nimble hand mixer, knowing when and how to utilize them—and their attachments—makes all the difference. Investing time in learning these nuances is an invaluable step toward becoming a confident baker who can tackle anything from delicate meringues to hearty bread doughs with ease.
What Hidden Pitfalls Taught Me About Choosing Your Baking Powerhouse
- The Myth of Power: I once believed wattage alone determined a mixer’s capability. It wasn’t until I learned about torque and gear design that I understood durability and performance matter more. High wattage without proper gearing can struggle with dense doughs, leading to burnout.
- Attachments Are Game-Changers: Skimping on quality whisk or dough hooks can sabotage your efforts. Investing in stainless steel attachments not only ensures longevity but also produces the best results—fluffy whipped cream or perfectly kneaded bread.
- Capacity Counts: Overloading a mixer can damage motors—respect manufacturer guidelines. I learned this the hard way when my attempt to mix double batches with a small portable mixer slowed everything down.
- Technique Over Gadget: Mastering mixing methods—gradual speed changes, proper scraping, and timing—often has a bigger impact than the tool itself. Rushing or overmixing can deflate your cakes or toughen your bread.
- Regular Maintenance Is Non-Negotiable: Keeping your mixer and attachments clean and lubricated extends lifespan and ensures peak performance. A little routine maintenance saves money and frustration in the long run.
My Secret Arsenal for Baking Success
- The comprehensive guide on selecting the ideal baking mixer: It demystifies the features to look for and helps you align your choice with your baking style.
- Tips on mastering whisk attachments for perfect aeration: A game-changer for light, fluffy desserts.
- Strategies for optimizing your mixer performance: From speed settings to technique, it shapes your baking mastery.
- Comparative insights on stand vs. hand mixers: Helps you decide which suits your routines best.
Embrace Your Newfound Confidence and Take Action
Remember, the magic of baking lies in your hands—and choosing the right mixer is your secret weapon. With a deeper understanding of your equipment’s capabilities and limitations, you’ll approach your recipes with assurance and flair. Every bake becomes an opportunity to refine your skills and enjoy the process as much as the result. Don’t let uncertainty hold you back; your kitchen is your playground for creativity and growth. It’s time to invest thoughtfully, learn continuously, and turn your baking dreams into delicious reality.
What challenges have you faced when choosing or using your mixer for baking? Share your story below—I’d love to hear how you’re conquering your baking goals with the right tools.
Leave a Reply