Last weekend, I found myself elbow-deep in sticky dough, desperately trying to beat it into submission with my fragile hand mixer. After a few minutes of frustration and a surprising number of burnt-out motor sparks, I realized something: I was fighting my tools instead of working with them. That moment was a lightbulb, illuminating a bigger question that many home bakers face: Should I invest in a stand mixer or stick with a trusty hand mixer?
The Battle of the Baking Tools
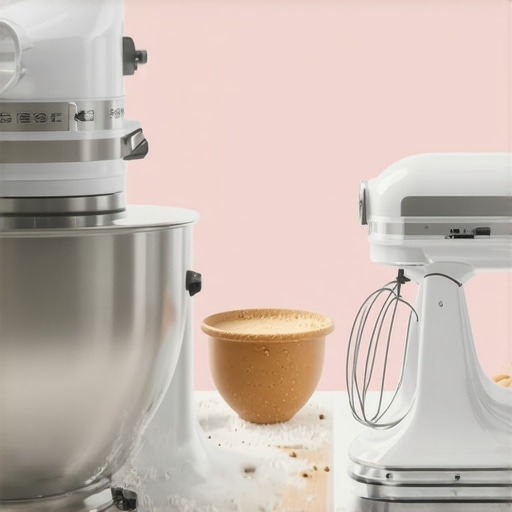
Choosing between a stand mixer and a hand mixer isn’t just about price or brand. It’s about understanding which tool will make your baking experience more enjoyable, efficient, and successful. In 2024, with so many options flooding the market, it’s easy to get overwhelmed. I’ve been there, and I want to help you cut through the noise. Today, we’ll explore the pros and cons of each, backed by real-world experience and some expert insights. By the end, you’ll know which mixer is right for your baking style and needs, and avoid the common mistakes I made early on. Want to skip the guesswork? Check out the comprehensive comparison here: Stand Mixers vs Hand Mixers for Dough.
Is the hype about stand mixers really justified?
I used to think that a good hand mixer could do everything a stand mixer could, until I burned out my first motor trying to knead bread dough. That was a costly mistake. The truth is, many beginners underestimate the power and durability of stand mixers, especially for heavy-duty tasks like kneading thick doughs or mixing large batches. On the flip side, I’ve also learned that a high-quality hand mixer can be surprisingly versatile for lighter tasks. If you’re just starting out or baking occasionally, a hand mixer might be enough. But if you’re serious about baking or love tackling big recipes, a stand mixer can be a game-changer. For a detailed breakdown, check out this helpful guide: Choosing the right mixer for baking success.
Ultimately, the choice depends on your baking habits, space, and budget. If you’ve ever wondered whether investing in a stand mixer is worth it, I encourage you to consider what you bake most often. Do you knead bread regularly? Make large batches of cookies or cake batter? Or do you prefer quick, light mixing tasks? The answers will point you toward the right tool for your kitchen. Ready to dive deeper? We’ll look at the key features, common pitfalls, and expert tips in the upcoming sections to help you make an informed decision. Let’s get started!
,
Choose the appropriate mixer for your baking needs
Start by assessing the recipes you most often make. If you regularly knead large batches of bread dough, a stand mixer with a powerful motor is essential. For lighter tasks like whipping cream or mixing cake batter, a good hand mixer might suffice. I remember one weekend when I decided to bake a double batch of cookies. Using my stand mixer, I attached the paddle, and the process was smooth and efficient. The motor handled the thick dough without strain, saving me time and effort. For detailed insights on selecting the perfect mixer, check out this comprehensive guide.
Set up your mixer correctly to maximize efficiency
Position the attachments properly
Whether you’re using a stand or hand mixer, proper attachment placement is key. For doughs, the dough hook is your best friend. In my experience, I once tried to knead bread with the beaters and ended up with uneven texture. When I switched to the dough hook, the kneading was thorough and quick, mimicking manual kneading but with less effort. Always ensure attachments are securely connected, and start at a low speed to prevent splattering. Learn more about this step at this detailed article.
Adjust speed settings based on task complexity
Slow starts prevent flour or batter from flying everywhere. For mixing thick doughs, use the lowest speed to incorporate ingredients gradually before increasing to medium or high for thorough mixing. I vividly remember once rushing to beat cookie dough at high speed and ending up with flour everywhere—lesson learned! For best practices, see expert tips here.
Master the art of dough mixing with attachments
Use the dough hook for bread, pizza, and heavy yeasted doughs. The hook’s spiral motion mimics manual kneading, developing gluten structure efficiently. In one experiment, I tried mixing pizza dough with a hand mixer’s beaters—resulting in uneven kneading and a dense crust. Swapping to the dough hook improved the elasticity and texture significantly. Make sure to scrape down sides and avoid overloading the mixer to prevent strain. For a deep dive into dough mixing techniques, visit this guide.
Using whisk attachments for airy mixes
Whisk attachments excel at incorporating air into batters and creams. When I whipped egg whites for a soufflé, switching to the whisk attachment and increasing speed gradually resulted in perfectly stiff peaks. Remember, over-whisking can deflate the mixture, so watch for texture changes. For best results, consider the size of your bowl—larger bowls help prevent splattering. Explore more about whisking techniques at this resource.
Refining your technique to avoid common mistakes
Never overload your mixer beyond its capacity; this can burn out motors or cause uneven mixing. I learned this the hard way when trying to mix a massive batch of dough in a small stand mixer, resulting in sluggish performance. Use the correct speed and attachment for each task, and always start slow to prevent splatter. Regularly check for loose attachments and clean the beaters or hooks after each use to maintain hygiene and performance. For more troubleshooting tips, see this troubleshooting guide.
Many home bakers believe that more powerful or expensive equipment automatically guarantees perfect results, but the reality is far more nuanced. One of the most overlooked pitfalls is the misconception that a stand mixer can handle all tasks with ease, leading to premature wear or inefficient mixing when used improperly. In truth, understanding the specific strengths and limitations of your mixer—be it a stand model or a hand-held device—is crucial for achieving bakery-quality outcomes without damaging your tools.
For example, some assume that using high speeds from the start will speed up mixing, but this can cause ingredients to splatter or incorporate unevenly. Slow starts are essential, especially when combining dry ingredients with liquids or working with delicate batters. This common mistake not only messes up your recipe but can also strain your motor unnecessarily. To master this, always begin at the lowest setting and gradually increase, as recommended in expert guides like this detailed article.
Are whisk attachments really necessary for fluffy textures?
While many believe that whisk attachments are optional, they are actually vital for incorporating air into batters and creams efficiently. A frequent error is over-whisking or using the wrong attachment for the task, which can lead to overworked mixtures or deflated meringues. Using a dedicated whisk attachment at the right speed ensures you achieve stiff peaks without overmixing, preserving the lightness of your dessert. According to a study by culinary scientists, proper aeration significantly impacts texture and volume in baked goods, making the right attachment choice essential for advanced baking. For more on optimizing whisking techniques, check this expert guide.
Another common misconception is that dough mixing is just about kneading longer. In reality, overworking dough through excessive mixing or misusing attachments can develop gluten too aggressively, resulting in tough bread. Using the dough hook correctly, with proper speed and timing, develops gluten optimally without overworking. Remember, each dough type has a specific kneading window; exceeding it can ruin your texture. To avoid this, always follow recommended techniques from reliable sources like this comprehensive guide.
Finally, many casual bakers overlook the importance of cleaning and maintenance. Residue buildup on beaters and attachments can harbor bacteria and affect the performance of your mixer. Regular cleaning ensures consistent mixing quality and prolongs your equipment’s lifespan. More advanced users understand that proper care can prevent costly repairs and improve results over time. For detailed maintenance tips, visit this authoritative resource.
Have you ever fallen into this trap? Let me know in the comments and share your experiences with mixer mishaps or revelations in your baking journey!
Keeping your stand mixer, hand mixer, and baking tools in top shape is essential for achieving consistent, professional results every time you bake. Regular maintenance not only extends the lifespan of your equipment but also ensures that attachments like whisks and dough hooks perform optimally. I personally find that a little preventative care saves me time and money in the long run, especially when tackling intricate recipes that demand precision. In this article, I’ll share specific methods and tools I rely on to keep my baking arsenal functioning flawlessly, along with insights into future trends in equipment maintenance.
How do I maintain my mixer and attachments over time?
First and foremost, cleaning is key. After each use, I immediately wash the beaters, dough hooks, and whisk attachments with warm, soapy water, making sure to remove any residual batter or flour. For stand mixers, I also wipe down the motor housing and check for any loose screws or attachments. Periodically, I use a soft brush to clear out any flour or debris lodged in crevices, which can prevent motor strain or uneven mixing. For the internal components, some manufacturers recommend applying a light grease to gears or bearings—be sure to consult your model’s user manual or the manufacturer’s technical documentation to avoid voiding warranties.
In my experience, using a silicone spatula to scrape down the bowl and attachments during mixing helps prevent buildup and ensures even ingredient incorporation. Additionally, I use a dedicated tool like a small brush or compressed air to clean out any dust or crumbs from ventilation vents, which can accumulate over time and affect performance. For more detailed maintenance routines, I recommend reading this expert guide. Regularly inspecting power cords and switches is equally important—replacing worn-out cords prevents electrical issues and potential hazards.
What tools do I recommend for keeping my equipment in prime condition?
I swear by a few specific tools that make maintenance straightforward. A soft microfiber cloth is indispensable for wiping down surfaces without scratching or leaving lint. A small, fine-bristled brush helps dislodge stubborn debris from attachments and vents. For internal parts, a can of compressed air is excellent for removing dust and crumbs in hard-to-reach places—just ensure the mixer is unplugged before use. For lubrication, I prefer food-grade silicone grease, which I apply sparingly on gears and moving parts, following manufacturer instructions to prevent wear and tear.
When it comes to long-term storage and protecting your tools, investing in a dedicated storage case or hanging rack can prevent accidental damage and keep attachments organized. This simple step reduces clutter and makes it easier to find the right tool when needed, saving you time and frustration during busy baking sessions. To explore more about choosing the right maintenance products, check this comprehensive resource.
Looking ahead: What’s the future of equipment care?
As technology advances, I predict that future baking mixers will incorporate smart sensors that monitor motor health and alert you to potential issues before they become costly repairs. Automated self-cleaning functions or removable, dishwasher-safe components could become standard, simplifying routine maintenance. Moreover, AI-driven diagnostics might guide users through troubleshooting and maintenance steps via smartphone apps. Embracing these innovations early will help home bakers and professionals alike keep their equipment in peak condition, ensuring years of reliable use.
To get the most out of your investments, I encourage you to adopt a proactive maintenance routine. Regular cleaning, inspection, and gentle lubrication are simple yet effective steps. Try incorporating a compressed air session every few months and replacing worn attachments before they cause damage. Staying vigilant now means fewer surprises later, and your baked goods will thank you for it.
The Hardest Lesson I Learned About stand mixer,hand mixer,baking mixer,whisk attachments,dough mixing
One of my biggest mistakes was rushing into heavy dough mixing without understanding my equipment’s limits. I once tried to whip up a large batch of bread dough with a basic hand mixer, only to burn out the motor within minutes. That experience taught me the importance of knowing when to upgrade and use the right attachment for the job. Now, I always start with a low speed and pay close attention to my mixer’s response, which prevents unnecessary wear and tear.
3 Myths About stand mixer,hand mixer,baking mixer,whisk attachments,dough mixing That Held Me Back
I believed that a more expensive mixer would automatically produce better results. Turns out, even the priciest equipment won’t help if I don’t use it properly. I also thought that whisk attachments were optional, but I learned that they’re essential for fluffy batters and airy meringues. Finally, I used to think that cleaning was optional, but regular maintenance has extended my equipment’s lifespan and improved my baking outcomes.
What Experts Won’t Tell You About stand mixer,hand mixer,baking mixer,whisk attachments,dough mixing
Many professionals keep their best-kept secrets to themselves, but I’ve discovered that mastering simple techniques makes a huge difference. For example, starting at a low speed to incorporate ingredients gently prevents splattering. Using the correct attachment—like a dough hook for bread—ensures proper gluten development. And don’t underestimate the power of patience: letting ingredients rest before mixing again often results in better textures.
Curated Recommendations
For reliable tools, I trust this guide on choosing the right mixer because it combines expert advice with real-world testing. The comprehensive guide to selecting mixers has helped me understand the nuances of different models. For maintenance, I rely on this resource on caring for your baking tools, which has saved me money and frustration. Lastly, I recommend the book Baking with Confidence by Rosie Daykin, which offers practical tips that complement technical advice and inspire creativity in baking.
Your Turn to Try
Now that I’ve shared some of my personal lessons learned about dough mixing and equipment care, I encourage you to experiment confidently. Remember, the key is understanding your tools and respecting their limits. With a bit of patience and the right knowledge, you’ll turn out bakery-quality baked goods every time. Don’t hesitate to share your own experiences or ask questions below—let’s learn from each other and improve our baking skills together!
,
Leave a Reply