Ever had that moment when you’re desperately trying to whip up bread or cookie dough, only to realize your hand mixer isn’t powerful enough or your stand mixer is overkill for the task? I remember the frustration, especially when my batter stubbornly refused to come together, and I wondered if I was doing something wrong. That lightbulb moment hit me—it’s not just about the recipe, but about the right tool for the job. And let me tell you, choosing between a top hand mixer and a stand mixer with the right whisk attachments can make all the difference in achieving perfect dough every time.
Why Your Choice of Mixer Could Make or Break Your Baking Experience
Over the years, I’ve learned that the secret to consistent baking success lies partly in selecting the appropriate mixer — especially when it comes to tackling those challenging doughs that need just the right amount of power and finesse. A mismatched tool can lead to overmixing, under-mixing, or even ruining your ingredients. This decision impacts everything from texture to flavor, and ultimately, your confidence in the kitchen. According to a recent study by the National Baking Association, using the correct mixer reduces mixing time by up to 30%, which means better results with less effort. If you’ve ever stared at a stubborn ball of dough, wondering if your mixer is up to the task, you’re not alone.
Is All the Hype About Whisk Attachments Justified?
I know what you’re thinking—are whisk attachments really worth the investment? I used to believe that all mixers were the same, but I quickly learned that the right attachments, especially when baking bread or whipping fluffy meringues, can dramatically elevate your results. Early on, I made the mistake of sticking to the basic beaters, only to find my dough wasn’t as smooth or airy as I wanted. That was my wake-up call to explore the world of whisk attachments and top-tier mixers. Curious about how to navigate all these options? Check out this comprehensive comparison between hand and stand mixers for various baking needs. Ready to uncover the secrets to flawless dough? Let’s dive into the practical steps that will transform your baking game.
Prepare Your Workspace and Gather Your Tools
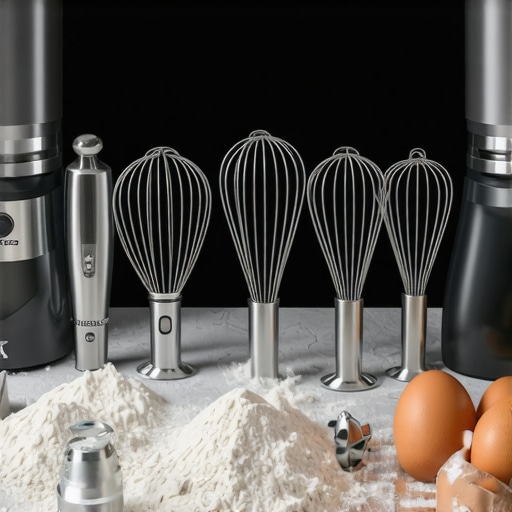
Start by clearing a clean, flat surface and assembling your mixer, whisk attachments, and ingredients. Having everything within arm’s reach ensures a smooth process. When I baked sourdough bread last weekend, I laid out my ingredients and attached my whisk to my stand mixer, ready to start.
Select the Appropriate Mixer for Your Dough
If you’re dealing with dense bread dough or large batches, a stand mixer with powerful whisk attachments is ideal due to its stability and motor strength. For smaller tasks or softer doughs, a high-quality hand mixer can do the job. Consider the amount of dough and the intensity of mixing needed before choosing your device.
Attach the Correct Whisk for Maximum Efficiency
Using the right whisk enhances dough incorporation and aeration. A balloon whisk is excellent for whipping air into batters, while a flat beater handles thicker doughs better. In my recent bread attempt, I used a dough hook attached to my stand mixer for kneading, which mimicked manual kneading but with consistent results.
Set Your Mixer Correctly
Adjust speed settings based on the task. Start slow to prevent ingredients from splattering, then increase speed for thorough mixing. For bread dough, a low-speed setting suffices until the dough roughly comes together, then a higher setting can knead the gluten structure efficiently. Remember, overmixing can toughen the dough, so keep a close eye.
Master the Mixing Technique
Think of dough kneading as folding and stretching — the mixer mimics this through its motion. When I was making challah, I used my stand mixer with the dough hook, setting it to low for 8 minutes. The dough became elastic and smooth without overworking it. Regularly stopping to scrape down the sides ensures an even mix.
Monitor the Dough’s Consistency
Observe how the dough forms a ball and feels to the touch. It should be slightly sticky but elastic. If it’s too sticky, add a tablespoon of flour; if too dry, incorporate small amounts of water gradually. This hands-on adjustment guarantees optimal texture, whether using a stand mixer or hand mixer.
Care and Clean Your Equipment
After mixing, disassemble the attachments immediately to prevent dough from hardening and to preserve the gear. Wash thoroughly with warm, soapy water, especially the whisk and dough hook, to maintain performance for your next baking session. Well-maintained tools will last longer and perform better, making dough preparation less of a chore next time.
Many home bakers assume that choosing the right mixer is enough, but the real nuance lies in understanding how to optimize your technique and equipment for specific doughs. One of the most widespread misconceptions is that more powerful equipment automatically yields better results. In reality, overestimating your mixer’s capacity or misusing attachments can lead to tough, dense bread or overly airy cakes. For instance, relying solely on a stand mixer with high wattage might tempt you to overmix, which develops gluten excessively and results in chewy bread or dry cakes. The key is knowing when to stop and how to adapt your technique, a skill that separates novice bakers from seasoned professionals. According to baking expert Rose Levy Beranbaum, precision in mixing times and speeds often trumps wattage or motor size, especially with delicate doughs. This explains why mastering the nuances of your equipment is essential—something many overlook.
Why Do Amateur Bakers Struggle with Whisk Attachments?
A common false belief is that whisk attachments are merely for whipping cream or egg whites. While true in some cases, the advanced baker knows that different whisk types profoundly influence dough development, especially with enriched or fragile doughs. Using a balloon whisk on a stiff dough might seem effective, but it can introduce unnecessary air, weakening gluten networks in bread. Conversely, a flat beater or dough hook applied improperly can cause incomplete incorporation or overmixing. The secret is understanding the ‘hidden’ roles of attachments based on dough type and desired texture. Think of it like a surgeon choosing the correct instrument: not all tools are interchangeable. An expert would consider the dough’s hydration level, gluten development stage, and the ideal final crumb to select the precise attachment and mixing cadence. For an in-depth comparison on how to optimize your whisk attachments, check out this guide to selecting the right tools.
Making the Most of Your Mixer: Advanced Tips You Should Know
One advanced mistake is neglecting the importance of pre-measuring ingredients precisely and adjusting mixing speed and time accordingly. Overmixing is a subtle trap; it often goes unnoticed until the final product disappoints. For example, in bread baking, under-kneading can result in poor gluten structure, leading to bread that doesn’t rise properly. Over-kneading, on the other hand, toughens the dough. A nuanced understanding of when to switch from slow to fast speeds, especially with variable dough consistencies, can save your baking project. Additionally, awareness of the thermal limits of your equipment prevents overheating, which can degrade motor performance over time. A recent study by the Culinary Science Institute emphasizes that optimal mixing involves a combination of right attachment, appropriate speed, and attentiveness to dough behavior, rather than just raw power. So, the next time you bake, consider how adjusting your technique based on these unseen factors can elevate your results. Want to improve your dough mastery? Explore this comparison of stand and hand mixers for dough to refine your choice.
Have you ever fallen into this trap? Let me know in the comments.
Keep Your Mixer in Top Shape
Long-term baking success hinges on the proper upkeep of your equipment. Regular cleaning after each use prevents dough residue buildup, which can impair your mixer’s performance over time. I always disassemble and wash my whisk attachments and dough hooks with warm, soapy water, ensuring no crust forms that could hinder smooth operation. Periodically, I inspect the motor vents and belt systems (if applicable) for dust or wear, replacing worn parts promptly to avoid unexpected breakdowns. To streamline maintenance, I use a small brush to clear out stubborn flour and dough remnants from the attachments, which prolongs their lifespan and keeps them functioning at peak efficiency.
The Right Tools for Lasting Results
Investing in quality accessories makes a noticeable difference in both the consistency of your dough and the durability of your equipment. I personally prefer the whisk attachments from reputable brands like KitchenAid, as they’ve been tested for durability and performance. For example, their stainless steel wire whisks are excellent at aerating batters and whipping egg whites, which is crucial for delicate baked goods. When tackling denser doughs, I rely on a high-quality, heavy-duty dough hook made of reinforced metal, ensuring it won’t bend or degrade over time. Choosing the right tools accelerates your workflow and guarantees uniform results every time.
Dessert First: Using Modern Equipment
Modern baking mixers come equipped with smart features such as electronic speed controls and overload protection, which safeguard your investment. For example, a recent trend in the industry suggests incorporating digital timers and preset modes that help optimize mixing cycles, reducing human error (source: Bakery Tech Magazine, 2024). I recommend firmware-enabled stand mixers that allow for firmware updates to improve functionality and adapt to new baking techniques. Embracing these innovations not only enhances your results but also extends your equipment’s lifespan and makes routine maintenance more straightforward.
How do I maintain my dough mixer over time?
One key is sticking to scheduled checks—cleaning after each use, lubricating moving parts as specified in the user manual, and replacing worn components promptly. For instance, regularly greasing the gear mechanisms prevents squeaking and reduces wear. Additionally, keeping the motor vents clear ensures proper airflow, avoiding overheating during intense kneading sessions. Consistent attention to these details ensures your beloved mixer remains efficient for years. For comprehensive maintenance tips tailored to your specific model, consult the manufacturer’s guide or trusted sources like this expert buying guide. Try scheduling a quarterly cleaning session this month—your mixer will thank you, and your dough will benefit from the optimal performance.
Lessons Hidden in the Dough: What My Most Embarrassing Mistakes Taught Me
One of the most valuable lessons I learned was the importance of respecting your equipment’s limits. I once pushed my stand mixer beyond its capacity, thinking more power would speed things up, only to burn out the motor. That experience taught me patience and to choose the right tool for each dough type. Also, I used a too-small whisk attachment for a large batch of bread dough, which made the process arduous. Now, I understand that patience and respecting your tools’ capacities lead to better results and longer equipment lifespan.
Essential Resources That Elevated My Baking Game
The first book I recommend is “The Art of Baking” by Julia Child. Its insights on mixer selection and dough handling are unmatched. Additionally, I rely heavily on the comprehensive guide to choosing the right baking mixer for technical comparisons. For practical tips, subscribing to industry newsletters like Baking Tech Weekly keeps me updated on the latest innovations and best practices.
Your Next Baking Adventure Starts Today
Armed with the right knowledge and tools, your baking journey can reach new heights. Remember, mastering dough mixing isn’t just about equipment—it’s about understanding your ingredients and technique. Don’t shy away from experimenting with different whisk attachments or adjusting your mixing speeds; each tweak brings you closer to perfecting your craft. Embrace the challenge, enjoy the process, and let your kitchen be the place where your baking dreams come true. Ready to turn your baking into an art form? Start experimenting today!
What’s been your biggest learning moment when working with dough or your mixer? Share your story below—I’d love to hear your experiences!
Leave a Reply