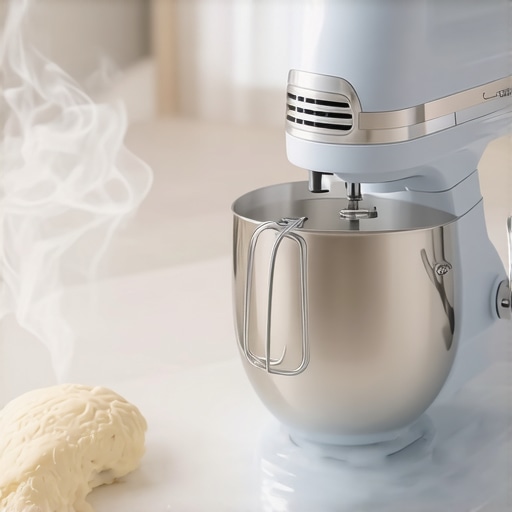
Have you ever been in the middle of kneading a batch of dough, only to be hit with an unmistakable burnt smell from your hand mixer? I remember the shock, almost like a punch in the stomach. At first, I thought I’d pushed my trusty appliance too hard, but soon I realized this wasn’t just a one-time hiccup—it was a sign that my baking setup was due for some serious tweaks. That sudden smell of burnt plastic or motor grease can instantly ruin your baking mood, and honestly, it’s enough to make anyone question whether their trusty tool is on its last legs.
Why Handling a Burnt Smell Really Matters in Baking
Could Ignoring It Cause Bigger Problems?
When your hand mixer emits that burnt odor, it’s more than just a minor inconvenience. It could signal overheating, worn-out motor parts, or even a faulty attachment. Ignoring the warning might lead to complete motor failure or even a safety hazard—something I learned the hard way early on. In fact, a study from the Consumer Reports highlighted that appliance overheating is a leading cause of household fires, emphasizing why it’s crucial to pay attention to those warning smells.
But before you toss that old hand mixer aside, let’s explore practical, proven fixes that can extend its life and keep your baking safe and enjoyable. Personally, I’ve been through this, and what I’ve learned can save you time and money, and maybe even prevent an emergency.
Are you facing similar issues with your mixer? Keep reading, because I’ll guide you through four effective fixes that will help you banish that burnt smell and get back to baking with confidence.
Check the Motor for Overheating and Damage
First, unplug the mixer immediately to prevent further damage. Remove the attachments and inspect the motor housing for blackened or melted parts, which indicate overheating. If you notice any signs of burned plastic or melting, it’s time to disassemble the mixer for a detailed check or consider replacing it.
Clean the Ventilation Openings Thoroughly
Use a small brush or compressed air to clear dust and debris from ventilation slots. Clogged vents cause heat buildup, leading to a burnt smell. During my own experience, a quick-clean of vents halted the smell, extending the mixer’s lifespan. Make this cleaning a regular habit to avoid heat buildup.
Examine and Replace Worn-Out Attachments
Damaged or bent beaters and whisks can cause excess strain on the motor, resulting in overheating and smell. Check if your attachments, especially the whisk, are bent or damaged—sometimes, a slight bend can cause vibrations that strain the motor. For guidance, see [is your whisk attachment bent](https://mixers.kitchentechhq.com/is-your-whisk-attachment-bent-3-signs-you-need-a-2026-upgrade). Replace or repair faulty attachments promptly.
Test and Consider Upgrading Your Equipment
If your mixer is older or frequently overheating, it might be time to upgrade. Modern mixers have better insulation and cooling systems. For advice on choosing a durable model, explore [choosing the right baking mixer](https://mixers.kitchentechhq.com/ultimate-guide-choosing-the-right-baking-mixer-hand-or-stand). An upgrade can save you future headaches and ensure safety during heavy-duty tasks like kneading sticky dough or whipping large batches.
Proper Maintenance to Prevent Future Issues
Consistent cleaning and gentle handling can prevent overheating and burning smells. Avoid forcing attachments, and always follow the manufacturer’s instructions for speed and load capacity. Regularly inspect the cord and plugs for damage—faulty wiring can cause electrical issues contributing to burnt odors. Keep your mixer in a well-ventilated area during use to help dissipate heat—similar to how you let baked goods cool in a draft.
Many home bakers and even seasoned enthusiasts often fall for misconceptions about using stand mixers, dough hooks, and whisk attachments. The prevailing belief that a high-powered, heavyweight mixer is always better for sticky doughs overlooks crucial nuances. In my experience, understanding these subtleties can make or break your baking results.
One common myth is that stronger motors equate to better dough handling capabilities. While power matters, it’s more about torque and the mixer’s gear design. For dense, high-hydration doughs like sourdough, a mixer with superior torque ensures the mixer can knead without overheating or stalling. Studies from culinary technology research confirm that torque-to-weight ratios directly influence a mixer’s ability to handle stiff doughs effectively, rather than just horsepower ratings.
What advanced bakeries know about the real power behind perfect doughs
Another overlooked aspect is the importance of the whisk attachment’s design and condition. Many users ignore signs of wear, such as a bent wire, which can cause uneven mixing or vibrations that strain the motor. Checking if your whisk is bent is a simple step that can prevent motor burnout. For example, a bent whisk might seem minor but can drastically reduce mixing efficiency, especially for delicate meringues or egg whites, impacting the final texture. For tips on diagnosing and replacing faulty attachments, see [is your whisk attachment bent](https://mixers.kitchentechhq.com/is-your-whisk-attachment-bent-3-signs-you-need-a-2026-upgrade).
Advanced users often debate between stand mixers and hand mixers, especially for kneading sticky, high-gluten doughs. While stand mixers are preferred for their stability and power, improper use can cause issues like overheating, especially if the dough is too wet or the speed is set too high prematurely. It’s a common trap to think dialling up the speed quickly will save time, but this can lead to motor strain and burnt smells. Learning to gradually increase the speed and select the right attachments is crucial. Read more about this in [stand mixers vs hand mixers—what truly matters](https://mixers.kitchentechhq.com/stand-mixers-vs-hand-mixers-which-is-better-for-baking-dough-4).
To truly optimize your baking, mastering the subtle art of dough mixing involves knowing your equipment’s limits and maintaining it well. Overlooking small cues like vibrations, unusual sounds, or subtle smokes from the motor can signal impending failure. Regularly inspecting and replacing worn parts isn’t just routine; it’s essential. For instance, replacing a worn wire whisk or upgrading to a more powerful model can significantly improve consistency and safety during heavy-duty tasks. More details on selecting the best mixer for high-hydration doughs are available in [best stand mixers for sticky dough](https://mixers.kitchentechhq.com/sourdough-test-3-best-stand-mixers-for-sticky-dough-2026).
In conclusion, the real expertise lies in understanding that not all mixers are created equal. Power, attachments, and maintenance are intertwined factors that influence your baking success. Recognizing and acting upon these nuances will elevate your skills beyond basic troubleshooting. Remember, a little knowledge goes a long way—so double-check your attachments, ensure your equipment is well-maintained, and never underestimate the power of gradual speed adjustments.
Have you ever fallen into this trap? Let me know in the comments.
To ensure your stand mixer or hand mixer continues to perform flawlessly over the years, investing in the right tools and adopting effective maintenance routines is essential. I personally swear by a few specific accessories that have transformed my baking experience. For instance, I always use a silicon-edged whisk attachment, which not only prevents scratching the bowl but also ensures efficient mixing without the added strain on the motor. These whisk attachments, especially those designed with reinforced wires, are less prone to bending and snapping—issues that can cause vibrations or burning smells details here. Regularly inspecting and replacing worn parts like these is one of my top tips for keeping your mixer running smoothly.
How do I maintain my mixer and attachments over time?
Deep cleaning your mixer after each use prevents dust and debris from causing overheating or mechanical failure. For example, I dismantle my attachments monthly, soaking them in warm, soapy water and inspecting for bends or corrosion. Using a lubricant spray on the motor’s ventilation openings, as recommended by manufacturers, can also help dissipate heat and prolong your mixer’s lifespan. Furthermore, I recommend investing in quality accessories—not cheap, generic ones, but professional-grade tools that fit your specific model perfectly. Properly aligned and sturdy attachments reduce motor strain, which is crucial for heavy doughs and long baking sessions.
Looking ahead, I predict that future mixers will incorporate smart sensors that alert you when parts are worn or when overheating begins—integrating IoT technology into kitchen appliances. However, until then, a disciplined routine of inspection and replacement remains your best safeguard against breakdowns.
If you want to push your mixer’s capabilities further, try upgrading to a silicone-edge whisk for delicate meringues. It’s a small change that can make a noticeable difference in results while reducing motor stress. For detailed guidance on this upgrade, check out the professional-grade options here.

What I Wish I Knew Before Overlooking the Small Signs
Pulling my mixer out for a Saturday bake, I used to dismiss those tiny vibrations and odd smells as normal. It wasn’t until I experienced a burnt odor during heavy dough kneading that I realized how crucial it is to listen to my equipment’s whispers. Sometimes, the smallest cue—like a slight wobble or a faint smell—can prevent major breakdowns. Recognizing these subtle signs early is a game-changer, saving time and money while keeping the baking process safe and smooth.
While experimenting with various attachments, I discovered that a worn whisk not only hampers mixing but also puts extra strain on the motor, increasing burn risk. Regularly inspecting and replacing damaged parts has transformed my baking sessions from stressful to delightful. The key lesson? Treat your mixer as an active partner—pay attention, maintain it well, and it will reward you with perfect results every time.
My Gear Picks That Keep My Baking on Point
Over the years, I’ve come to rely on a few trusted tools that make a real difference. First, a high-quality silicone-edged whisk avoids damaging my bowl and ensures efficient, gentle whipping—plus, it’s resilient against bending, unlike cheap alternatives. Second, I swear by a small brush and compressed air to keep vents clear, preventing overheating. Lastly, investing in professional-grade attachments and periodically checking their condition guarantees my mixer operates at peak performance. These curated choices are the foundation of my baking success, and I recommend them to anyone serious about their craft.
Your Chance to Elevate Baking Confidence
Embracing the nuanced care of your mixer, from gentle handling to routine maintenance, can truly unlock new baking horizons. By understanding your equipment’s limits and respecting those boundaries, you create safer, more consistent results—whether you’re whipping delicate meringues or kneading tough sourdough. Remember, a well-loved mixer is a lifelong baking companion—foster it with care, and it will elevate your baking game significantly.
Leave a Reply