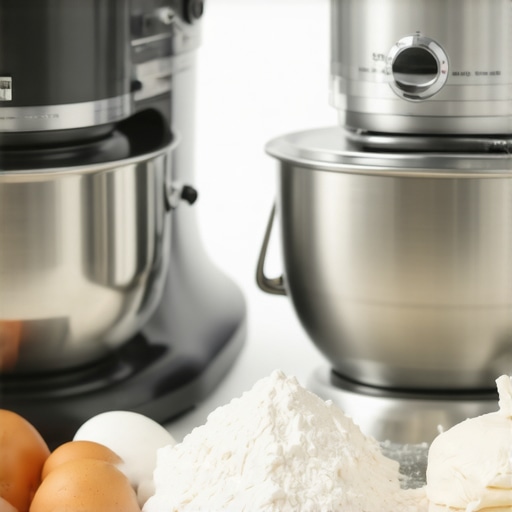
I remember the first time I tried to knead a mountain of dough by hand. My arms were trembling, and I was already considering whether to invest in a new kitchen gadget or just accept that I was not cut out for serious baking. That lightbulb moment made me realize how crucial it is to choose the right mixer, especially when you’re aiming for that perfect bread or fluffy cake. But here’s the thing — with so many options out there, how do you pick between a trusty hand mixer and a powerful stand mixer? I’ll admit, I made a lot of mistakes early on, like thinking I could get by with a cheap handheld for all my baking needs, only to find out it struggled with heavy dough or thick batters. That’s why I want to share my journey and help you avoid those pitfalls.
Why Your Choice of Mixer Can Make or Break Your Baking Experience
Picking the right mixer isn’t just about convenience; it’s about achieving consistent, delicious results without turning your kitchen into a battleground. Whether you’re whisking eggs, whipping cream, or kneading dough, the right tool can save you time and effort — and make baking genuinely enjoyable. Conversely, the wrong choice can lead to frustration, uneven textures, or even damaged appliances. According to a recent study by KitchenTechHQ, the right mixer can cut your prep time in half while improving the end product’s texture. That’s a game-changer for home bakers who want to impress friends or just enjoy the process.
So, if you’ve ever wrestled with a hand mixer that kept overheating or a stand mixer that felt like overkill for small batches, you’re not alone. These struggles led me to explore the nuances of each type, and I want to help you find your perfect match. Are you tired of sticking with the same old mixer, only to find it doesn’t quite meet your needs? If so, keep reading — because I’ll walk you through the key differences, benefits, and what to consider before making that investment.
Is All the Buzz About Stand Mixers and Hand Mixers Actually Worth It?
One mistake I made early on was assuming that a more expensive, feature-packed stand mixer would automatically be better for all tasks. Turns out, that’s not always true! Sometimes, I’d spend more time cleaning a bulky machine than actually baking. The truth is, both types have their place, and knowing which one fits your specific baking style is essential. If you’re wondering whether you should splurge on a top-tier stand mixer or stick with a budget-friendly hand one, I’ll help you weigh the pros and cons based on real-world baking scenarios.
Let’s get into the nitty-gritty of what each type offers and how to choose based on your baking habits. Along the way, I’ll share some insider tips and links to comprehensive guides, so you can make an informed decision without second-guessing every time you start a new recipe.
},
Get Hands-On with Your Mixer
Start by assembling your equipment. For example, I vividly remember the time I attempted to knead a batch of bread dough with my first hand mixer. I attached the dough hook, set it to low speed, and watched as the mixer struggled initially. The key here is to understand your equipment’s capabilities and limitations before diving into complex recipes. Always ensure your mixer is stable on the countertop to prevent accidents during vigorous mixing.
Select the Right Attachment for the Job
Choose your attachments wisely. If you’re whisking eggs or whipping cream, opt for a balloon whisk. For heavy dough, use the dough hook. When I made my first batch of sugar cookies, I used the paddle attachment to cream butter and sugar until fluffy. Remember, each attachment is designed for specific tasks. Using a whisk for dough can damage both the attachment and your mixer, so stick to the intended tools.
Master the Mixing Speed for Consistent Results
Adjust your speed settings based on the task. Start slow to combine ingredients and increase gradually. For example, I once tried to incorporate flour into wet ingredients at high speed, which caused a cloud of flour to puff everywhere. Instead, I set my stand mixer to low, added the flour slowly, then increased the speed once the ingredients were incorporated. This technique prevents mess and ensures even mixing.
Timing and Technique for Best Outcomes
Timing matters. Overmixing can lead to tough baked goods, while undermixing can cause uneven textures. When making sponge cake batter, I mixed until just combined—about 2 minutes on medium speed—then stopped. Use the paddle for creaming butter and sugar, the whisk for aerating, and the dough hook for kneading. Knowing when to switch between these techniques is key to professional results.
Clean and Maintain Your Mixer Properly
After each use, detach the accessories and clean them thoroughly. Wipe down the mixer body with a damp cloth. For example, I once neglected to clean my dough hook properly, which caused rust over time. Regular maintenance extends your appliance’s lifespan. Check the manufacturer’s instructions for specific cleaning tips and avoid immersing the motor housing in water.
Test and Adjust Your Technique
Practice makes perfect. I recommend trying small batches initially to understand how your mixer behaves with different ingredients. For instance, I learned that my hand mixer overheated after 10 minutes of continuous use, so I took breaks. Adjust your technique based on the results—if your batter is lumpy, mix longer; if it’s overworked, stop sooner. This iterative process helps you refine your skills and achieve bakery-quality results.
By following these concrete steps, you’ll gain confidence and precision in your baking. Remember, mastery comes from understanding your equipment and practicing consistently. For more insights on selecting the right equipment, visit this comprehensive guide.
Many home bakers fall into the trap of oversimplifying their choice of mixers, believing that a more powerful or expensive model automatically translates to better results. In reality, there are nuanced aspects that often get overlooked, which can significantly impact your baking success. For instance, a frequent misconception is that stand mixers are exclusively for heavy dough, while hand mixers are only suitable for light tasks. However, the truth is more layered. The key lies in understanding the specific features and limitations of each type, especially when it comes to attachments like whisks and dough hooks.
One critical mistake many make is assuming that all whisk attachments are interchangeable across different mixers. Not all whisk attachments are compatible with every model, and using the wrong attachment can lead to inefficient mixing or even damage. For example, high-performance stand mixers often come with specialized whisks designed to aerate and whip at higher speeds, which can be a game-changer for meringues or soufflés. On the other hand, attempting to use a standard hand mixer for similar tasks might not yield the same volume or stability, even if the attachment looks similar. To dig deeper into this, check out this detailed guide.
Another hidden nuance is the importance of understanding dough mixing dynamics. Many novice bakers think that kneading dough is just about running the mixer until the dough looks smooth. But overmixing can actually develop too much gluten, leading to dense, tough bread. Conversely, undermixing can leave the dough weak and unable to hold shape. Advanced bakers know that the right technique involves precise timing and speed adjustments. For example, using a stand mixer with a dough hook at medium-low speed for the appropriate duration is crucial. This isn’t just about power; it’s about mastering how to manipulate the mixer’s settings based on the dough’s hydration level and elasticity. For an in-depth discussion on this, see this resource.
Why do some recipes require specific mixing techniques and how can ignoring this backfire?
Many advanced bakers underestimate the significance of mixing technique. For instance, the difference between folding and mixing vigorously can be the difference between a tender sponge and a dense cake. Ignoring these subtle techniques often results in flat, uneven textures. Moreover, the speed settings matter immensely; mixing at high speed for delicate batters can deflate the mixture, ruining the final product. This is where understanding the physics of mixing—like how air incorporates into the batter—is vital. According to culinary scientist Dr. Harold McGee, mastering these nuances elevates your baking from good to professional-quality. You can find more about this in this expert guide.
Finally, a common mistake is neglecting proper maintenance and cleaning. Residual dough or batter buildup not only shortens the lifespan of your equipment but can also harbor bacteria or cause corrosion. For example, failing to clean the dough hook thoroughly after each use can lead to rust and compromised performance. Regularly inspecting and maintaining your mixer ensures consistent results and extends its lifespan. This might seem trivial, but it’s an often-overlooked aspect that professional bakers swear by. For tips, see this maintenance guide.
So, have you ever fallen into any of these traps? Let me know in the comments and share your own experiences with mixing equipment. Mastering these subtle but critical details can truly transform your baking journey from trial-and-error to confident artistry.
Keeping your baking equipment in top shape is essential for consistent results and extending the lifespan of your tools. I personally swear by a few specific maintenance routines that have served me well over the years. One of the most important practices is regular cleaning after each use, especially for attachments like whisks and dough hooks. A quick wipe with a damp cloth to remove residual flour or batter prevents buildup that can cause rust or impair performance. For metal attachments, I recommend occasionally soaking them in warm, soapy water and drying thoroughly to avoid corrosion. Additionally, inspecting the power cord and switch for any signs of damage is crucial for safety and longevity.
When it comes to your stand mixer, a key tip I follow is to keep the motor housing free of dust and crumbs. Using a soft brush or compressed air can help remove debris that might accumulate around vents. Some models have removable splash guards or covers; I advise removing and cleaning these monthly to prevent grease buildup. Applying a light layer of food-grade lubricant to the moving parts—according to manufacturer instructions—can also help keep everything running smoothly. This proactive approach reduces the risk of overheating and ensures your mixer can handle heavy doughs without hiccups.
As for tools and attachments, investing in high-quality brushes and gentle cleaning solutions is worth it. I like to use a toothbrush or small detailing brush to clean around the whisk attachment’s joints and crevices. This prevents dirt from accumulating and affecting the attachment’s balance or aeration ability. For the bowl and paddle attachments, I prefer hand washing with a mild dish soap and drying immediately to avoid water spots and rust. Remember, always consult your user manual for specific cleaning recommendations, as some parts may be dishwasher safe while others require hand washing.
Many home bakers overlook the importance of proper storage. Keeping your mixer and attachments in a dry, dust-free environment prevents rust and damage. Using a dedicated utensil drawer or a covered container helps protect your tools from accidental impacts or exposure to moisture. Additionally, storing attachments separately allows for easier access and reduces the likelihood of losing small parts like whisks or dough hooks.
Looking ahead, I predict that the trend in mixer maintenance will increasingly incorporate smart features. Future models may include self-cleaning mechanisms or sensors that alert you to potential issues before they become serious. Until then, a consistent maintenance routine—at least once a month—will keep your equipment performing at its best. I encourage you to try my tip of applying a food-grade lubricant to your mixer’s moving parts; it’s an advanced step that makes a noticeable difference in durability and performance.
How do I maintain my baking tools over time?
Regular cleaning, gentle handling, and proper storage are your best strategies. For example, I always disassemble my attachments after baking, soak and scrub them thoroughly, then dry and store them in a dry place. Checking for wear and tear periodically helps catch small issues before they escalate into costly repairs. This simple routine ensures your tools remain reliable and effective, making your baking experience smoother and more enjoyable. For detailed guidance on specific maintenance techniques, visit this comprehensive guide.
The Hardest Lesson I Learned About stand mixer,hand mixer,baking mixer,whisk attachments,dough mixing
One of my biggest realizations was that not all mixers are created equal, especially when it comes to delicate tasks like whipping egg whites or kneading dough. I once tried to make a perfect meringue with a basic hand mixer, only to find it lacked the power to achieve stiff peaks. That taught me that investing in a quality whisk attachment and understanding your equipment’s capabilities can dramatically elevate your baking results.
3 Myths About stand mixer,hand mixer,baking mixer,whisk attachments,dough mixing That Held Me Back
I used to believe that more expensive always meant better. Turns out, a high-end stand mixer isn’t necessary for small batches or light tasks. Also, I thought all attachments were universal, but compatibility varies. Recognizing these myths helped me avoid unnecessary purchases and focus on what truly benefits my baking style.
What Experts Won’t Tell You About stand mixer,hand mixer,baking mixer,whisk attachments,dough mixing
Professionals know that mastering the timing and technique of mixing is more important than just the equipment. For instance, overmixing can ruin a delicate sponge, while undermixing can leave ingredients uneven. Fine-tuning your approach based on the recipe and understanding your mixer’s strengths makes a big difference, a secret many home bakers overlook.
Curated Recommendations for Your Baking Arsenal
My essential toolkit includes the KitchenAid Artisan Stand Mixer for its durability and versatile attachments, a Silicone Mixing Bowl Set for easy handling, and the comprehensive guide to choosing the right mixer to help you make informed decisions. These tools have truly transformed my baking experience and are worth every penny.
Your Turn to Try
Embrace the learning curve and don’t be afraid to experiment with different attachments and techniques. Remember, the secret to great baking isn’t just the equipment but your understanding and confidence in using it. Whether you opt for a stand mixer or a trusty hand model, mastering your tools will unlock new baking possibilities. Share your experiences below and let’s grow together as passionate bakers.
Reading through this post really resonated with me, especially the part about understanding your equipment’s capabilities before diving into complex recipes. I remember how I initially underestimated the importance of properly attaching the right tools—using a paddle instead of a dough hook when making bread, for example, which made the process unnecessarily frustrating and slow. Over time, I’ve learned that investing in a good quality dough hook and taking the time to learn the nuances of each attachment makes all the difference, especially for heavier doughs. One thing I’d love to hear more about is how others determine the ideal mixing speed for different types of dough and batters, especially when baking in a hurry or during busy weekends. Do you modify your approach based on the batch size or ingredient hydration levels? It seems like mastering speed and technique is just as critical as having the right machine. Overall, this article offers fantastic insights that will help anyone avoid common pitfalls and elevate their baking skills.