It all started on a rainy Saturday afternoon when I attempted to make my favorite bread recipe, and my trusty hand mixer sputtered and died halfway through kneading. That moment was a bit of a lightbulb for me—realizing how crucial reliable mixing equipment is for baking success. I’ve spent years tinkering with different gadgets, and trust me, not all mixers are created equal. Now, in 2024, the choice between a sturdy stand mixer or a versatile hand mixer can make or break your baking experience. Today, I’m here to help you navigate this often confusing decision. We’ll explore the strengths and weaknesses of each, share real-world insights, and point you toward the best options tailored to your baking needs. If you’ve ever faced frustration over a mixer that underdelivers or wondered if investing in a top-tier stand mixer is worth it, stick around; we’re about to clarify everything.
Why your baking deserves the right mixer and how to pick it
Secure the Right Attachments for Your Task
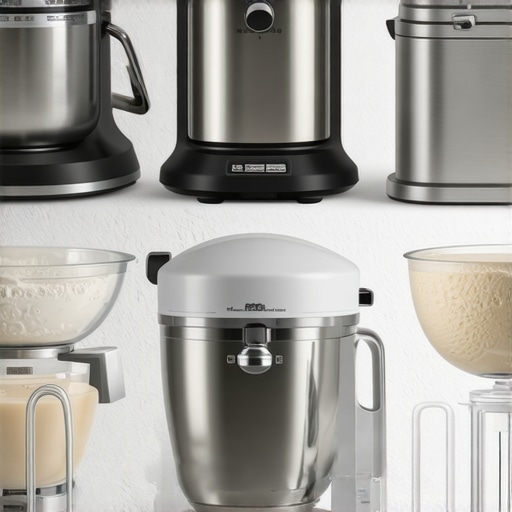
Start by selecting the appropriate attachment for your mixing task. For light, airy batters, use a balloon whisk; for dense doughs, a dough hook is ideal. A beater is versatile for common cake batters. Remember, choosing the right attachment enhances efficiency and results. I once lost five minutes fiddling with the wrong head, leading to a lumpy batter, so double-check before proceeding.
Set Up Your Mixer Correctly
Place your mixer on a stable surface. Ensure the bowl is securely attached, and the attachment firmly connected to the motor. For stand mixers, lock the bowl into place; for hand mixers, hold firmly. This prevents spills or slips, saving you cleanup time. I recall a time when an unstable setup caused batter to splash all over, forcing me to start over; a simple check prevented that mishap.
Adjust Speed Thoughtfully
Begin mixing at a low speed to prevent ingredients from flying out—think of it like gently steering a boat before engaging full throttle. Gradually increase speed as ingredients incorporate. For example, when whipping egg whites, start slow, then gradually ramp up to avoid curdling. Too high a speed initially can cause messes and uneven mixing. I learned this after an egg-white volcano exploded across my countertop.
Control Mixing Time and Pattern
Pay attention to the consistency and avoid overmixing, which can toughen baked goods. Mix until ingredients are just combined—think of it as folding in delicate layers. Use a circular motion if manually controlling, especially with hand mixers, to ensure even distribution. For dense doughs, knead in a consistent pattern to develop gluten without overworking. I once overmixed a bread dough, resulting in a dense, tough loaf, because I was blinded by speed rather than observation.
Use Proper Technique for Density and Texture
Listen to the mixer — a change in sound can indicate overworking or under-processing. For stiff doughs, don’t force the mixer beyond its capacity; instead, pause and scrape the sides of the bowl to ensure even mixing. If your mixture appears glossy and elastic, you’ve likely achieved proper kneading. I remember struggling with sticky dough until I realized the importance of frequent scraping and appropriate speed adjustments.
Clean and Maintain Your Equipment
Immediately after use, detach attachments and wash them thoroughly. Wipe down the motor housing to prevent buildup. Regular maintenance ensures consistent performance and longevity. I once ignored this and faced a muffled motor, which I resolved by cleaning and lubricating the parts, extending the life of my mixer significantly.
Experiment and Adjust
Don’t be afraid to tweak your technique based on the recipe. Some batters benefit from longer mixing, others from brief pulses. For dense bread doughs, a longer, slower knead mimics manual work, helping develop gluten structure. Remember, practice makes perfect; over time, you’ll instinctively know when your mixture has reached the ideal stage.
For further insights into optimal mixer techniques and choosing the right equipment, dive into those resources. Applying these steps will elevate your baking game—snagging that perfect loaf or cake becomes less about luck and more about technique.
 Many home bakers believe that the choice between a hand mixer and a stand mixer is simply about convenience or budget, but there’s more beneath the surface. A common myth is that hand mixers are inherently less powerful or versatile than stand mixers; however, advances in technology have blurred these lines, with some high-end hand mixers matching stand mixers in performance for specific tasks. The real nuance lies in understanding the subtleties of attachments and mixing techniques. For example, whisk attachments on hand mixers can excel at aerating egg whites if used correctly, but many overlook the importance of technique over equipment — overmixing can lead to stiff, dry baked goods, regardless of the mixer type. Equally, many beginners fall into the trap of believing that kneading dough is only effective with a stand mixer, yet with the proper dough hook and technique, a high-quality hand mixer can handle moderate doughs, especially when combined with manual folding. An advanced mistake is neglecting the importance of motor stability and build quality; inexpensive models may struggle with dense doughs, which could cause motor burnout or inconsistent results. As debated among experts, the neurobiological aspect of tactile feedback during manual kneading isn’t easily replicated by machines, and some bakers swear by manual methods for developing gluten. For those aiming to elevate their baking, understanding these nuanced differences is vital. Studies, like the one from the Institute of Food Technologists, suggest that proper technique often outweighs equipment capability, emphasizing mastery over machinery. Want to unlock professional-level results? Focus on technique, attachment selection, and understanding the limitations and strengths of your equipment. Did you ever fall into the trap of oversimplifying your equipment’s abilities? Share your experience in the comments! For a comprehensive comparison, check out this insightful guide on choosing the right mixer for your baking needs.
Invest in Quality Attachments and Parts
One of my top tips for maintaining your mixers and accessories is to invest in high-quality attachments, especially whisk and dough hooks. Personally, I prefer stainless steel components over plastic ones, as they withstand frequent use and cleaning better, ensuring consistent performance over years. I regularly inspect and replace worn parts since aging or damaged attachments can compromise mixing quality and strain the motor, leading to potential failures. For example, a cracked dough hook may seem minor, but it can cause uneven kneading and damage the motor over time. Reliable equipment ensures your baking remains flawless.
Establish a Routine Cleaning Regimen
After each baking session, I detach and rinse all attachments immediately to prevent residue buildup. A quick wipe of the motor housing with a damp cloth also prevents dust and flour accumulation that could hinder motor performance. Using a mild detergent and a soft brush on attachments keeps them shiny and functional. Regular cleaning significantly extends the lifespan of your equipment and maintains hygiene—nothing is worse than discovering mold in neglected crevices.
Keep a Maintenance Schedule and Document It
To stay organized, I maintain a maintenance checklist, noting when to lubricate the gear mechanisms or replace worn-out parts. A good rule is to lubricate the beaters’ gearing every six months using manufacturer-approved lubricants, which can prevent squeaks and sluggish action. Additionally, keeping a log helps identify patterns, like motor overheating or unusual noises, alerting me early to potential issues. This approach saves money and time, avoiding unexpected breakdowns during a critical baking moment.
Be Mindful of Overloading and Proper Usage
Overloading your mixer by attempting to knead massive quantities can stress the motor excessively. I’ve learned from experience that batching ingredients in smaller portions prevents overheating and prolongs device longevity. Also, always adhere to the manufacturer’s recommended speed settings; running at maximum speed for extended periods isn’t just noisy—it can burn out your motor. Using your equipment correctly from the start keeps it running smoothly for many baking adventures to come.
Plan for Scalability and Upgrade When Needed
As your baking projects grow in ambition, so should your tools. I recommend researching robust stand mixers that can handle larger batches or more demanding doughs, especially if you’re transitioning from hobbyist to professional-level baking. Companies like KitchenAid are continually updating their models with better motors and more durable components, making upgrades worthwhile. For instance, considering a high-torque motor model in your next upgrade ensures consistency and reduces wear and tear over time. Check out this comprehensive guide to help choose a versatile, future-proof mixer.
Utilize Proper Storage to Protect Your Investment
Lastly, storing your equipment properly is just as important as maintenance. I keep my mixers and attachments in a dedicated drawer or cabinet, away from dust and accidental bumps. Using protective covers for attachments and motor housing prevents scratches and environmental damage. Well-maintained storage ensures your tools are always ready to perform and last for years.
Interested in extending your equipment’s life even further? Try my favorite advanced tip: regularly lubricate your mixer’s gear mechanisms with manufacturer-approved lubricants. This simple step minimizes friction and prevents motor strain. Over time, such proactive maintenance can significantly enhance longevity and performance. For detailed instructions, consult the ultimate guide. Incorporate this into your routine today and experience smoother, more reliable baking hardware that’s ready for your next culinary masterpiece.
The Unexpected Truth About Mixer Power and Versatility
One lightbulb moment I had was realizing that high wattage doesn’t always mean better performance, especially when it comes to delicate doughs or airy mixtures. Sometimes, a smaller, well-designed motor with optimal gear ratios produces more consistent results than sheer power. I used a powerful but poorly designed mixer early on, which overheated frequently and struggled with dense recipes. Investing in equipment with quality engineering taught me that understanding the technological backbone is key for reliable baking.
Why Mastering Technique Trumped Equipment Upgrades
I once believed that upgrading my mixer would instantly improve my baking. Turns out, honing my kneading and mixing techniques—like adjusting speed gradually and scraping the bowl—had a far more profound effect. Equipment without proper technique is like a high-performance car driven with a foot on the brake. The real game-changer was recognizing that skill development unlocks equipment potential, making even modest tools perform at a professional level.
Learning to Read Audio and Feel for Perfect Results
Listening to the subtle changes in your mixer’s sound has been invaluable. A telltale squeak or a change in the pitch often signals overworking or impending motor strain. Feeling the texture and elasticity of dough as you knead provides feedback no machine can replace. These sensory cues have helped me catch mistakes early, saving ingredients and time, and reinforcing that bakers—whether novice or pro—must develop their tactile and auditory awareness for consistent success.
Where to Dive Deep—Resources That Transformed My Baking
Over the years, certain guides and communities have become my go-tos. The in-depth articles on comparing stand and hand mixers helped me understand the nuanced capabilities of each, steering me toward equipment that truly fit my baking style. The detailed reviews on whisk attachments and their performance in real kitchen settings provided practical insights I couldn’t find elsewhere. These resources saved me from costly mistakes and deepened my appreciation for the craft.
Your Baking Journey Begins Now
Embracing the balance between technique, equipment knowledge, and maintenance can elevate your baking to new heights. Remember, even the most advanced tools are secondary to the skills and understanding you bring to your projects. By staying curious and committed to learning, you set yourself up for consistent success in every loaf, cake, or dough you craft. Curious—what’s the next piece of equipment you’re planning to try or upgrade? Share your thoughts below, and let’s keep the conversation rolling!
Reading through this detailed guide really resonated with me, especially the parts about technique and the importance of attachments. I used to think that having a more powerful mixer was the ultimate solution, but I realized over time that mastering the right techniques—like gradually increasing speed and proper ingredient addition—made all the difference. Personally, I recently upgraded to a stand mixer with a sturdy dough hook, and it’s been a game changer for my bread baking. Still, I often manually knead smaller batches to develop gluten better. Does anyone else find that combining manual techniques with electric mixers gives the best results? Or is there a specific routine you’ve adopted for dense doughs that works consistently? Understanding the subtleties of both machine and hand work truly elevates the baking experience, and I’m curious to hear how others balance these methods.