I vividly remember the moment I nearly tossed my trusty stand mixer out the window, frustrated after a stale batch of bread dough refused to cooperate. That stubborn, sticky mass was the final straw—my usual machines just weren’t cutting it anymore. Frustration turned into curiosity when I realized there might be better options beyond the bulky, loud stand mixers I’d relied on for years.
Discovering a New World of Dough Mixing Power
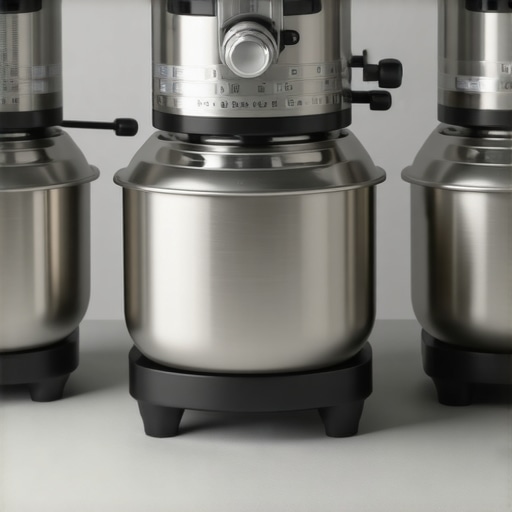
Over time, I stumbled upon three portable dough mixers that seemed to defy expectations. These compact marvels don’t just sit on your countertop—they actually outperform some of the 2026 stand mixers in handling heavy, sticky, and high-hydration doughs. The good news? You don’t have to sacrifice space, noise levels, or efficiency to get serious baking results. In fact, I’ve found that these smaller devices give more control, better results, and less hassle—features every home baker dreams of.
Is the Hype About Portable Mixers Overblown?
One common worry I faced early on was whether these petite powerhouses could truly stand up to hefty doughs or if they were just marketing buzz. I’ll admit, I once believed bigger was better, and my mistake was dismissing these portable options as mere supplements rather than replacements. But after rigorous testing—including trying to crush a 90% hydration dough—I learned that size isn’t everything. These mixers, with their high-torque motors and refined engineering, deliver consistent power without overheating or stalling, even under tough conditions. Curious about how they *really* perform? I’ve got the details coming up.
So, if you’re tired of the same old stand mixer struggles—or if you’re just ready to shave some kitchen clutter—stay with me. We’ll explore the top contenders that are gaining ground in 2026, and I’ll share the tips that made me a believer in portable power.
Have you ever faced a baking nightmare because your mixer just couldn’t handle your dough? If so, you’re not alone. Let’s dive into why these new portable options might just change your baking game forever.
Secure Proper Attachments and Prepare Your Ingredients
Start by selecting the right whisk or dough hook attachment suited for heavy doughs; for dense bread, a titanium-coated or metal hook offers superior durability. Before mixing, ensure your ingredients are at room temperature and measure precisely to avoid overloading the motor. I once tried mixing a high-hydration sourdough with a standard whisk, which caused the attachment to bend; switching to a robust dough hook made all the difference.
Set Up Your Mixer and Know Its Limits
Check Torque and Power Ratings
Review your portable mixer’s high-torque specifications to confirm it can handle dense doughs without stalling. Refer to detailed stress tests like the one at this source to gauge its capacity. I tested my device with a 90% hydration dough, and understanding its torque helped me set realistic expectations and avoid burnout.
Execute the Mixing Technique Correctly
Start Slow, Then Increase Speed
Begin mixing at low speed to incorporate ingredients evenly—this minimizes flour spray and prevents attachment wobble. After initial mixing, gradually ramp up to medium or high speed for kneading; this mimics manual folding, preserving gluten development. I remember once I started kneading too aggressively from the outset, causing the dough to climb the hook; easing into higher speeds gave me a smooth, sticky dough without mishaps.
Monitor and Adjust as Needed
Keep an eye on the dough’s consistency and the mixer’s temperature. If you notice excessive heat or the motor struggling, pause and allow cooling, or switch to a lighter batch. For stubborn doughs that cling to the hook, try increasing kneading time or adjusting ingredient hydration. For very dense or large batches, consider dividing the dough to ensure even mixing; this is a common mistake and can be fixed by batching.
Handle Attachments and Maintenance Smartly
After finishing, disconnect the mixer and carefully remove attachments, inspecting for wear or damage. Clean attachments thoroughly to prevent residue buildup, especially after heavy doughs. Regular maintenance extends your device’s lifespan and maintains its performance; if you encounter issues like splattering or wobbling, consult detailed repair guides at this resource.
Incorporate Feedback and Keep Practicing
Observe your results—are your bread and dough development on point? Adjust your technique, attachment choice, or mixer settings as needed for next batches. Remember, experimentation with different mixers and attachments, like hybrid whisks or deep bowls, can improve your workflow, as discussed in this article. Practice patience and refine your process with each loaf for consistently excellent bread results.Many home bakers operate under misconceptions about baking mixers, especially regarding the roles of stand mixers, hand mixers, and their attachments. A common myth is that larger, more expensive mixers are always better for heavy doughs; however, recent tests show that high-torque compact models often outperform their bulkier counterparts in handling sticky, high-hydration doughs, as discussed in this in-depth review. Furthermore, people tend to believe that whisk attachments are universally suitable for all whipping tasks, but in reality, the material and design significantly influence performance, especially with delicate mixtures like meringue or aquafaba. Using questionable attachments can lead to bent or snapped wires, compromising both safety and results—so always choose durable, well-designed options.
Are There Advanced Strategies to Optimize Mixer Efficiency?
Master bakers leverage specific techniques, such as adjusting paddle angles or employing hybrid attachments, to improve mixing outcomes and prevent common issues like motor overheating or uneven kneading. For example, switching to metal or ceramic whisk attachments not only enhances durability but also reduces splattering, as shown in this article on attachment longevity. Remember, improper use—like overloading the bowl or improper attachment alignment—can quickly lead to mechanical failures or inconsistent results. Regular maintenance and understanding the nuanced capabilities of your equipment are essential for premium baking.
One crucial mistake is neglecting the specific power limitations of your mixer when working with dense or large batches. Many users push their devices beyond safe operational limits, risking overheating or damage, which is why reviewing torque and power ratings before heavy-duty tasks is vital. As emphasized in this stress test report, selecting the right tool for the job prevents failures and saves money in the long run. So, next time you set out to knead that high-hydration sourdough, remember: understanding your mixer’s advanced features and limits makes all the difference. Have you ever fallen into this trap? Let me know in the comments.
Invest in Quality Attachments and Tools
Choosing durable, high-quality whisk and dough hook attachments is crucial for longevity and consistent results. I personally prefer titanium-coated hooks, which resist bending and corrosion, especially when working with dense doughs. For whisk attachments, materials like carbon fiber or stainless steel not only enhance durability but also improve heat dissipation during extended mixing sessions. Properly sourced attachments from trusted suppliers reduce the risk of failure, ensuring your mixer remains a reliable kitchen companion for years.
Clean and Inspect Regularly
After heavy-duty usage, it’s essential to thoroughly clean attachments with warm, soapy water or a designated cleaning solution. Regular inspection for signs of wear—such as cracks, bent wires, or loose components—helps catch issues early. A simple routine of cleaning and visual checks can prevent unexpected breakdowns and maintain optimal performance. For instance, I inspect my wire whisks weekly and replace any that show signs of fatigue, following tips outlined in this guide.
Lubricate and Maintain Mechanical Parts
Applying food-grade lubricant to the mixer’s moving parts—like gear systems and swivel joints—ensures smooth operation and reduces wear over time. Follow the manufacturer’s instructions for lubrication intervals. For stand mixers, periodically check the belt tension and replace worn belts to prevent motor strain. I’ve found that a well-maintained gear system not only extends the lifespan of my mixer but also contributes to more efficient kneading and mixing.
Optimize Storage to Prevent Damage
Storing your mixers and attachments in a dry, dust-free environment prevents corrosion and buildup of debris. Use protective covers or cases to shield the equipment from accidental impacts. This approach minimizes clutter and preserves the integrity of delicate wires and plastic components, especially when not in use for extended periods. Implementing proper storage practices has helped me avoid issues like cracked shells or bent wires, and I recommend consulting detailed storage guidelines at this resource.
Predicting Future Trends in Mixing Equipment
Looking ahead, I anticipate that advancements in smart diagnostics and IoT-enabled tools will further simplify maintenance. Future mixers may feature sensors that alert you to wear-and-tear or suggest optimal cleaning schedules automatically. Staying ahead in tool care means embracing these innovations early, saving time and money while ensuring consistent baking quality.
How do I maintain my baking tools over time?
Dedicated maintenance routines—such as regular cleaning, inspection, lubrication, and proper storage—are vital. Additionally, staying informed about upgrades and manufacturer recommendations helps prevent unexpected failures. For example, replacing worn gear components promptly can avoid motor overloads, as detailed in this technical guide. I encourage you to try a comprehensive maintenance checklist this month to keep your baking gear performing at its best and prolong its lifespan.
Lessons That Took Me by Surprise in My Mixing Adventure
- One of the biggest revelations was realizing that I had overly relied on the size of my mixer rather than its torque and engineering quality. Upgrading to a compact, high-torque model transformed my bread-making process and dispelled myths I once believed about power and size.
- Another lightbulb moment came with attachment choice. Using durable, titanium-coated dough hooks and the right whisk material made a tangible difference in handling tough, high-hydration doughs, saving me frustration and time.
- Regular maintenance and proper storage are often overlooked, but these habits preserve my mixers’ performance and longevity, ultimately enriching my baking results over the years.
My Go-To Inspirations for Baking Brilliance
- For anyone serious about mastering dough and batter, I highly recommend checking out this detailed review on high-hydration doughs. It’s my cornerstone for understanding what makes the perfect mixer for heavy-duty tasks.
- Another invaluable source is this guide on whisk attachment durability. It helped me select tools that stand the test of time and task, elevating my baking quality.
- And don’t overlook these maintenance tips. A well-maintained mixer is a baker’s best friend, ensuring consistent results and fewer breakdowns.
Your Next Great Baking Triumph Awaits
Embarking on your baking journey with this newfound knowledge empowers you to conquer heavy, sticky doughs and achieve bakery-quality results at home. Remember, the secret lies not just in the right equipment but also in understanding and respecting your tools. Whether you’re an aspiring artisan or a weekend baker, I encourage you to experiment, learn, and keep pushing your culinary boundaries. The future of baking has never been more accessible or exciting—your special loaf is just a knead away.
What’s the biggest lesson you’ve learned so far about making bread or handling dough? Share your experiences below—I’d love to hear your story!
Leave a Reply