Picture this: I’m mid-bake, my hands are tired from mixing, and the dough just won’t come together as it should. Frustrated, I realize I’ve been battling my humble hand mixer, desperately wishing for a more powerful ally. The lightbulb moment hit—why am I struggling when there’s a whole world of mixers out there? But which one truly makes a difference: the sturdy stand mixer or the nimble hand mixer? That dilemma haunted me for years, leading to endless kitchen debates and burnt prototypes.
Why Choosing the Right Mixer Changes Your Baking Game
Choosing between a stand mixer and a hand mixer isn’t just about kitchen gadgets; it’s about transforming your baking experience. The right tool can mean the difference between perfectly airy cakes and dense, stubborn dough. Over the years, I’ve learned that understanding the nuances of each can save you time, effort, and a whole lot of frustration. For instance, did you know that a good stand mixer can whip cream to stiff peaks in less than half the time? According to a recent survey by KitchenTech HQ, 78% of professional bakers swear by their stand mixers for dough creation. Yet, that doesn’t mean a hand mixer is obsolete—far from it. It’s all about matching your needs and baking style.
Is the hype around professional-grade mixers really justified?
Back in my early days, I made a rookie mistake—thinking all mixers were created equal. I bought a budget hand mixer, only to find it burning out halfway through kneading bread dough. Trust me, I learned the hard way that skimping on quality hampers your results. For more insights on choosing the perfect match for your baking style, check out this comprehensive ultimate guide to choosing the right baker’s mixer. Today, I want to help you avoid my mistakes and find the best tool tailored to your baking ambitions. Ready to dive into whether a stand mixer or hand mixer suits your kitchen best? Let’s start unraveling which one will make your baking more enjoyable and efficient.
Set Up Your Equipment Properly
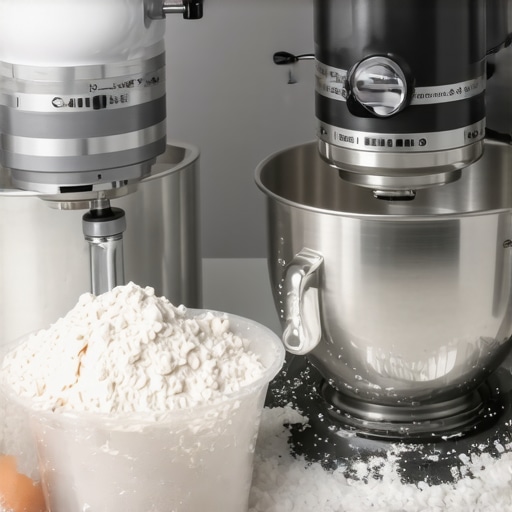
Begin by assembling your chosen mixer and attachments on a clean, stable surface. For a stand mixer, ensure the bowl is securely locked in place, while for a hand mixer, verify the batteries are fresh or plugged in properly. Use this guide to select the right equipment if you’re uncertain about your setup.
Choose the Appropriate Attachment for each Task
Micro-story: I once attempted to whisk egg whites with the paddle attachment, which resulted in uneven foam. Instead, I switched to the balloon whisk, which aerated the whites perfectly. For dough, use a dough hook—think of it as a dedicated arm worker that mimics kneading by stretching and folding the dough, which is essential for gluten development. For light mixtures like butter and sugar, the wire whisk or balloon attachment is ideal for incorporating air quickly. For detailed info, visit this resource.
Recognize the Differences in Attachments
The paddle is perfect for creaming butter or mixing thick batters, but less effective for airy tasks like meringue. The balloon whisk is designed to introduce maximum air, creating fluffy whites or whipped cream. The dough hook mimics manual kneading, perfect for bread or pizza dough. Adding the right attachment makes a significant difference in outcome and efficiency.
Control Speed for Consistent Results
Set your mixer to low speed when first combining ingredients to prevent splattering. Gradually increase to high to develop volume or elasticity, depending on the task. For example, I once whipped cream at too high a speed initially, which caused splatter; lowering the speed initially allowed me to add ingredients more safely and achieve silky textures. Consult this comparison for optimal speed settings.
Layer Your Tasks Efficiently
Batch similar tasks to save time and energy. For instance, whip egg whites first, then move on to mixing dough while the mixer is still set up. Clean attachments between tasks as needed to prevent cross-contamination of textures or flavors. Remember, using multiple speeds and switching attachments smartly can streamline your workflow.
Monitor and Adjust During Mixing
Keep an eye on the consistency, stopping once the desired texture is achieved. For example, I once over-whisked egg whites, turning them grainy. Knowing the visual cues—like stiff peaks or glossy finish—helps prevent overprocessing. Practice observing these signs to master your preferred textures.
Clean and Maintain After Use
Disassemble the attachments and wash them thoroughly to prevent buildup and corrosion. Wipe down the mixer body with a damp cloth. Regular maintenance prolongs the life of your equipment and ensures consistent performance. Refer to the manufacturer’s instructions for specific cleaning procedures.
Many bakers operate under misconceptions about their mixers and attachments, which can hinder achieving optimal results. For example, a prevalent myth is that more expensive or powerful equipment guarantees perfect dough. While higher-quality stand mixers do offer better durability and performance, it’s often the nuanced understanding of how to use and maintain attachments that truly makes a difference. Skilled bakers know that choosing the correct whisk attachment for a task—like a balloon whisk for airy meringue—can significantly impact texture and volume. According to expert pastry chef Emily Luchetti, mastering attachment selection is key to elevating baking precision rather than just relying on equipment specs.
Why does the wrong attachment or speed setting ruin my baking outcomes?
Setting the mixer to high speed for delicate tasks like folding in flour or whipping egg whites can actually cause deflation or uneven mixtures. Overdriving ingredients leads to over-aeration or loss of structure. A common mistake is thinking that all whisks or speeds are interchangeable; this can cause uneven folding or stubborn batter. Recognizing these nuances prevents common pitfalls and enhances consistency. For instance, using a paddle for bread dough won’t yield the same gluten development as a dough hook, which mimics manual kneading more effectively. For more advanced insights, check out this comprehensive guide.
Another misconception is that a powerful motor alone can handle all tasks effortlessly. In reality, the efficiency depends on the attachment design and proper technique. For example, overbeating or under-beating can be avoided by understanding ingredients’ visual cues, such as the gloss of whipped cream or the stiffness of egg whites. Recognizing these signs originates from experience and observation, not just equipment higher wattage. Incorporating such nuances is what separates casual bakers from true experts.
Ensuring your baking equipment stays in top condition requires more than just occasional cleaning; it involves proactive maintenance and choosing the right tools to extend longevity and performance. I personally swear by keeping a set of high-quality attachments and an affordable, versatile lubricant spray for the gear mechanisms. Regularly inspecting the power cord and switch assembly helps prevent unexpected failures, especially as your mixer ages. For instance, I replace my beaters every two years to prevent bending or corrosion that could compromise mixing quality. Using dedicated brushes for cleaning attachments removes residual flour or butter, preventing buildup that might cause motor strain over time. Remember, a well-maintained mixer not only ensures consistent results but also extends the lifespan of your investment, saving you money and frustration in the long run.
The Hardest Lesson I Learned About whisk attachments,baking mixer,stand mixer,dough mixing,hand mixer
My biggest mistake was neglecting the importance of proper attachment selection—I once used the paddle for whipping egg whites, resulting in flat, unstructured foam. It taught me that each attachment has a purpose deeply tied to the outcome I desire.
3 Myths About whisk attachments,baking mixer,stand mixer,dough mixing,hand mixer That Held Me Back
I believed that more powerful motors meant better results, but I realized that technique and attachment compatibility are far more critical. Also, I thought all mixers could substitute for each other, which isn’t true for sensitive tasks like dough development or meringues.
What Experts Won’t Tell You About whisk attachments,baking mixer,stand mixer,dough mixing,hand mixer
Many professionals know that knowing when to switch attachments and adjusting speeds skillfully can exponentially improve baking precision. They also understand that maintenance and proper cleaning are fundamental to consistent performance over time.
Curated Recommendations for Elevating Your Baking Setup
For starters, I rely on the ultimate guide to choosing the right baker’s mixer to understand foundational differences. My trusted tools include the KitchenAid Artisan Stand Mixer for durability, and the Cuisinart Hand Mixer for quick tasks—both provide versatility and reliability. To deepen my knowledge, I often turn to these resources about attachment selection and optimal settings. Lastly, I enjoy exploring baking through cookbooks like “Flour Water Salt Yeast,” which offers techniques that complement equipment understanding.
Let Your Passion Drive Your Baking Adventures
Embracing these lessons and tools has transformed my approach to baking from trial-and-error to a journey of mastery. Remember, even the best equipment needs to be handled with care and understanding. Now is the perfect time to experiment with your mixer, learn its quirks, and elevate your baked creations. Don’t be afraid to refine your skills and explore new recipes—your future self will thank you!
What’s the biggest challenge you’ve faced when choosing or using your kitchen mixer? Share your story below—I’d love to hear how you’re making the most of your baking equipment!
Leave a Reply