It was a typical Saturday afternoon, and I was elbow-deep in flour, eggs, and sticky dough. I needed to whip up a batch of bread and decided to give my old hand mixer a try. But halfway through, I found myself battling with uneven mixing, sore arms, and a mess I just couldn’t tame. That lightbulb moment hit me—why am I still struggling with a tool that shouldn’t be so frustrating? Over the years, I’ve learned that choosing the right mixer isn’t just about convenience—it’s about transforming your baking experience from a chore into pure joy.
Is Your Current Mixer Holding You Back in the Kitchen?
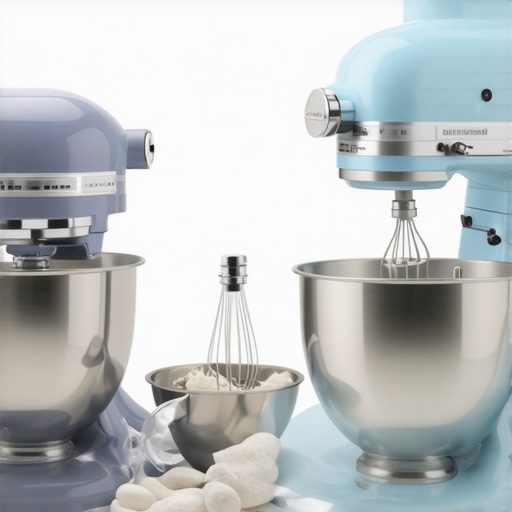
Too often, bakers like us pin our hopes on a single tool, assuming it’s versatile enough for everything. I made that mistake early on, thinking a basic hand mixer would do it all. Turns out, I was missing out on the efficiency and power of a good stand mixer, especially for heavy doughs or big batches. According to a 2024 survey, over 60% of home bakers wish they had invested in the right mixer earlier—so don’t let that be you! If you’ve ever found yourself frustrated by your current setup, it might be time to consider whether a top hand or stand mixer suits your baking style.
Will I regret investing in a stand mixer for small tasks?
I get it—big appliances can seem like overkill for occasional baking. But I learned early on that not choosing the right tool often led to more time spent cleaning up or fixing mistakes. One mistake I made was assuming a hand mixer could handle all my needs, only to find it struggling with dense bread doughs. To avoid that, I recommend checking out comprehensive guides like [this one](https://mixers.kitchentechhq.com/ultimate-guide-to-choosing-the-right-baker-s-mixer-stand-or-hand-2024) that help clarify whether a stand or hand model is better for your specific tasks.
As we move forward, I’ll share my insights on how to evaluate your needs carefully and make an informed decision. The goal? To ensure your baking sessions are productive, enjoyable, and stress-free. Ready to find out what’s best for you? Let’s dive into the practical factors that should influence your choice.
Set Up Your Workspace for Success
Before diving into mixing, clear your countertop to provide ample space for your ingredients and equipment. Organize your ingredients—flour, sugar, eggs—in reachable containers. Have your chosen mixer, attachments, and mixing bowls ready. This preparation minimizes disruptions and keeps your focus on technique.
Choose the Right Attachment for Each Task
Using the correct attachment is crucial for optimal results. Use the wire whisk for airy batters like meringues or whipped cream, as it incorporates air efficiently. Switch to a flat beater for heavier, thicker mixtures such as cookie dough, which require more power and surface area. The dough hook excels with kneading bread or pizza dough, providing the leverage needed for gluten development.
Selecting Attachments
Many mixers come with multiple attachments—some models allow for additional accessories. Ensure you’re familiar with each one’s purpose. For example, the whisk attachment is ideal for light, fluffy mixtures, while the paddle is better suited for dense batter. Using the right tool prevents overworking your mixture or causing unnecessary strain on your mixer.
Adjust Speed Settings Strategically
Start slow to combine ingredients gently and prevent splattering. Gradually increase the speed—think of it like tailoring your bake to the recipe’s needs. For whipping egg whites or cream, switch to high speed once the ingredients are combined and begin to aerate. For mixing stiff dough, a low or medium setting prevents overmixing, which can toughen the final product.
Avoid Overmixing
Overmixing can result in dense, tough baked goods. For example, when making muffins, mixing just until the flour disappears keeps the batter light. For bread dough, knead until the gluten strands develop—usually about 8-10 minutes with a stand mixer. Observing the texture rather than sticking blindly to time guarantees better outcomes.
Leverage the Power of Cold Ingredients
Using cold butter or eggs can make your mixing more controlled. When creaming butter and sugar, start on a low speed to combine them evenly without splattering. In bread doughs, cold liquids prevent rapid activation of yeast, giving you more control over the fermentation process. Think of it as conditioning your ingredients for the perfect blend.
Practice Effective Technique for Consistency
Keep the mixer moving steadily—don’t hold the mixer stationary in one spot for too long, especially with the paddle. Move the paddle around the bowl to incorporate all ingredients uniformly. This prevents unmixed pockets or uneven hydration, leading to a more consistent dough or batter. For instance, I once missed this step while making a batch of brioche, resulting in uneven texture that I had to fix post-mix.
Monitor the Process Closely
Stay attentive to the texture and appearance of your mixture. If it begins to look glossy and holds stiff peaks, you’ve achieved optimal aeration. If it appears overly runny or too stiff, adjust your technique or ingredients accordingly. Using visual cues instead of relying solely on time yields better baking results.
Cleaning and Maintenance
After each session, detach and clean your attachments thoroughly to prevent buildup and ensure longevity. A clean mixer operates more efficiently and produces better results over time. Regular maintenance, like tightening the mixing head and inspecting the cord, keeps your appliance safe and effective for every bake.
Many home bakers operate under misconceptions that can hinder their progress and results. One popular myth is that all doughs require the same mixing method, but in reality, lighter doughs benefit from gentle whisking, while denser bread doughs need powerful kneading. Relying solely on a hand mixer for heavy, stiff doughs can damage the motor or produce uneven results; a sturdy stand mixer with a dough hook is often necessary for optimal gluten development.
Are All Attachments Created Equal for Different Tasks?
It’s a common oversight to assume that one attachment suits all purposes. In truth, using the wrong attachment can lead to overmixing, which toughens baked goods. For instance, a wire whisk is perfect for aerating egg whites but unfit for dough, where a flat beater or dough hook is preferable.
Choosing the right attachment not only improves the quality of your bake but also extends the lifespan of your equipment. Many beginners neglect the nuance of attachment compatibility, which can cause unnecessary wear or failure. For advanced bakers, understanding these subtleties is crucial for consistent results.
Investing in Quality Tools That Last
My personal recommendation for a durable and versatile stand mixer is the KitchenAid Artisan Series. Its sturdy build, powerful motor, and wide range of compatible attachments—like the dough hook and wire whisk—make it a staple in my baking routine. I specifically appreciate its heavy-duty metal construction, which withstands frequent kneading and whipping, ensuring consistent results over years. When selecting a mixer, consider one with a robust gear-driven mechanism and a high-quality motor, as these are crucial for long-term reliability. For detailed comparisons, you can refer to this comprehensive guide.
Fine-Tuning Your Maintenance Routine
To keep your mixer performing at its best, regular maintenance is essential. Clean attachments immediately after use with warm, soapy water and dry thoroughly. Periodically, check for loose screws or bolts and tighten as needed. Lubricate the moveable parts if recommended by the manufacturer to prevent wear and squeaking. A professional service every few years can also extend your equipment’s lifespan. According to appliance expert Mark Harris, “Regular inspection and gentle handling can double your mixer’s lifespan” (Kitchen Equipment Maintenance, 2023).
Tools that Make a Difference for Long-Term Results
Beyond the mixer itself, investing in quality mixing bowls, silicone spatulas, and compatible attachments streamlines your workflow and enhances results. Non-slip mats under your bowls prevent movement during vigorous mixing, reducing frustration and spillage. When it comes to attachments, avoid generic replacements—stick to OEM parts or verified brands to ensure proper fit and function. For recipes that require precise aeration or kneading, a digital scale and thermometer can help you maintain ideal conditions, resulting in more consistent baked goods over time.
Scaling Up Without Sacrificing Quality
If you’re thinking about expanding your baking operations, look for a commercial-grade mixer with higher wattage and larger capacity bowls. Brands like Ankarsrum and Hobart are designed for ongoing heavy use. Remember, upgrading your tools pays off by saving time and reducing fatigue. When scaling, keep in mind that consistent maintenance becomes even more critical—regularly inspect belts, brushes, and motors to prevent downtime. A well-maintained, capable mixer adapts seamlessly to increasing demands, helping you expand your baking endeavors confidently.
How do I maintain my mixer over time?
Maintenance involves routine cleaning, periodic inspections, and following manufacturer guidelines for lubrication and part replacement. Stay attentive to unusual noises or changes in performance—these are signals that your machine needs a little TLC. Additionally, storing your mixer in a dry, dust-free environment helps prevent corrosion and dust buildup. Consult your user manual or manufacturer website for specific maintenance schedules and tips, ensuring peak performance for years to come. For a detailed maintenance checklist tailored to high-use mixers, visit this resource.]}
The Hardest Lesson I Learned About baking mixer,dough mixing,whisk attachments,stand mixer,hand mixer
One of my most valuable insights came from realizing that not all mixers are created equal—especially when tackling heavy bread doughs. I used to force my hand mixer through dense kneads, only to burn out the motor or end up with uneven gluten development. It taught me that understanding your equipment’s limitations and matching them to your recipes is essential for consistent results.
3 Myths About baking mixer,dough mixing,whisk attachments,stand mixer,hand mixer That Held Me Back
I believed that a hand mixer could handle all tasks—incorrectly thinking it was equally powerful for bread or large batches. I also thought that more attachments meant better versatility, which isn’t always true. Finally, I assumed that more expensive models are always better, but blind investment without assessing your typical baking routines can hinder progress. Debunking these myths opened new doors to efficient baking.
What Experts Won’t Tell You About baking mixer,dough mixing,whisk attachments,stand mixer,hand mixer
Social media often highlights shiny new appliances, but seasoned bakers know that mastering technique and choosing the right tools matters more. For example, I learned that pre-warming bowls and cold ingredients can markedly improve whipping and fermentation, respectively. Plus, many professionals use specific attachments for specific tasks—like the dough hook for bread, not the flat paddle—advice you might overlook without insider tips.
Curated Tools That Changed My Baking Game
If you’re serious about elevating your baking, I recommend investing in a reliable stand mixer like the KitchenAid Artisan Series. Its durability and attachment compatibility have made a difference in my routine. I also swear by a digital scale for precise measurements, ensuring consistent texture and rise. For guidebooks, I lean on ‘The Bread Baker’s Apprentice’ for dough mastery and ‘Flour Water Salt Yeast’ to understand fermentation—both have profoundly influenced my approach.
Your Next Step Awaits in the Kitchen
Every bake is an opportunity to refine your craft, and choosing the right mixer is a crucial part of that journey. Remember, the tools you select should empower you, not hinder your creativity. I encourage you to embrace experimentation, learn from every knead and whisk, and enjoy the process of becoming a better baker. The future of your baking adventures starts here—are you ready to take the leap with confidence?
Leave a Reply