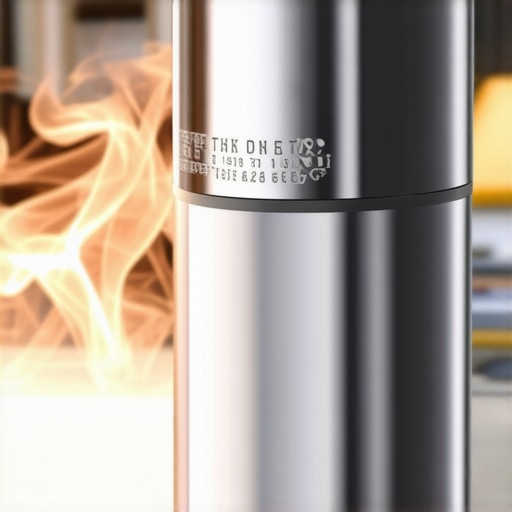
I remember the moment vividly — I was halfway through whipping a batch of meringue, and suddenly, my hand mixer started to smell like burning rubber. Panic set in. That little appliance, which I relied on every week, suddenly felt more like a ticking time bomb than a kitchen tool. It was a lightbulb moment that made me realize, in 2026, even our trusty hand mixers can signal trouble before they break down completely.
The Hidden Dangers of Overheating Hand Mixers
For years, I thought if my mixer was running, it was working fine. But as my baking sessions got more intense, I started noticing subtle signs of strain — increased vibrations, unusual noises, and warmth that wouldn’t go away. Soon, I learned that overheating isn’t just an inconvenience; it can damage your mixer’s motor, lead to uneven mixing, and even pose safety risks. And with the rise of heavy-dough recipes and high-hydration baking, knowing how to spot these signs early is more crucial than ever.
Did you know that in 2026, experts warn about increased motor stress in hand mixers due to the popularity of artisanal baking? Proper maintenance and awareness can save you from costly repairs or replacement. But how do you know if your mixer’s about to give out? That’s exactly what I want to help you uncover today.
Concerned about whether your hand mixer is safe to use?
I’ll share five critical warning signs you should never ignore. From unexpected motor stalls to strange smells, these indicators will help you prevent bigger problems down the line. Trust me, I made the mistake of ignoring the warning signs early on — and it cost me a new mixer. The good news? With a little knowledge, you can extend your appliance’s lifespan and keep baking happily.
Inspect Your Equipment Before Each Use
Start every baking session by carefully examining your hand mixer and attachments. Look for signs of wear, such as bent whisk spokes or cracks in the housing. If you notice any damage, replace or repair before continuing. I once skipped this step and ended up with a bent whisk that splattered batter everywhere, costing me time and clean-up. Conduct a quick visual check to prevent similar mishaps.
Assess the Motor’s Performance During Use
Pay attention to how your mixer sounds and feels while operating. Unusual vibrations, wobbling, or a sudden slowdown can indicate motor stress. For example, during a batch of dense bread dough, I noticed my mixer struggling and overheating after just a few minutes. Recognizing this early allowed me to pause and troubleshoot by checking for overload or overheating, extending the life of my appliance. If your mixer stalls or emits burnt smells, those are clear warning signs to pause and diagnose, not push through.
Keep Attachments Clean and Undamaged
Regularly clean all attachments with warm, soapy water. Inspect for dents, bent wires, or cracks. Damaged whisk attachments can lead to uneven mixing or further motor stress. Recently, I replaced a bent wire whisk with a titanium one—mentioned as a top choice by many experts—that handled high-speed whipping without bending or breaking, ensuring smooth, splatter-free results. Maintaining pristine attachments not only improves performance but also reduces the risk of damaging your motor.
Use Appropriate Speed Settings for Different Tasks
Adjust your mixer’s speed carefully depending on the ingredient or process. Low speeds are ideal for adding dry ingredients or starting mixing, while high speeds facilitate whipping and aeration. During my last batch of stiff cookie dough, I used a low speed initially and gradually increased, which prevented overheating or motor straining. Remember, rushing to high speed on dense dough is a surefire way to burn out your motor quickly. Consult your mixer’s manual or expert tips for optimal speed ranges, such as those outlined in this guide.
Limit Continuous Operation Time
Never run your hand mixer for extended periods without breaks—aim for no more than 3 minutes of continuous mixing on heavy dough. After that, let it rest to cool down. I learned this the hard way when my quick session turned into a burnt-out motor after multiple lengthy mixes. By timing my sessions and including short pauses, I shortened downtime and prolonged my equipment’s lifespan. Think of it like giving your muscles a break—your mixer needs that too.
Implement Proper Maintenance Routines
Every few months, give your device a thorough check. Lubricate moving parts if recommended, and replace worn brushes or gears. Fans and vents should be free of dust to prevent overheating. For heavy-duty baking, especially with recipes demanding high hydration, such as sourdough, consider reviewing why metal gearing is preferred for durability. A proactive maintenance schedule keeps your mixer in top shape and ready for challenging tasks.
Test Your Mixer Under Strain to Detect Weak Points
Periodically run your mixer with challenging recipes, like sticky pizza dough or dense bread starters, to gauge its capacity. During one such test, I used a high-hydration dough (over 90%) to see if my mixer could handle the load. It strained initially, but adjusting my technique and ensuring my attachments were in perfect condition made the process smoother. Regular testing helps identify emerging issues before complete failure—just like inspecting damaged whisks for early signs of wear.
Upgrade When Signs of Wear Emerge
If your mixer shows persistent signs of motor stress or damage despite maintenance, it’s time to upgrade. The latest models, praised for their robust builds like heavy-duty stand mixers for 2026, are designed to handle demanding recipes without overheating. Investing in quality gear not only saves money in repairs but also guarantees better results and safety during your baking adventures.
Many home bakers believe that choosing a higher wattage motor guarantees better performance, but in my experience, the type of gearing and build quality matter much more, especially for handling heavy doughs consistently. For instance, experts now emphasize metal gearings—like those in heavy-duty models—as crucial to durability and motor longevity. Additionally, there’s a misconception that all whisk attachments are suitable for every task; but as specialized attachments have shown, choosing the right material—like carbon fiber or ceramic—can drastically improve performance and lifespan. Many users underestimate how advanced the precision of speed settings has become; relying on high speed for delicate tasks often leads to unnecessary wear, especially when a variable speed control is overlooked, which can cause motor stress and attachment strain. When mixing dense or high-hydration doughs, the common mistake is to push machinery beyond its capacity, risking overheating or gear failure—so it’s vital to recognize the nuanced load limits. A study published by professional bakers notes that metal gearings provide up to 50% more resilience in demanding recipes compared to plastic ones. Be cautious about the ‘bigger is better’ myth; opting for larger capacity bowls and attachments without considering your rack’s power and your typical recipes may result in underperformance or damage. Remember, the goal isn’t just capacity—it’s efficient, safe, and long-lasting operation. Have you ever fallen into this trap? Let me know in the comments.
How do I keep my baking tools in top shape over time?
To ensure your stand mixer, whisk attachments, and hand mixers deliver consistent results, adopting a disciplined maintenance routine is essential. I personally swear by using a microfiber cloth and a soft brush to remove dust from vents and gears after each heavy-duty session, preventing dust buildup that can impair motor function. Additionally, periodically applying a small amount of lubricant on moving parts, following manufacturer instructions, can dramatically extend the appliance’s lifespan, especially when tackling high-hydration doughs that put stress on gears and motors.
When it comes to tools like whisk attachments, inspecting for bent wires or cracks before each use can save you from uneven mixing or sudden breakage. I use a simple trick—soaking attachments in warm, soapy water and checking flexibility helps me catch early signs of wear. For thick cookie dough, choosing titanium or ceramic attachments can handle the load better and resist wear, as recommended in this expert article.
Using the right speed settings for different tasks not only improves results but also reduces wear. Remember, high speeds are for whipping and aeration, while slow starts are best for dough incorporation. I often set my mixer at a low speed for initial mixing, then gradually increase, preventing motor overheating and gear strain. For heavy doughs, especially those with over 90% hydration, it’s wise to test your mixer’s capacity regularly, like in this guide. Performing tests under strain helps identify early warnings before costly repairs are needed.
For long-term success, a scheduled deep-clean every few months is non-negotiable. Disassembling attachments for thorough cleaning, removing dust from motor vents, and checking gear integrity prevents breakdowns. I also recommend reviewing your manual or consulting expert blogs to replace worn brushes or gears proactively, as detailed in this article.
Is your current setup prepared for demanding baking seasons?
If you want to keep your mixer and attachments performing at their best, invest in high-quality, durable components and stick to a maintenance routine. Don’t wait for signs of failure—prevention is key. I encourage you to try the simple tip of inspecting your attachments for deformation before each session; it’s a small step that can save hours of clean-up and repair. Incorporate monthly checks for dust buildup and lubrication, especially if you often handle challenging recipes requiring heavy-duty mixing.
What I Wish I Learned Sooner About My Mixing Arsenal
- Realizing that even the sturdiest hand mixers need regular check-ins to stave off burnout was a game-changer for me. Ignorance almost cost me a full-day bakefest. It’s a reminder that proactive maintenance prevents surprises.
- Discovering that upgrading to high-quality whisk attachments, like those made of ceramic or carbon fiber, saves time and reduces wear, transformed my workflow and results—it’s a small investment with big returns.
- Seeing how proper speed adjustments make the difference between perfect dough and burnt-out motors pushed me to always start slow and increase gradually, especially with high-hydration recipes.
- Learning that periodic heavy-duty tests can reveal early signs of gear fatigue empowered me to replace components before failure, especially crucial for demanding bread recipes.
- Understanding that modern metal gearings in mixers can handle twice the load of plastic ones made me rethink my equipment choices, ensuring longevity even with the latest artisanal baking trends.
The Kitchen Secrets That Saved My Baking Routine
- I trust the comprehensive guides on metal gearings for heavy doughs to inform my upgrades, knowing durability is worth the investment.
- My go-to resource for troubleshooting vibrations or strange smells is these expert tips, which have helped me extend my appliances’ lifespan significantly.
- To keep my attachments in top shape, I rely on advice on choosing durable materials and proper cleaning routines—a strategy that’s paid off over countless baking sessions.
- For tackling the most challenging recipes, I consult heavy-duty mixer reviews, ensuring I select tools built for the toughest jobs.
Seize the Moment and Elevate Your Baking Game
Take charge of your baking journey by embracing preventive care, investing in durable equipment, and continually learning from trusted sources. Your mixer, whisk, and dough techniques are the backbone of consistent, delicious results. Remember, the most profound improvements often come from small, deliberate steps—like inspecting attachments before each use or timing your mixing sessions.
What’s one habit you plan to adopt today to keep your baking tools performing at their best? Share your thoughts below and let’s support each other in achieving baking excellence every time!
Leave a Reply