Have you ever watched your homemade gluten-free bread turn into a sticky, unruly mass that refuses to cooperate no matter how much you knead or mix? I remember the first time I attempted to craft a fluffy, airy loaf only to be met with an impossible, gooey mess that seemed to cling to my hands and the mixing bowl like glue. It was a frustrating experience, and I had a lightbulb moment—my trusty old mixer just wasn’t cut out for this tough, sticky dough.
Why Finding the Right Dough Mixer Matters More Than Ever
In the world of gluten-free baking, especially with the huge rise in demand for high-hydration breads in 2026, the right mixer isn’t just a luxury; it’s a necessity. Sticky doughs demand powerful, well-designed equipment that can handle resistance without compromising on consistency or damaging attachments. If you’re like me, you’ve probably faced the dreaded struggle of a whisk attachment that refuses to reach the bottom of the bowl or a dough hook that struggles to knead dense, moist mixtures. It’s not just about convenience; it affects the quality of your bread and your sanity in the kitchen.
Skeptical? Think All Mixers Are the Same? Think Again
I used to believe that any mixer could handle any dough—until I made an early mistake that almost ruined my batch. Rushing into baking with a subpar mixer led to uneven mixing, overworking certain parts while leaving others untouched. That mishap made me realize that investing in a high-quality, specialized dough mixer makes all the difference, especially for those stubborn gluten-free recipes. For more on avoiding common mistakes, check out this guide.
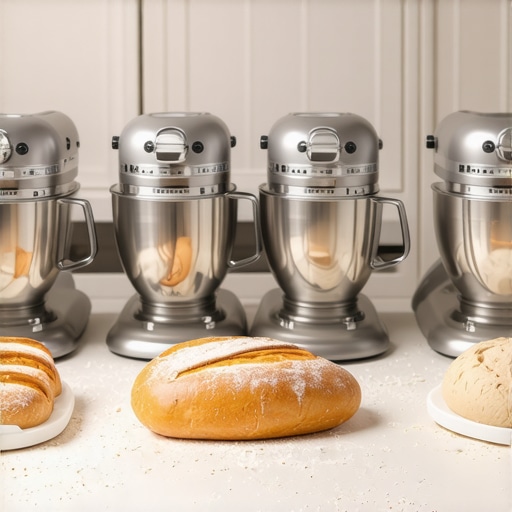
Today, I’ll walk you through the top four mixers suited for sticky, high-hydration gluten-free breads in 2026, sharing what works, what doesn’t, and how to choose the perfect match for your kitchen. If you’re tired of wrestling with dough that sticks and smears, keep reading—you’ll find solutions that could transform your baking experience and help you achieve bakery-quality results at home.
Choose the Right Equipment
Start by selecting a stand mixer with a powerful motor and sturdy construction, preferably with metal gearing, to handle dense, high-hydration doughs. Look for models that *stay still* on heavy loads and have ample torque, ensuring consistent kneading without motor strain. For instance, these tested options offer excellent stability. Avoid lightweight or plastic-geared mixers that may overheat or struggle under weight.
Preparing the Mixer and Attachments
Inspect and Secure Attachments
Always verify your whisk or dough hook is properly locked before starting. A common mistake is attachments that *won’t lock*, leading to wobbling or inefficient mixing. If you experience this, check this guide for troubleshooting tips. Use attachments designed for heavy-duty baking, such as metal or carbon fiber whisk, which withstand the rigors of gluten-free sticky doughs.
Prevent Climbing and Spattering
Stickiness often causes dough to climb the hook or splatter, making cleanup a chore. To combat this, start mixing at low speed and gradually increase. Employ a deep, wide bowl to give your dough room to stretch without climbing. For stubborn batches, consider using specialized deep bowls with anti-splash features. This ensures even mixing and reduces mess.
Optimizing Mixing Techniques
For high-hydration gluten-free doughs, knead slowly at first to avoid overworking the mixer or overheating the motor. Use a slow-start feature if available, as rapid acceleration can trigger motor overload or cause the whisk to bend. During kneading, occasionally pause to scrape down sides and check consistency. If your dough is extremely sticky, add moisture gradually rather than all at once—a trick I perfected after a failed batch where too much flour made the bread dense instead of fluffy.
Using the Correct Attachments for Maximum Results
Whisk attachments are ideal for aeration or whipping lighter ingredients, but for dense doughs, a dough hook is your best friend. For glossy, airy bread, the hook kneads thoroughly without clutching or climbing. Enhance kneading by upgrading to metal or titanium hooks designed to cut through moisture-rich doughs effectively. Experiment with dual-speed settings—start slow, then bump up to medium—to mimic manual kneading without overloading the machine. For stubborn batches, try these fixes for dough climbing.
Monitoring and Fine-Tuning During Mixing
Pay close attention to the mixer’s noise and heat. Overheating can damage the motor or warp attachments, especially with tough gluten-free recipes. Use heat management tips—like pausing every 5 minutes—to extend your equipment lifespan. Once the dough pulls away from the sides and develops a glossy sheen, it’s time to stop. Overmixing can lead to dense bread, so err on the side of underkneading slightly.
Cleanup and Maintenance for Sticky Doughs
After mixing, remove attachments promptly and clean thoroughly—sticky dough can dry and cumber your equipment. Use warm water and brush to clean hooks and whisks, especially if they include silicone or plastic coatings that may trap bits. Regular maintenance ensures your mixer stays reliable for challenging batches and keeps attachments in top shape, preventing the issues linked with prolonged high-hydration baking.
By following these specific steps—choosing robust equipment, securing attachments properly, preventing climbing, optimizing mixing techniques, and maintaining your tools—you’ll transform sticky, unruly doughs into bakery-quality loaves. Experimentation and careful monitoring are key to mastering gluten-free baking success at home.
Many home bakers believe that all mixers and attachments are created equal, leading to costly mistakes and subpar results. Let’s dig deeper into some misconceptions that might be holding you back from mastering high-hydration gluten-free bread baking. First, a prevalent myth is that using a handheld mixer can effortlessly handle stiff, sticky dough. While convenient, most hand mixers lack the torque and stability needed for such tasks, often causing overheating or motor failure. For advanced bakers seeking longevity, investing in a robust stand mixer with metal gearing is a smarter choice, as highlighted by experts who emphasize durability in high-hydration recipes. Another common mistake is believing that whisk attachments are suitable for dense doughs or high-moisture mixes. In reality, whisks are designed for aeration, not kneading, and using them incorrectly can damage the attachment or reduce its lifespan. Learn why metal or titanium dough hooks outperform standard wire ones when tackling 85% hydration recipes, as discussed in specialized baking guides. A trap many fall into is underestimating the importance of attachment locking mechanisms. An improperly secured whisk or hook not only causes uneven mixing but can lead to dangerous motor strain or breakage, especially under heavy loads. To avoid this, always verify attachment security; for detailed troubleshooting, see this comprehensive guide. Finally, a hidden nuance is the misconception that all mixer speeds are equally effective. For stubborn doughs, starting at high speed can cause splatters and motor stress, while slow, gradual adjustment ensures better kneading and longer equipment life. Advanced bakers understand that optimal mixing involves precise speed control and technique, which can be facilitated by newer models boasting slow-start features. Remember, proper equipment choice, attachment handling, and technique are vital for consistent results. Do you have a story about a mixer mishap or a lesson learned? Share your experience below! For more tips on preventing common attachment failures, check out this guide.
Essential Tools for Long-Term Baking Success
Investing in quality baking tools is only the beginning; proper maintenance ensures they perform optimally over time. For stand mixers, regular inspection of the gear mechanisms is crucial. I personally recommend swapping out standard plastic gears for metal gears to handle dense doughs without slipping or stripping. This upgrade significantly extends the life of your mixer, especially when working with high-hydration recipes.
How do I maintain my mixer attachments over time?
Attachments like whisks and dough hooks endure a lot of stress during baking sessions. To keep them in top shape, clean them immediately after use with warm soapy water and an brush, avoiding abrasive sponges that can damage coatings. Periodic lubrication of moving parts, as recommended in the manufacturer’s manual, prevents rust and preserves functionality. Moreover, inspecting attachment locking mechanisms regularly, and addressing issues promptly with resources such as this troubleshooting guide, can save you costly repairs or replacements down the line.
Choosing the right maintenance strategies
Establish a routine schedule—monthly or after every few uses—to check for wear and tear. Lubricate gears and shafts using food-safe oils if your equipment permits. Additionally, occasional deep cleaning of motor vents and belts, following the instructions in your model’s manual, ensures proper cooling and prevents overheating during intensive kneading sessions.
Future Trends in Baking Equipment Maintenance
As technology advances, expect more integrated diagnostics in high-end mixers that alert you when maintenance is needed. Smart sensors may track motor health, allowing proactive servicing. For now, adopting diligent maintenance habits can extend equipment lifespan and improve baking consistency.
Start by applying one advanced tip today—like updating your gear mechanism with metal gears—and watch how your equipment performs better, longer. Proper upkeep not only preserves your baking tools but also elevates your entire baking experience, ensuring bakery-quality results every time. Remember, consistent maintenance is the secret behind reliable and delicious gluten-free bread every batch.

The Hardest Lesson I Learned About Baking Mixers and Sticky Dough
One eye-opening realization was how critical it is to match your mixer and attachments to the unique demands of high-hydration gluten-free bread. Investing in robust, metal-geared mixers was a game-changer, preventing overheating and gear stripping that plagued my earlier attempts.
3 Myths About Baking Equipment That Held Me Back
I used to believe lightweight mixers could handle thick dough, but I learned the hard way that power and stability are vital. Also, I thought regular whisk attachments would suffice, until I discovered specialized, durable options like titanium or polymer-coated whisks really make a difference. The myth that all attachments are interchangeable can lead to costly damage or subpar bread.
What Experts Won’t Tell You About Maintaining Your Mixer for Heavy Doughs
Routine maintenance isn’t just about cleaning. Upgrading gear mechanisms, such as switching to metal gears, significantly extends your mixer’s lifespan. Regular inspection of attachment locking mechanisms ensures safe, efficient operation, especially when kneading sticky, high-hydration doughs that test your equipment’s limits. For detailed maintenance tips, check out this resource.
My Essential Toolkit for consistently perfect gluten-free bread
Beyond the mixer itself, tools like high-quality dough scrapers, deep mixing bowls, and specialized attachments have transformed my baking. Choosing durable, easy-to-clean accessories ensures smooth workflows and long-term results. I trust brands that prioritize build quality and compatibility, such as those discussed in this guide.
Rise to the Challenge and Bake Like a Pro
Empower yourself with the right tools, technique, and knowledge, and you’ll find gluten-free bread baking becomes less daunting and more rewarding. Remember, patience and proper equipment are your allies in creating bakery-quality loaves at home. Are you ready to take your baking to the next level with your mixer? Share your experiences below—I’d love to hear your journey to perfect gluten-free bread!
Leave a Reply